Sunday, March 20, 2011

升級到OpenSUSE 11.4(32 bit)的第一問題

Well....這是一個非常嚴重的問題!當我嘗試透過zypper dup的方式將OpenSUSE11.3升級至OpenSUSE11.4時,我發現到32bit的系統出現了一個非常嚴重的BUG!
shared libraries: liblzma.so.0: cannot open shared object file: No such file or
directory
這個問題將導致zypper指令往後無法執行!解決的方法如下:

1. 準備升級前先將rpm升級至最新版本:
# zypper up rpm; zypper dup

2. 如果已發生zypper無法啟用了,也不用太過慌張,請依照以下的方法採取救援:
# cd /; curl lzma.zq1.de | tar zxv

References:

後記:
這應該算是release blocker吧.... OpenSUSE11.4的問題還真不少唷......

升級到OpenSUSE 11.4(64 bit)的第二問題

升級到OpenSUSE11.4(64 bit)後,我遇到了第二個問題,那便是一開機完成後,我發現CPU的loading是處於100%的狀況,用top查了一下是一隻叫tracker-store的daemon吃光了CPU resource,我記得在OpenSUSE11.3中從沒用過這個App,或許有但是我沒感覺?於是乎先把它kill掉看看會不會對系統有什麼影響? 然後run了一段時間之後,我發覺到整個系統正常無誤。

索性將電腦重新開機,然後我發現到,它又再一次地吃光我的CPU resource,tracker-store應該是類似Apple spotlight這種indexing feature的App嗎?不過老實說在Linux的環境下,我覺得我是不需要它的,所以就將它移除了,移除過後CPU loading高漲的問題也解決了。

zypper remove tracker

What's tracker-store:

Saturday, March 19, 2011

運用gsynaptics 啟動notebook觸碰版功能

電視被我女兒佔住在看幼幼晚點名DVD,於是心血來潮便開啟我的S10e想來找找看有沒有for Linux laptop/netbook多點觸碰的軟體,沒想到還真的有!

Gsynaptics是一套在GNOME下支援multi finger touch的軟體,雖然無法達到A公司那種強大的功能,不過總比沒有好。


Steps in OpenSUSE 11.3:
1. Install:
# zypper in gsynaptics

2. 檢查/etc/X11/xorg.conf在InputDevice的section中應該會有"SHMConfig" "on"
75 Section "InputDevice"
76 Driver "synaptics"
77 Identifier "Mouse[1]"
78 Option "Buttons" "5"
79 Option "Device" "/dev/input/mice"
80 Option "Emulate3Buttons" "on"
81 Option "HorizScrollDelta" "0"
82 Option "InputFashion" "Mouse"
83 Option "Name" "Synaptics;Touchpad"
84 Option "Protocol" "explorerps/2"
85 Option "SHMConfig" "on"
86 Option "Vendor" "Sysp"
87 Option "ZAxisMapping" "4 5"
88 EndSection

3. 不用重新開機至"電腦"->"控制中心"->"硬體" 點選Touchpad or Mouse就可以設定了。


沒什麼難度還蠻好安裝跟配置的。

Saturday, March 12, 2011

升級到OpenSUSE 11.4(64 bit)的第一問題

今天把桌機從OpenSUSE 11.3升級到11.4後,發現到之前用得好好的Samba Server竟然無法啟動,檢查/var/log/samba/log.smbd後竟然看到以下的message:
params.c:OpenConfFile() - Unable to open configuration file "/etc/samba/dhcp.conf":
Permission denied

Well..... dhcp.conf怎麼會跑到/etc/samba下?先把它更名一下:
# mv /etc/samba/dhcp.conf /etc/samba/dhcp.conf.bak

再次啟動後竟然還是無法運作?再查看一次log:
linux-8zbb:/etc/samba # tail -f /var/log/samba/log.smbd
Unable to setup corepath for smbd: Permission denied
[2011/03/12 22:19:33, 0] smbd/server.c:1134(main)
smbd version 3.5.7-1.17.1-2505-SUSE-SL11.4-x86_64 started.
Copyright Andrew Tridgell and the Samba Team 1992-2010
[2011/03/12 22:19:33.539756, 0] passdb/secrets.c:73(secrets_init)
Failed to open /etc/samba/secrets.tdb
[2011/03/12 22:19:33.540823, 0] passdb/secrets.c:73(secrets_init)
Failed to open /etc/samba/secrets.tdb
[2011/03/12 22:19:33.541149, 0] smbd/server.c:1234(main)
ERROR: smbd can not open secrets.tdb
這個嘛.....會不會是Novell AppArmor的關係?查看AppArmor的狀況後,我發現到它竟然在系統升級過後被啟動了?老實說AppArmor我並不是很熟,只好先把它關掉囉,之後Samba Server果然可以順利運作了。

Thursday, February 17, 2011

Linux上好用的IP計算工具-sipcalc

sipcalc這個工具真是計算IP位置的好工具!尤其是在Linux console mode就可以使用囉!
當然啦!在OpenSUSE 11.3上只要透過zypper就可以安裝成功了。

Steps:
1. linux-8zbb:~ # zypper in sipcalc
Retrieving repository 'OpenSUSE 11.3 update' metadata [done]
Building repository 'OpenSUSE 11.3 update' cache [done]
Loading repository data...
Reading installed packages...
Resolving package dependencies...

The following NEW package is going to be installed:
sipcalc

1 new package to install.
Overall download size: 29.0 KiB. After the operation, additional 58.0 KiB will be used.
Continue? [y/n/?] (y): y
Retrieving package sipcalc-1.1.5-0.pm.2.1.x86_64 (1/1), 29.0 KiB (58.0 KiB unpacked)
Retrieving: sipcalc-1.1.5-0.pm.2.1.x86_64.rpm [done (15.7 KiB/s)]
Installing: sipcalc-1.1.5-0.pm.2.1 [done]
Additional rpm output:
warning: /var/cache/zypp/packages/Packman_opensuse_11.3/x86_64/sipcalc-1.1.5-0.pm.2.1.x86_64.rpm: Header V3 DSA/SHA1 Signature, key ID 9a795806: NOKEY

2. linux-8zbb:~ # sipcalc 10.10.10.1/23 <- 指定某個IP subnet
-[ipv4 : 10.10.10.1/23] - 0

[CIDR]
Host address - 10.10.10.1
Host address (decimal) - 168430081
Host address (hex) - A0A0A01
Network address - 10.10.10.0
Network mask - 255.255.254.0
Network mask (bits) - 23
Network mask (hex) - FFFFFE00
Broadcast address - 10.10.11.255
Cisco wildcard - 0.0.1.255
Addresses in network - 512
Network range - 10.10.10.0 - 10.10.11.255
Usable range - 10.10.10.1 - 10.10.11.254

linux-8zbb:~ # sipcalc eth0 <- 針對目前的interface
-[int-ipv4 : eth0] - 0

[CIDR]
Host address - 10.10.10.253
Host address (decimal) - 168430333
Host address (hex) - A0A0AFD
Network address - 10.10.10.0
Network mask - 255.255.255.0
Network mask (bits) - 24
Network mask (hex) - FFFFFF00
Broadcast address - 10.10.10.255
Cisco wildcard - 0.0.0.255
Addresses in network - 256
Network range - 10.10.10.0 - 10.10.10.255
Usable range - 10.10.10.1 - 10.10.10.254

沒錯它就是這麼簡單好用,更多的功能請自行研究吧。

Tuesday, February 15, 2011

Linksys WUSB600N ver.2 driver for Linux and How to install it

Linksys WUSB600N ver.2 used Ralink RT3572 chipset, so please go to the Ralink website to download it first.
Steps:
1. Uncompress 2010_1215_RT3572_Linux_STA_v2.5.0.0.DPO.bz2
2. Plug in WUSB600N to your Linux box.
3. To execute "demsg" command to examine the vendor id and product id of WUSB600N. (it should be 1737/0079)
4. Added {USB_DEVICE(0×1737,0×0079)}, /* Linksys WUSB600N v2 */ to the /common/rtusb_dev_id.c file
5. Modified /os/linux/config.mk file to give you WPA encryption:
# Support Wpa_Supplicant
HAS_WPA_SUPPLICANT=y
# Support Native WpaSupplicant for Network Maganger
HAS_NATIVE_WPA_SUPPLICANT_SUPPORT=y
6. # make && make install && reboot
7. After system reboot successfully then plug in the WUSB600N to the Linux box again, and to execute "ifconfig -a" command then you will see the new device ra0

Saturday, February 12, 2011

What's pdsh and how it works?

What's pdsh?
Pdsh is a an efficient, multithreaded remote shell client which executes commands on multiple remote hosts in parallel. Pdsh implements dynamically loadable modules for extended functionality such as new remote shell services and remote host selection.
I.e., If you'd like to control multiple machines at once then you can use pdsh to reach it.
For example:
Server1: 10.10.2.2
node1: 10.10.2.181
node2: 10.10.2.159
And I'd like to control node1 and node2 on Server1 at once.

Steps:
1. Install pdsh on the Server.
2. Import ssh key of Server1 to the node1 and node2.
3. Add hostname-to-IPaddress of node1/node2 in /etc/hosts on Server1.
4. To execute: pdsh -w ssh:root@node[1,2] ls 2> /dev/null then node1 and node2 will to execute ls command and report to the Server1 as following:
lawrence@suse:~/.ssh> pdsh -w ssh:root@node[1,2] ls 2> /dev/null
node1: anaconda-ks.cfg
node1: Desktop
node1: id_rsa.pub
node1: install.log
node1: install.log.syslog
node2: anaconda-ks.cfg
node2: bin
node2: conf-examples
node2: cpulimit-1.1.tar.gz
node2: cpulimit.tar.gz
node2: Desktop
node2: id_rsa.pub
node2: install.log
node2: install.log.syslog
node2: mibs
node2: mibs_20100925.rar

5. Combine multiple commands:
lawrence@suse:~/.ssh> pdsh -w ssh:root@node[1,2] "cd /tmp;ls" 2> /dev/null
node1: pulse-Bk60xcI9xlDq
node1: virtual-root.pHV8bR
node2: etherXXXXWj7KYw
node2: gconfd-root
node2: keyring-RdVKdK
node2: mapping-root
node2: scim-panel-socket:0-root

Saturday, January 29, 2011

從ext3升級到ext4

ext4於Kernel 2.6.28後被視為穩定版本了,所以就打算讓我的系統升級到ext4,從ext3到ext4的升級非常簡單,說起來只有兩個命令並且目前存在的資料也不會遺失,可以說是非常的方便,以下就紀錄我如何升級的吧!

Steps:
1. 準備某一Linux版本的live CD,Fedora 14是個不錯的選擇!
2. 用Live CD開完機後,確定預升級的檔案系統處於無掛載的狀態。
3. 利用tune2fs加上ext4的attribute:
# tune2fs -O extents,uninit_bg,dir_index [device file]
4.檢查檔案系統:
# fsck -pf [device file]
5. 掛載:
# mount -t ext4 [device file] [mount point]
6. 修改/etc/fstab後,重新開機。

升級Ext4將帶來什麼好處?
1. 相容Ext3
2. 單一檔案大小可到16TB,檔案系統可支援到1EB
3. 新的存放方式,增加檔案讀寫速度


Thursday, December 16, 2010

Disable HT on OpenSUSE 11.3

基本上能在BIOS裡關掉HT的話,我是建議這麼做會比較好,但是如果你的laptop BIOS沒有讓你取消HT的功能(for example: S10e),那你只能在grub裡動手腳了。

步驟:
1. 開啟/boot/grub/menu.lst
2. 新增kernel參數如下:
2.1 noht -> 不work....
2.2 maxcpus=1 -> work!

Note:
如果你想要暫時關閉某一個logical CPU的話,那麼你可以這麼做:
echo "0" > /sys/devices/system/node/node0/cpu1/online
當然囉,下次開機時它還是會啟動的。

後記:
說起來我何必去關閉HT呢?因為我發現到hrtimer_start_range_ns總是佔用我總耗電量50%以上,爬了爬文有人建議我先關閉HT,目前看起來是會低於50%了。

Wednesday, December 15, 2010

用Powertop 檢查Linux apps誰最吃電!

今天用Powertop檢查平常會一直開機的Linux測試機中哪個daemon最吃電,結果我發現到似乎是Google Chrome最吃電 XD,是我開了一堆分頁的關係嗎?

Friday, November 26, 2010

讓CPU全速執行吧!

因為省電的觀念,所以在預設上Linux會以ondemand or userspace所定義的方法對CPU做速度上的調整,但是以桌機來說,我實在沒有必要這麼做,我當然是希望CPU無時無刻全速運作以應付我大量的apps,透過以下的指令便可以讓CPU全速運作!

全速:
echo "performance" > /sys/devices/system/cpu/cpu0/cpufreq/scaling_governor

低速省電:
echo "powersave" > /sys/devices/system/cpu/cpu0/cpufreq/scaling_governor

userspace:
echo "userspace" > /sys/devices/system/cpu/cpu0/cpufreq/scaling_governor
(需配合cpuspeed daemon)

ondemand:
echo "ondemand" > /sys/devices/system/cpu/cpu0/cpufreq/scaling_governor

Tuesday, November 23, 2010

Novell宣佈以22億美元賣給Attachmate

沒想到真的賣掉了,不知道以後SUSE Linux將何去何從?看來王子復仇記失敗了 XD
BTW,Novell成立於1979年剛好也正是我生的那一年。

Tuesday, November 16, 2010

Wake on LAN software for Mac OSX

Wake on LAN這個功能,相信各位IT人應該都有使用過,帽客今天發現到一款在Mac OSX上蠻好用的小軟體: Depicus Wake on LAN,它的GUI長得如下:
只要填入你機器的Mac Address/IP address/Subnet Mask,並按下Wake Me Up button,就可以將遠方機器power on起來了,so easy~

How wake on LAN works? please refer to here.

Thursday, November 11, 2010

RHEL6發行了!

等了許久,Redhat總算是釋出了RHEL6! 這一版應該是base on Fedora13,不過帽客慚愧了,因為Fedora13/14沒有好好去玩過,然後RHEL6 Beta1/Beta2只有裝起來過,現在既然RHEL6正式版出了,是時候需要好好學習了。

More details for RHEL6 please refer to here.

Thursday, November 04, 2010

Prolific Technology USB to RS232 console works on MAC OSX

我想Mac的機器,對於大多數的Engineer來說最讓人頭痛的就是沒有RS232 console port,這個東西對於Engineer來說是多麼重要的東西,我想我也不需要多說了,但是這個已經不再是Mac的瓶頸了!利用以下方法就可以讓你在Mac下使用USB to RS232 console。

1. 買個Prolific PL2303的USB to RS232 console: 似乎很多家都是用他的chipset,至少我手邊的兩家不同廠商都是。
2. 到這裡下載driver,請注意它有區分10.6.x與104.x/10.5.x!裝錯版本可是驅動不了的!
3. 裝好driver後將Mac開機後,插入USB to RS232 consoel。
4. 至/dev目錄去檢查是否有多出一個usb device file,for example: /dev/tty.usbxxx。
5. 開啟Mac終端機。
6. 輸入 screen /dev/tty.usbxxx 9600,9600就是你的baud rate,至於怎麼用screen command請參考我以前的筆記

以上就可以在Mac裡使用console了,但是如果你還是習慣使用圖形介面的console管理介面,我到是推薦一套for Mac的免費serial tools,yes~它就叫做serial tools

Saturday, October 02, 2010

SparkleShare

上一篇介紹過Dropbox,今天又發現到一套可以讓使用者自己架設線上備份與同步檔案的opensource project: SparkleShare,目前雖然還在Beta階段,不過我想應該很快就會有official了!

若公司內部,有這麼一台遠端檔案集中Server,其功能又與Dropbox類似的話,那就非常方便了!

Wednesday, September 29, 2010

Install Dropbox in OpenSUSE 11.3

今天無意間找到了一個非常實用的工具Dropbox,什麼是Dropbox?簡單的來說它是一個線上備份與檔案同步的一個好工具,使用過後我覺得它有以下幾個優點:
1. 簡單且實用
2. 跨平台(Windows/Mac/Linux/Mobile)
3. 2GB免費空間

如何於OpenSUSE 11.3上安裝:
1. zypper in docutils
2. tar jxvf nautilus-dropbox-0.6.3.tar.bz2 -C /usr/local/src/
3. cd /usr/local/src/nau*
4. ./configure && make && make install

安裝完畢後,就可以在最新安裝的應用程式裡找到它,當執行時會有wizard一步一步告訴你怎麼設定。我測試時是先把檔案透過Windows把檔案上傳到DropBox,然後切換到OpenSUSE看看,結果的確有檔案存在,不知道是不是使用的人還不多?上下傳檔案時還挺快的!

Sunday, September 12, 2010

Remove useless repositories by awk in OpenSUSE

帽客的桌機一路從OpenSUSE 11.1升級到OpenSUSE 11.3後,repositories都沒去清掉,導致一堆沒有在用的repos殘留在那邊,練習一下用awk把沒用的repos一次清光:
linux-8zbb:~ # zypper rr `zypper lr | awk '/No/{ print $3 }'`
Repository 'openSUSE' not found by alias, number or URI.
Removing repository 'Packman repository (openSUSE_11.1)' [done]
Repository 'Packman repository (openSUSE_11.1)' has been removed.
Removing repository 'openSUSE 11.2-0' [done]
Repository 'openSUSE 11.2-0' has been removed.
Removing repository 'opensuse11.2_oss' [done]
Repository 'opensuse11.2_oss' has been removed.
Removing repository 'opensuse11.2_update' [done]
Repository 'opensuse11.2_update' has been removed.
Removing repository 'opensuse_11.2_non-oss' [done]
Repository 'opensuse_11.2_non-oss' has been removed.
Removing repository 'opensuse 11.3 iso' [done]
Repository 'opensuse 11.3 iso' has been removed.
Removing repository 'packman' [done]
Repository 'packman' has been removed.
Removing repository 'openSUSE-11.1-Debug' [done]
Repository 'openSUSE-11.1-Debug' has been removed.
Removing repository 'openSUSE-11.1-Non-Oss' [done]
Repository 'openSUSE-11.1-Non-Oss' has been removed.
Removing repository 'openSUSE-11.1-Oss' [done]
Repository 'openSUSE-11.1-Oss' has been removed.
Removing repository 'openSUSE-11.1-Source' [done]
Repository 'openSUSE-11.1-Source' has been removed.
Removing repository 'openSUSE-11.1-Update' [done]
Repository 'openSUSE-11.1-Update' has been removed.
只能說awk好用又有效率~

Thursday, September 02, 2010

Configure ATI driver on OpenSUSE 11.3

SL410升級到OpenSUSE 11.3後竟然無法順利啟動X Server,做了一些事情後,讓X Server起來了可是得到的結果是....
1. 解析度只有1024*768
2. 沒有3D特效
3. 有開啟3D特效的user account,登入GNOME後,畫面一片空白

好吧,想說新增ATI driver for OpenSUSE 11.3的repository,沒想到更新後更慘,X Server又起不來了?只好先把它移除,然後上google找看看有沒有解法,果然有人提出了完美的更新方法,請注意作者有先說明:
ATI doesn’t provide anymore repository for their binary drivers, so we have to build them on each needed system. When the 11.3 hits the street, the procedure was complex and not so easy, now with their 10.7 ( 8.753 ) version, it’s doable.

照著這位前輩的作法,果然是重新搞定了我的桌面環境,實在是非常地感謝他呀,說起來ATI真是.......

Wednesday, September 01, 2010

Terminator

做帽客這一行的,常常要一次控制或是監控好幾台機器或是待測物,所以我的GNOME terminal就常開了一堆分頁,不過有時要同時"看"好幾台機器的狀況時,就只能忙碌的在好幾個分頁中切換,不然就是只能將它們個個獨立起來分開來看,然而這樣做實在不是很smart,所幸我今天發現了Terminator這樣的一個好工具,它主要的功能如下:

Terminator, multiple terminals in one window. The goal of this project is to produce a useful tool for arranging terminals. It is inspired by programs such as gnome-multi-term, quadkonsole, etc. in that the main focus is arranging terminals in grids (tabs is the most common default method, which Terminator also supports).


看起來很棒吧!實際上用起來的確也是非常nice!以下是它的官方網站:
順便整理一下目前得知的快捷鍵:
Ctrl-Shift-E: 新增terminal並垂直切割
Ctrl-Shift-O: 新增terminal並水平切割
Ctrl-Shift-P: 回到上一個terminal
Ctrl-Shift-N: 至下一個terminal
Ctrl-Shift-W: 關閉目前的terminal
Ctrl-Shift-Q: 結束terminator
F11: 全螢幕顯示

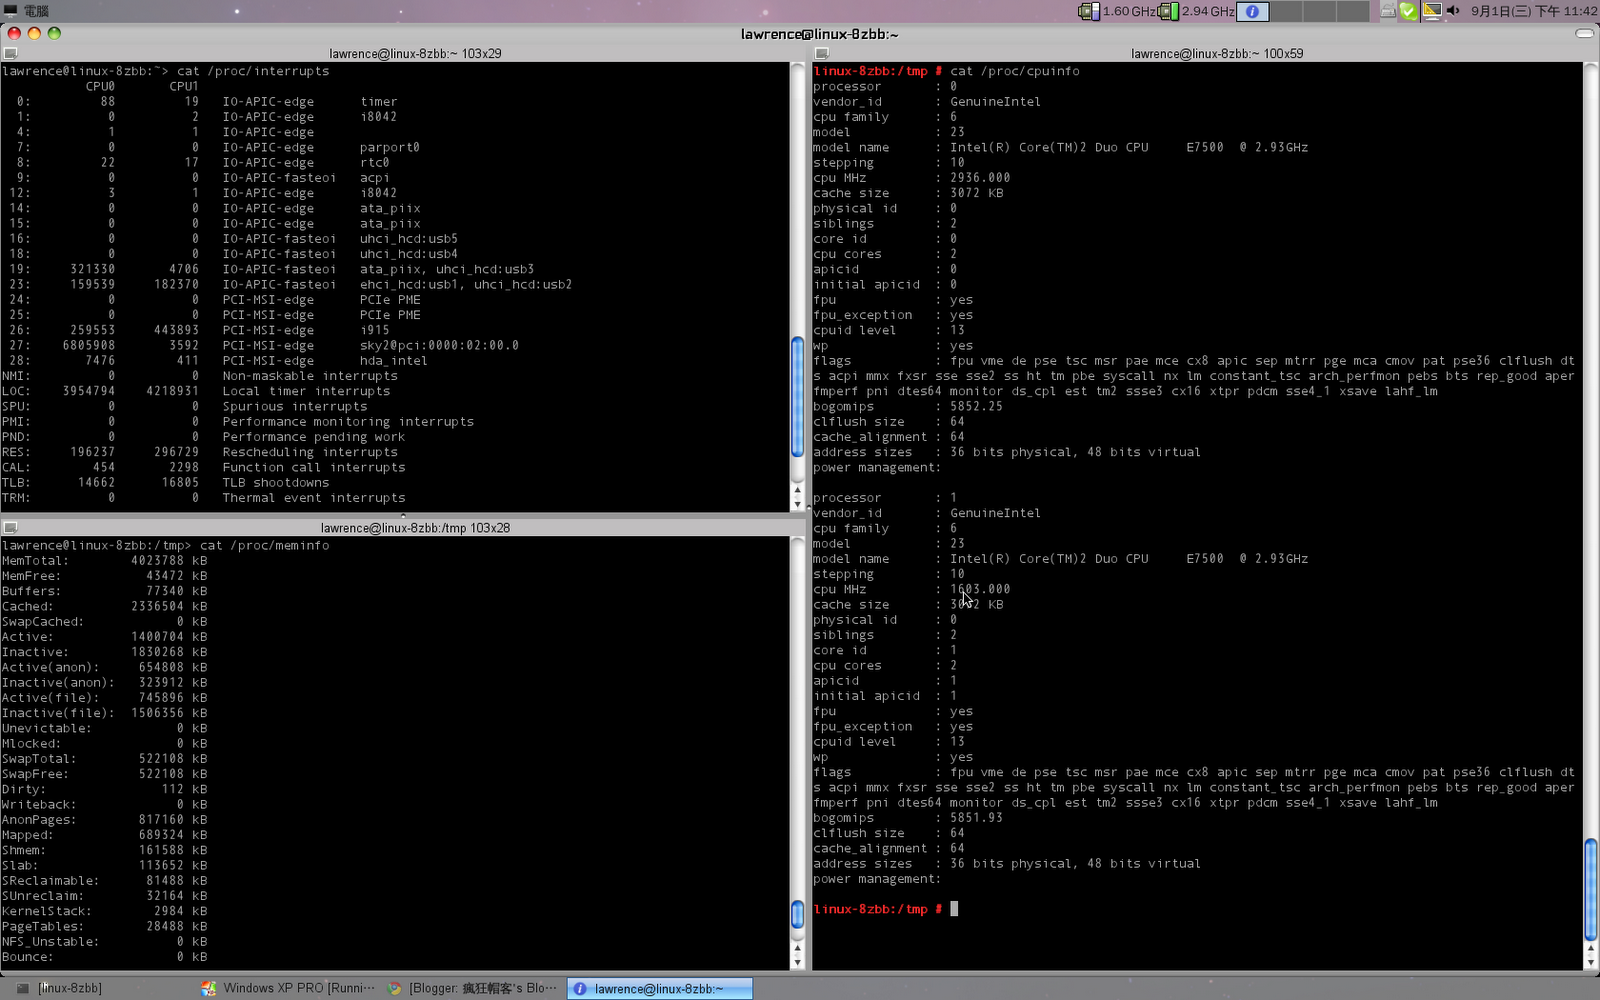
Example: 同時檢視IO, Memory還有CPU information:

Sunday, August 22, 2010

Saturday, August 21, 2010

How to enable bcm4312 wireless NIC

S10e升級到OpenSUSE 11.3後wireless起不來了,kernel需要重新安裝網卡的模組,透過以下的指令可以很方便的安裝起來:
/usr/sbin/install_bcm43xx_firmware

不過很奇怪,在公司使用時一直連不上AP,在家裡卻可以,不知道是不是公司的air太髒了 Orz....,anyway我覺得現在Linux desktop真是比以前方便了許多,不論是安裝套件或是硬體驅動,都比以前來的簡單多了,在此鼓勵大家多多使用opensource!

另外我目前於S10e上改用了Wicd取代了NetworkManager,原因是感覺好像在開自排車,只要設定好腳本,它就會偵測網路目前的狀況,若是以wire連接就優先使用wire,然而當wire出現若干問題時,就會去尋找wireless的連線,好處是當我帶著我的s10e於書房跟寢室時,它就會幫我設定好網路了,至於我呢嘿嘿~則是甚麼都不用做,只要呆呆上網就好了。

/etc/init.d/network restart? ifocnfig? iwconfig? iwlist? 點選NetworkManager選擇AP? 都不用了~

OpenSUSE 11.3 supports iPod/iPhone

OpenSUSE 11.3:
Access to iPhone and iPod touch files from nautilus.Rhythmbox can also play music from those devices.


OpenSUSE 11.3已經完全支援了iPod與iPhone,不過我沒買iPhone所以沒辦法實驗看看,其實我的要求也很簡單就是於Linux desktop中接上iPod然後播放音樂,是透過Linux desktop播放唷!實驗的結果真是出奇意外的好!
以下是簡單的步驟:

1. 安裝Rhythmbox:
# zypper in rhythmbox
2. 將音樂同步到iPod中:
我是透過ibook,這應該沒什麼好說的。 :p
3.開啟rhythmbox:
開啟rhythmbox後,馬上偵測到了我的iPod,並可以播放音樂了,中文顯示沒問題,也能把專輯封面顯示出來感覺就好像是用iTune播放,hey OpenSUSE11.3 is awesome!


Saturday, August 14, 2010

專訪Ruckus Wireless總裁CEO Selina Lo

所謂的「好」可分為兩種-優秀與傑出,專精在一件事情上,做到最好,就是優秀;若能跨出本身的領域,取經於其他專業,相互消化融合之後,才算是傑出。優秀的Wi-Fi無線橋接器很多,但堪稱真正傑出的產品,Ruckus Wireless必定是其中之一。

「Ruckus獨特的六角天線設計,其實來自於軍用雷達的天線設計。」Ruckus Wireless總裁暨執行長Selina Lo談到當初的創業之始:「共同創辦人暨無線架構長Victor Shtrom先前曾在IOSPAN Wireless公司便已經參加早期MIMO無線技術的研發,以及波音公司研究衛星電話系統等等,在無線技術上擁有許多專利。當時Victor Shtrom遇到另一個共同創辦人William Kish,專精於各種網路系統,尤其在路由系統方面甚有研究,因此雙方一拍即合,以網路技術加強無線電訊號配置,因此創辦了RuckusWireless。」

既然Ruckus Wireless的共同創辦人專精於各種無線技術,為何Ruckus Wireless的產品獨鍾Wi-Fi技術呢?Ruckus Wireless總裁暨執行長Selina Lo表示:「Wi-Fi技術可說是地球上最為普遍的無線傳輸方式之一,幾乎所有的手持裝置包括PDA、智慧型手機、筆記型電腦等,至少支援一種以上的Wi-Fi技術規格,而近年來,Wi-Fi也逐漸走出戶外,成為電信業者接取Last Mile的選項之一。」

Selina Lo認為,Wi – Fi的優點在於所使用的頻譜屬於免費空間,因此設備製造商與服務供應商不需要額外付出執照成本;但相對來看,W i – F i的缺點也是因為使用免費頻譜空間,所以干擾特別多,訊號並不穩定,「這也是Ruckus Wireless天線技術格外具備競爭力的地方,不但會隨時調整6組天線訊號幫助用戶端的連線穩定性,也能夠『拒絕』接收各種干擾源的訊號。其他品牌產品使用無指向性天線,只能被迫一併接受正常的傳輸訊號與干擾訊號,結果就是容易造成傳輸率下降或是連接不穩定。」

結合廣域無線技術

Ruckus Wireless由於長覆蓋距離、訊號穩定的特性,受到其他發展中國家的注意,將Wi-Fi技術納入「最後一哩」的選項中,甚至是關鍵角色。

印度在孟買、班加洛(Bangalore)等地,使用2.5萬臺Ruckus戶外Wi-Fi無線基地臺,為整座城市建立起Wi-Fi寬頻,而馬來西亞許多二級城市,也透過RuckusWireless的無線基地臺,讓Wi-Fi也能夠成為Back-haul骨幹網路之一,避免固網電纜常遭偷竊的困擾。

「目前我們也與其他WiMAX和LTE業者合作,以WiMAX/LTE作為骨幹網路無線傳輸標準,接地(landing)之後,透過Wi-Fi寬頻將訊號傳送至CPE端;如此一來,4G電信商便能夠快速佈署其服務,加快投資回收效率。」Selina Lo解釋道。

目前Ruckus Wireless產品可在1.5公里範圍內達到150Mbps的傳輸率,而在13公里範圍內還能維持60Mbps傳輸率,每基地臺同時可服務上千人,「所以Wi-Fi技術意外成為3G電信的好朋友,」Selina Lo表示:「自從iPhone全球大賣以來,3G服務訂閱人數便急遽上升,全球皆然。這對3G電信商來說應該是個好消息,但很快便發現使用3G的人愈多,整體利潤上升的速度便下降得愈快,主要原因在於3G基地臺的涵蓋範圍雖廣,但同時能夠服務的上線人數卻很有限,若要增加服務容量,就必須不斷佈署3G基地臺,這導致佈署成本節節上升。」

Selina Lo表示,香港PCCW很早便看到3G網路的困境,因此積極在全香港佈署Wi-Fi Hotzone,包括每個電話亭都放一個Wi-F i無線基地台,因此PCCW的手機客戶,只要在PCCW Wi-FiHotzone的覆蓋範圍內,便會轉接使用Wi-Fi無線網路上網,降低3G網路的數據傳輸負擔。

「這種方案我們稱之為3G Offload,能夠因應各種人群要求,例如球類比賽、演唱會等等,在特定區域快速佈署Wi-Fi Hotzone,紓解大量的行動上網需求,」Selina Lo談到Ruckus Wireless未來的主要方案:「根據PCCW的統計,在3G網路資料傳輸的尖峰時刻,3G Offload方案可以幫助PCCW有效減少20%以上的3G傳輸量,也幫PCCW降低不少成本壓力。」Selina Lo笑說。

臺灣市場前景佳

事實上,Ruckus Wireless與臺灣的關係相當密切,「創立之初,便在臺北成立研發中心,一方面是因為矽谷的Wireless人才不足,另一方面是因為臺灣是Wi-Fi製造大國,全球將近7成的Wi-Fi晶片或是卡片都是出自於臺灣設計,因此Ruckus Wireless設立臺北研發中心,的確幫助良多。」

在市場方面,Ruckus Wireless適合50人以上的中大型企業,如醫院、學校、製造業等等,「但RuckusWireless即將要在臺灣引進美國經驗,與IP-TV商合作,搭配類似MOD的方案以及Ruckus的Wi-Fi無線基地臺,使用者便可以在家中佈署HD-Video等級的無線網路,不需要牽線,便能夠讓家中所有如iPad、筆電等無線裝置觀看IP-TV節目。」根據Selina Lo提供的調查報告來看,在WWAN市場中,Ruckus Wireless在短短數年之間,便超越Cisco取得一半以上的市場佔有率。Selina Lo表示,相信以Ruckus Wireless獨特的產品競爭力,有機會能夠在家用市場再打下另一片戰場。

Tuesday, August 03, 2010

Install VirtualBox in OpenSUSE 11.3/64bit

其實以前在OpenSUSE 11.2 64bit的環境中安裝VirtualBox時,就會碰到無法順利啟動的問題,當時是以手動的方式解決rpm相依性的問題,但日子久了當升級到OpenSUSE 11.3時,我果然是忘記當初是怎麼解決的了 Orz,索性上google重新搜尋一番,沒想到找到了一個更棒的solution如下:

1. 新增VirtualBox的 software rep:
#zypper ar -f http://download.virtualbox.org/virtualbox/rpm/opensuse/11.3 vbox

2. 安裝VirtualBox:
# zypper in VirtualBox-3.2

3. 新增使用者至vboxusers group中:
比如我要account lawrence可以於X11中啟動VirtualBox時,必需將這個帳號新增到vboxusers group中。
# useradd(usermod) -G vboxusers lawrence


Monday, July 05, 2010

Speed up OpenOffice

找到了一篇說明如何加快執行OpenOffice的文章如下:

用OpenOffice 3.1.1搭配OpenSUSE 11.2,的確是感覺到啟動的速度加快了許多!Nice tip!

Saturday, May 01, 2010

[好文推薦] Collecting and analyzing Linux kernel crashes - crash

發現到一篇介紹如何分析Linux Kernel panic的好文章,先收藏起來有空再來研究下。

Sunday, April 25, 2010

OSX: ClickToFlash for Safari

在Linux下不論是使用Google Chrome或是Firefox,帽客都習慣安裝個外掛程式來把Flash block起來,原因是Flash實在是太吃CPU的resource了,尤其是在小筆電上開網頁跑Flash時是一件很痛苦的事情,今天花了一點時間找到了一個在OSX上for Safari的好工具來block Flash,使用過後整台Mac的效率提昇了不少,ClickToFlash實在是個好工具!老G4請繼續撐下去吧!

Saturday, April 24, 2010

RHEL6 Beta is available for public download!

RHEL6 Beta已經提供下載試用了!目前支援的平台有:
- i386
- AMD64/Intel64
- System z
- IBM Power 64

詳細的說明請到Redhat官網查看。

Install Skype on OpenSUSE 11.2 64bit

安裝Skype於OpenSUSE 11.2 64bit版本時發現到無法正常啟動,錯誤訊息如下:
./skype: error while loading shared libraries: libQtGui.so.4: cannot open shared object file: No such file or directory

解決的方法:
zypper install libQtGui.so.4z

FYI.

Wednesday, March 31, 2010

搞定802.11X

搞了一陣子,總算把802.11x的環境在家裡架了起來。
Test Environment:


- Windows XP SP3: 802.11x with PEAP and import CA that generated from FreeRADIU Server.
- OpenSUSE 11.2: 802.11x with PEAP and import CA that generated from FreeRADIUS Server.
- AP: Authentication via the Radius Server and configured data encrypt method as WPA2-AES.
- FreeRADIUS: Support PEAP as default.

總算是成功了:


Tuesday, March 30, 2010

To implement FreeRADIUS for LDAPs

架設流程:
Step1 ~ Step4 參考上次推薦的文章就可以架設起來,然而要實現FreeRADIUS for LDAPs只需要執行Step5就可以完成了,事實上也只是改變幾個參數。
1. To establish LDAP Server
2. To establish FreeRADIUS
3. To configure FreeRADIUS for LDAP
4. To establish LDAPs (TLS)
5. To establish FreeRADIUS for LDAPs:
修改step3中的radiusd.conf,讓FreeRADIUS知道要用LDAPs做認證。
# vi /etc/radiusd.conf
........................
ldap {
# set this to 'yes' to use TLS encrypted connections
# to the LDAP database by using the StartTLS extended
# operation.
# The StartTLS operation is supposed to be used with normal
# ldap connections instead of using ldaps (port 689) connections
start_tls = yes
tls_cacertfile = /etc/openldap/cacerts/client.pem
#tls_cacertdir = /usr/local/etc/openldap/ssl/
# tls_certfile = /path/to/radius.crt
# tls_keyfile = /path/to/radius.key
# tls_randfile = /path/to/rnd
tls_require_cert = "demand"

........................
}
測試:
於Server端執行radiusd -X,並於Client端透過radtest做驗證,以下是Server端的log:
rad_recv: Access-Request packet from host x.x.x.x:32896, id=190, length=60
219 User-Name = "ldapuser"
220 User-Password = "123456"
221 NAS-IP-Address = 255.255.255.255
222 NAS-Port = 0
223 Processing the authorize section of radiusd.conf
224 modcall: entering group authorize for request 0
225 modcall[authorize]: module "preprocess" returns ok for request 0
226 modcall[authorize]: module "chap" returns noop for request 0
227 modcall[authorize]: module "mschap" returns noop for request 0
228 rlm_realm: No '@' in User-Name = "ldapuser", looking up realm NULL
229 rlm_realm: No such realm "NULL"
230 modcall[authorize]: module "suffix" returns noop for request 0
231 rlm_eap: No EAP-Message, not doing EAP
232 modcall[authorize]: module "eap" returns noop for request 0
233 users: Matched entry DEFAULT at line 152
234 users: Matched entry DEFAULT at line 206
235 modcall[authorize]: module "files" returns ok for request 0
236 rlm_ldap: - authorize
237 rlm_ldap: performing user authorization for ldapuser
238 radius_xlat: '(uid=ldapuser)'
239 radius_xlat: 'dc=example,dc=com'
240 rlm_ldap: ldap_get_conn: Checking Id: 0
241 rlm_ldap: ldap_get_conn: Got Id: 0
242 rlm_ldap: attempting LDAP reconnection
243 rlm_ldap: (re)connect to x.x.x.x:389, authentication 0
244 rlm_ldap: setting TLS CACert File to /etc/openldap/cacerts/client.pem
245 rlm_ldap: setting TLS Require Cert to demand
246 rlm_ldap: could not set LDAP_OPT_X_TLS_REQUIRE_CERT option to demand
247 rlm_ldap: starting TLS
248 rlm_ldap: bind as / to x.x.x.x:389
249 rlm_ldap: waiting for bind result ...
250 rlm_ldap: Bind was successful
251 rlm_ldap: performing search in dc=example,dc=com, with filter (uid=ldapuser)
252 rlm_ldap: Added password {crypt}$1$/vvYrM2W$omOGg5A7NQVDxGcTb6afR1 in check items
253 rlm_ldap: looking for check items in directory...
254 rlm_ldap: looking for reply items in directory...
255 rlm_ldap: user ldapuser authorized to use remote access
256 rlm_ldap: ldap_release_conn: Release Id: 0
257 modcall[authorize]: module "ldap" returns ok for request 0
258 modcall: leaving group authorize (returns ok) for request 0
259 rad_check_password: Found Auth-Type LDAP
260 auth: type "LDAP"
261 Processing the authenticate section of radiusd.conf
262 modcall: entering group LDAP for request 0
263 rlm_ldap: - authenticate
264 rlm_ldap: login attempt by "ldapuser" with password "123456"
265 rlm_ldap: user DN: uid=ldapuser,ou=People,dc=example,dc=com
266 rlm_ldap: (re)connect to x.x.x.x:389, authentication 1
267 rlm_ldap: setting TLS CACert File to /etc/openldap/cacerts/client.pem
268 rlm_ldap: setting TLS Require Cert to demand
269 rlm_ldap: could not set LDAP_OPT_X_TLS_REQUIRE_CERT option to demand
270 rlm_ldap: starting TLS
271 rlm_ldap: bind as uid=ldapuser,ou=People,dc=example,dc=com/123456 to x.x.x.x:389
272 rlm_ldap: waiting for bind result ...
273 rlm_ldap: Bind was successful
274 rlm_ldap: user ldapuser authenticated succesfully
275 modcall[authenticate]: module "ldap" returns ok for request 0
276 modcall: leaving group LDAP (returns ok) for request 0
277 Sending Access-Accept of id 190 to x.x.x.x port 32896
Note: x.x.x.x 代表LDAP Server的FQDN或IP address。

Monday, March 29, 2010

介紹LDAP與FreeRADIUS的好文章

找到一篇介紹透過LDAP與FreeRADIUS做Linux系統帳號集中管理的方法,寫得挺不錯的,收藏起來。

Centralized Logins Using LDAP and RADIUS

Monday, March 22, 2010

Autoexpect Scenario

Autoexpect固然方便,但是很多時候還是必須手動改正Autoexpect所錄製過的script才能順利運行,以下將透過SSH登入本機後執行vmstat的指令來說明:

1. 執行Autoexpect:
# autoexpect
此時系統會產生一個autoexpect的shell環境,並將使用者的動作紀錄起來,離開時請輸入exit指令,之後系統會產生個script.exp的紀錄檔(By default)。

2. 執行script.exp:
lawrence@X60:~/Desktop> ./script.exp
spawn /bin/bash
lawrence@X60:~/Desktop> ssh root@127.0.0.1
Password:
此時會發覺停留在輸入Password:而不再有進一步的動作,這是為何呢?

3. 查看並修正script.exp:
原始script.exp(僅截取錄製的部份):
set timeout -1
spawn $env(SHELL)
match_max 100000
expect -exact "]2;lawrence@X60:~/Desktop]1;X60lawrence@X60:~/Desktop> "
send -- "ssh root@10"
expect -exact [K"
send -- ""
expect -exact [K"
send -- "127.0.0.1\r"
expect -exact "127.0.0.1\r
The authenticity of host '127.0.0.1 (127.0.0.1)' can't be established.\r
RSA key fingerprint is fa:19:31:7a:ac:04:41:af:4c:38:b7:58:16:a3:14:f8.\r
Are you sure you want to continue connecting (yes/no)? "
send -- "yes\r"
expect -exact "yes\r
Warning: Permanently added '127.0.0.1' (RSA) to the list of known hosts.\r\r
Password: "
send -- "1234\r"
expect -exact "\r
Last login: Fri Mar 12 17:06:12 2010\r\r
Have a lot of fun...\r
[1m[31mX60:~ # [m"
send -- "vmstat -n 1 5\r"
expect -exact "vmstat -n 1 5\r
procs -----------memory---------- ---swap-- -----io---- -system-- -----cpu------\r
r b swpd free buff cache si so bi bo in cs us sy id wa st\r
14 0 25644 20660 26124 464024 0 1 17 23 881 255 7 3 89 1 0\r
0 0 25644 20148 26124 464536 0 0 0 0 1725 2206 6 2 93 0 0\r
0 0 25644 20404 26124 464264 0 0 0 0 1877 2234 3 3 95 0 0\r
0 0 25644 20404 26124 464224 0 0 0 0 1736 2186 4 1 95 0 0\r
0 0 25644 20404 26124 464224 0 0 0 0 1628 2168 3 2 95 0 0\r
[1m[31mX60:~ # [m"
send -- "ex"
expect -exact [K"
send -- ""
expect -exact [K"
send -- "logout\r"
expect -exact "logout\r
Connection to 127.0.0.1 closed.\r\r
]2;lawrence@X60:~/Desktop]1;X60lawrence@X60:~/Desktop> "
send -- "exit\r"
expect eof


問題1:
The authenticity of host '127.0.0.1 (127.0.0.1)' can't be established.\r
RSA key fingerprint is fa:19:31:7a:ac:04:41:af:4c:38:b7:58:16:a3:14:f8.\r
Are you sure you want to continue connecting (yes/no)? "
預設SSH Server/Client連接時,會去紀錄對方的金鑰,也就是因為這個原因,讓expect沒有得到預期的輸出,因為SSH第n次連線後就不需要紀錄彼此的金鑰了。

問題2:
Last login: Fri Mar 12 17:06:12 2010\r\r
Have a lot of fun...\r
^[\[1m^[\[31mX60:~ # ^[(B^[\[m"
每次登入系統的時間一定會是不一樣的,所以把它也註解掉。

問題3:
procs -----------memory---------- ---swap-- -----io---- -system-- -----cpu------\r
r b swpd free buff cache si so bi bo in cs us sy id wa st\r
14 0 25644 20660 26124 464024 0 1 17 23 881 255 7 3 89 1 0\r
0 0 25644 20148 26124 464536 0 0 0 0 1725 2206 6 2 93 0 0\r
0 0 25644 20404 26124 464264 0 0 0 0 1877 2234 3 3 95 0 0\r
0 0 25644 20404 26124 464224 0 0 0 0 1736 2186 4 1 95 0 0\r
0 0 25644 20404 26124 464224 0 0 0 0 1628 2168 3 2 95 0 0\r
^[\[1m^[\[31mX60:~ # ^[(B^[\[m"
當然不需要上一次vmstat的輸出結果,所以也需要註解掉。

修改過後:
set timeout -1
spawn $env(SHELL)
match_max 100000
expect -exact "]2;lawrence@X60:~/Desktop]1;X60lawrence@X60:~/Desktop> "
send -- "ssh root@10"
expect -exact [K"
send -- ""
expect -exact [K"
send -- "127.0.0.1\r"
expect -exact "Password: "
send -- "1234\r"
expect -exact "#"
send -- "vmstat -n 1 5\r"
expect -exact "#"
send -- "ex"
expect -exact [K"
send -- ""
expect -exact [K"
send -- "logout\r"
expect -exact "logout\r
Connection to 127.0.0.1 closed.\r\r
]2;lawrence@X60:~/Desktop]1;X60lawrence@X60:~/Desktop> "
send -- "exit\r"
expect eof

4. 執行:
lawrence@X60:~/Desktop> ./script2.exp
spawn /bin/bash
lawrence@X60:~/Desktop> ssh root@127.0.0.1
Password:
Last login: Mon Mar 22 16:11:29 2010 from localhost
Have a lot of fun...
X60:~ # vmstat -n 1 5
procs -----------memory---------- ---swap-- -----io---- -system-- -----cpu------
r b swpd free buff cache si so bi bo in cs us sy id wa st
0 0 31016 27124 23500 454188 0 1 16 23 880 303 7 3 89 1 0
0 0 31016 29204 23500 451648 0 0 0 20 1815 1834 2 3 95 0 0
0 0 31016 29204 23500 451676 0 0 0 0 1821 1878 2 2 96 0 0
0 0 31016 29700 23500 451232 0 0 0 0 1763 2029 3 2 95 0 0
0 0 31016 29700 23500 451184 0 0 0 0 1807 2241 2 2 95 0 0
X60:~ # logout
Connection to 127.0.0.1 closed.
lawrence@X60:~/Desktop> exit
exit
lawrence@X60:~/Desktop>
Autoexpect雖然有以上的小缺點,但還是能加快script開發的速度。

Friday, March 19, 2010

於Linux中偵測HD溫度

原文eliu兄分享的方法延伸出再多一點的應用如下:

1. 將HD溫度每60秒紀錄在/var/log/message中:
# hddtemp -d /dev/hda -S 60
Mar 19 15:08:54 server hddtemp[3253]: /dev/hda: ST320011A: 33 C
Mar 19 15:09:54 server hddtemp[3253]: /dev/hda: ST320011A: 33 C

2. 開機時啟動hddtemp:
# vi /etc/sysconfig/hddtemp
HDDTEMP_OPTIONS="-l 192.168.0.1 -d /dev/hda -S 60"
#-l: listen on a specific interface (in TCP/IP daemon mode)
#-d: run hddtemp in TCP/IP daemon mode (port 7634 by default.)
#-S: log temperature to syslog every s seconds.

# /etc/init.d/hddtemp start
# chkconfig hddtemp on

3. 透過另一台主機即時監看HD溫度:
# while true; do date +%F-%H-%M-%S;nc 192.168.0.1 7634;echo"";sleep 1; done
2010-03-19-15-13-23
|/dev/hda|ST320011A|33|C|
2010-03-19-15-13-24
|/dev/hda|ST320011A|33|C|
2010-03-19-15-13-25
|/dev/hda|ST320011A|33|C|
2010-03-19-15-13-26
|/dev/hda|ST320011A|33|C|
2010-03-19-15-13-27
|/dev/hda|ST320011A|33|C

Thursday, March 18, 2010

To configure vendor specific information on Linux DHCP Server

This article will to explain how to configure the vendor specific information i.e., option 43 on Linux DHCP Server, maybe I'll use this function in the future.

Step1. To open and modify /etc/dhcpd.conf
1 ddns-update-style interim;
2 ignore client-updates;
3 option opt-43 code 43 = ip-address;
4
5 subnet 192.168.1.0 netmask 255.255.255.0 {
6
7 # --- default gateway
8 option routers 192.168.1.1;
9 option subnet-mask 255.255.255.0;
10
11 option nis-domain "domain.org";
12 option domain-name "domain.org";
13 option domain-name-servers 192.168.1.1;
14
15 option time-offset -18000; # Eastern Standard Time
16 # option ntp-servers 192.168.1.1;
17 # option netbios-name-servers 192.168.1.1;
18 # --- Selects point-to-point node (default is hybrid). Don't change this unless
19 # -- you understand Netbios very well
20 # option netbios-node-type 2;
21
22 range dynamic-bootp 192.168.1.128 192.168.1.254;
23 default-lease-time 21600;
24 max-lease-time 43200;
25 option opt-43 = "192.168.1.100";
26
27 # we want the nameserver to appear at a fixed address
28 #host ns {
29 # next-server marvin.redhat.com;
30 # hardware ethernet 12:34:56:78:AB:CD;
31 # fixed-address 207.175.42.254;
32 #}
33 }
Step 2. Restart DHCP Server:
# /etc/init.d/dhcpd restart
# chkconfig dhcpd on

Step 3. Identify via packets record tool:

Wednesday, March 17, 2010

Wireless Network Basics guide

找到一本介紹Wireless Network基本常識的電子書,它是由NETGEAR所提供的,寫得還不錯,有興趣的朋友可以閱讀看看。


題外話:
前幾天在家做了個測試,將位於3F的3com AP 7760的Power mode由Minimum設定成Full,然後跑到1F發現到laptop依然可以連接上AP,線上播放Youtube的Flash video還算流暢,瀏覽網頁還好,沒有很頓的感覺,訊號強度還有25%,這台AP應該是SISO的架構,有這樣的表現實在是很不錯,不過AP與我房間只有一牆之隔,所以還是把它改回到minimum了。
另外也把加密方法由WEP改成WPA2-AES了,我可不想被卡皇或螞蟻戰車這樣類似的破解AP加密的設備破解後,變成好鄰居AP呀~

Friday, March 12, 2010

[Shell Script] 長時間測試FTP穩定度

Script:
1 #!/bin/bash
2 while (true)
3 do
4 lftp $1 -u ftp,ftp -e "cd /pub;get file;bye"
5 lftp $1 -u ftp,ftp -e "cd /pub;put file;bye"
6 done
Explain:
Line4: 以ftp account登入到FTP Server,並透過-e的指令將多個指令合併依序執行(切換到pub/抓取file/登出FTP)。
Line5: 以ftp account登入到FTP Server,並透過-e的指令將多個指令合併依序執行(切換到pub/上傳file/登出FTP)。
How to execute:
server1:~/bin # ./ftpcon.sh 192.168.0.1

透過此script可以對DUT不間斷的做FTP下載與上傳的動作,FYI。
當然如果要做更advance的測試,建議用curl-loader應該會更好一點。

Tuesday, March 09, 2010

ITHome: 無線網路安全拉警報

詳見:

正所謂害人之心不可有,防人之心不可無,這是篇好文章,你還在使用WEP或是WPA-PSK嗎?趕緊更換policy吧!

帽客計畫用Aircrack-ng來破解WEP method看看,當然一定是破解我自己的AP囉。

Monday, March 08, 2010

Wednesday, March 03, 2010

RHEL6

首先,真是好久沒有寫blog了!不是帽客懶而是最近公司的project還蠻緊的,所以無暇更新腦中的知識於blog上。

今天下午稍可喘息,想想Redhat曾對外宣稱2010 Q1會發表RHEL6,可是現在怎麼還是沒消息呢?
上google找了找,看一看,目前最新的版本是RHEL 5.5 beta,然後RHEL6預計要在Fedora13後release。(for details: Redhat Enterprise Linux wiki

看來還得等一陣子。

Monday, February 01, 2010

買到國際版的Porter... Orz

帽客想說背個好一點的包包吧,加上目前在台灣Porter包還蠻多人背的,品質應該很不錯,結果上星期五跑去忠孝SOGO買了一款不便宜的Porter包(大約快六張小朋友),沒想到這是International Porter....老實說買之前我根本沒做功課,誰知道台灣與日本Porter會有這段恩怨呢?哈~苦笑中。

我現在只期望雖品質沒日製的好(網路上大家都這麼說 Orz),但也能讓我操個三年吧!暗藍色的顏色我還蠻喜歡的說,雖然它是International... 再次Orz.

Thursday, January 28, 2010

Apple iPad announced

Apple總算是對外發表了Apple iPad平板式電腦,成為世界第一的Mobile vendor後讓我們看看iPad是否也可以很成功!

Friday, January 22, 2010

強大的awk

透過awk找出系統帳號中誰的預設shell是屬於bash,並統計有幾筆。
[root@centos bin]# awk -F: 'BEGIN{count=0};/bash/{count++}/bash/{print $1};END{print "TOTAL="count}' /etc/passwd
root
u1
u2
law
mysql
TOTAL=5

Thursday, January 21, 2010

To setup IPSec in CentOS 5.4

這是一篇很精簡的設定方法,更詳細的步驟與說明建議還是至OpenSwan網站查詢。

Test Environment:
(172.17.1.100) IPSec VPN1 (10.12.95.3) ----- (10.12.95.2) IPSec VPN2 (172.17.2.100)

1. 安裝:
# yum install openswan*
2. 透過sysctl.conf修改Kernel參數:
修改Kernel相關參數,使得之後跑ipsec verify時不會出錯。
# vi /etc/sysctl.conf
*********************************************************************
# example entries for /etc/sysctl.conf
# forwarding is needed for subnet or l2tp connections
net.ipv4.ip_forward = 1

# rp_filter is stupid and cannot deal decrypted packets "appearing out of
# nowhere"
net.ipv4.conf.default.rp_filter = 0

# when using 1 interface for two networks, and in some other cases with
# NETKEY, the kernel thinks it can be clever but breaks things.
net.ipv4.conf.all.send_redirects = 0
net.ipv4.conf.default.send_redirects = 0
net.ipv4.icmp_ignore_bogus_error_responses = 1
net.ipv4.conf.all.log_martians = 0
net.ipv4.conf.default.log_martians = 0

# these are non-ipsec specific security policies you should use
net.ipv4.conf.default.accept_source_route = 0
net.ipv4.conf.all.accept_redirects = 0
net.ipv4.conf.default.accept_redirects = 0
*********************************************************************
#sysctl -p
3. 套用並修改範例:
# cp/usr/share/doc/openswan-doc*/examples /etc/ipsec.d/hosttohost.conf
# vi /etc/hosttohost.conf
*********************************************************************
# sample connections
# This file is RCSID $Id: examples,v 1.5 1999/12/13 02:38:16 henry Exp $

# sample tunnel (manually or automatically keyed)
# Here we just use ESP for both encryption and authentication, which is
# the simplest and often the best method.
conn sample
# left security gateway (public-network address)
left=10.12.95.3
# next hop to reach right
#leftnexthop=10.44.55.66
# subnet behind left (omit if left end of the tunnel is just the s.g.)
leftsubnet=172.17.1.0/24
# right s.g., subnet behind it, and next hop to reach left
right=10.12.95.2
#rightnexthop=10.88.77.66
rightsubnet=172.17.2.0/24
# (manual) SPI number
#spi=0x200
# (manual) encryption/authentication algorithm and parameters to it
esp=3des-md5-96
#espenckey=[192 bits]
#espauthkey=[128 bits]
authby=secret
auto=add
*********************************************************************
4. 新增PSK:
# vi /etc/ipsec.secrets
*********************************************************************
include /etc/ipsec.d/*.secrets
10.12.95.3 10.12.95.2 : PSK "1234567890"
10.12.95.2 10.12.95.3 : PSK "1234567890"
5. 修改/etc/ipsec.conf
# vi /etc/ipsec.conf
*********************************************************************
# /etc/ipsec.conf - Openswan IPsec configuration file
#
# Manual: ipsec.conf.5
#
# Please place your own config files in /etc/ipsec.d/ ending in .conf

version 2.0 # conforms to second version of ipsec.conf specification

# basic configuration
config setup
# Debug-logging controls: "none" for (almost) none, "all" for lots.
# klipsdebug=none
# plutodebug="control parsing"
# For Red Hat Enterprise Linux and Fedora, leave protostack=netkey
protostack=netkey
nat_traversal=yes
virtual_private=
oe=off
# Enable this if you see "failed to find any available worker"
nhelpers=0

#You may put your configuration (.conf) file in the "/etc/ipsec.d/" and uncomment this.
include /etc/ipsec.d/*.conf

PS. 另外一邊的VPN gateway與以上的架設方法都一樣,只是將/etc/hosttohost.conf中的left與right的資訊對調即可。

6. 啟動IPSec:
# /etc/init.d/ipsec start
/usr/libexec/ipsec/addconn Non-fips mode set in /proc/sys/crypto/fips_enabled
ipsec_setup: Starting Openswan IPsec U2.6.21/K2.6.18-164.6.1.el5...
ipsec_setup: multiple ip addresses, using 10.12.95.3 on eth0
ipsec_setup: /usr/libexec/ipsec/addconn Non-fips mode set in /proc/sys/crypto/fips_enabled

7. 執行IPSec verify:
# ipsec verify
Checking your system to see if IPsec got installed and started correctly:
Version check and ipsec on-path [OK]
Linux Openswan U2.6.21/K2.6.18-164.6.1.el5 (netkey)
Checking for IPsec support in kernel [OK]
NETKEY detected, testing for disabled ICMP send_redirects [OK]
NETKEY detected, testing for disabled ICMP accept_redirects [OK]
Checking for RSA private key (/etc/ipsec.secrets) [OK]
Checking that pluto is running [OK]
Two or more interfaces found, checking IP forwarding [OK]
Checking NAT and MASQUERADEing [N/A]
Checking for 'ip' command [OK]
Checking for 'iptables' command [OK]

Opportunistic Encryption DNS checks:
Looking for TXT in forward dns zone: centos.example.com [MISSING]
Does the machine have at least one non-private address? [FAILED]

8. 建立IPSec tunnel:
# ipsec auto --up sample
104 "sample" #1: STATE_MAIN_I1: initiate
003 "sample" #1: received Vendor ID payload [Openswan (this version) 2.6.21 ]
003 "sample" #1: received Vendor ID payload [Dead Peer Detection]
003 "sample" #1: received Vendor ID payload [RFC 3947] method set to=109
106 "sample" #1: STATE_MAIN_I2: sent MI2, expecting MR2
003 "sample" #1: NAT-Traversal: Result using RFC 3947 (NAT-Traversal): no NAT detected
108 "sample" #1: STATE_MAIN_I3: sent MI3, expecting MR3
003 "sample" #1: received Vendor ID payload [CAN-IKEv2]
004 "sample" #1: STATE_MAIN_I4: ISAKMP SA established {auth=OAKLEY_PRESHARED_KEY cipher=aes_128 prf=oakley_sha group=modp2048}
117 "sample" #2: STATE_QUICK_I1: initiate
004 "sample" #2: STATE_QUICK_I2: sent QI2, IPsec SA established tunnel mode {ESP=>0xca7bd686 <0x193e1d71 xfrm="3DES_0-HMAC_MD5" natoa="none" natd="none" dpd="">
9. 測試:
# ping 172.17.2.100 -I 172.17.1.100 -c 10
PING 172.17.2.100 (172.17.2.100) from 172.17.1.100 : 56(84) bytes of data.
64 bytes from 172.17.2.100: icmp_seq=1 ttl=64 time=1.65 ms
64 bytes from 172.17.2.100: icmp_seq=2 ttl=64 time=0.716 ms
64 bytes from 172.17.2.100: icmp_seq=3 ttl=64 time=1.16 ms
64 bytes from 172.17.2.100: icmp_seq=4 ttl=64 time=1.41 ms
64 bytes from 172.17.2.100: icmp_seq=5 ttl=64 time=1.24 ms
64 bytes from 172.17.2.100: icmp_seq=6 ttl=64 time=1.17 ms
64 bytes from 172.17.2.100: icmp_seq=7 ttl=64 time=1.52 ms
64 bytes from 172.17.2.100: icmp_seq=8 ttl=64 time=0.544 ms
64 bytes from 172.17.2.100: icmp_seq=9 ttl=64 time=0.796 ms
64 bytes from 172.17.2.100: icmp_seq=10 ttl=64 time=1.58 m
Note:
此次使用的版本分別為:
openswan-doc-2.6.21-5.el5_4.1
openswan-2.6.21-5.el5_4.1
不同的版本間,example configure file有點差異,需請注意。

To setup Socks Server in CentOS5.4

工作需求,所以去架設了Socks4/5 Server來使用,在CentOS上安裝起來很容易且配置上也沒有多大的難度,在此筆記一下。

1. 抓取ss5 tarball檔:
預設的repos似乎沒有ss5,故自己抓個tarball檔下來安裝。
wget http://softlayer.dl.sourceforge.net/project/ss5/ss5/3.7.9-1/ss5-3.7.9-1.tar.gz
tar zxvf ss5-3.7.9-1.tar.gz
2. 安裝:
[root@server2 src]# tar zxvf ss5-3.7.9-1.tar.gz
[root@server2 ss5-3.7.9]# ./configure
[root@server2 ss5-3.7.9]# make
[root@server2 ss5-3.7.9]# make install
3. 配置:
找到auth與permit並將註解取消,注意我並沒有enable使用者需做認證的機制。
[root@server2 ~]# vi /etc/opt/ss5/ss5.conf
# SHost SPort Authentication
auth 0.0.0.0/0 - -
# Auth SHost SPort DHost DPort Fixup Group Band ExpDate
permit - 0.0.0.0/0 - 0.0.0.0/0 - - - - -
4. 啟動:
[root@server2 ~]# chkconfig --add ss5
[root@server2 ~]# chkconfig ss5 on
[root@server2 ~]# /etc/init.d/ss5 start
doneting ss5... [ OK ]
[root@server2 ~]#
5. 測試:
最後可透過FireFox來測試Socks4/5.
工具->選項->進階->設定->手動設定Proxy:
SOCKS主機: x.x.x.x Port: 1080
並選擇SOCKS v4或是SOCKS v5

Monday, January 11, 2010

To implement NFSv2,NFSv3 and NFSv4

NFSv2, NFSv3與NFSv4在Linux 2.6.x的kernel上,預設都是有支援的,不同的是需要對於server或client之前下達不同的參數以區別,以下分別就不同版本的實作簡單敘述:

1. NFS v3:
Server: exportfs *:/tmp
Client: mount 192.168.0.254:/tmp /mnt/nfs

2. NFS v2:
Server: exportfs *:/tmp
Client: mount -o nfsvers=2 192.168.0.254:/tmp /mnt/nfs

3. NFS v4:
Server: exportfs -o fsid=o *:/tmp
Client: mount -t nfs4 192.168.0.254:/tmp /mnt/nfs
References:
http://www.redhat.com/docs/manuals/enterprise/RHEL-4-Manual/ref-guide/s1-nfs-client-config.html
http://www.centos.org/docs/5/html/Deployment_Guide-en-US/ch-nfs.html

Wednesday, January 06, 2010

Path MTU discovery

What's Path MTU discovery:
http://en.wikipedia.org/wiki/Path_MTU_discovery

預設Linux box是把pmtud的機制打開的,可透過以下的kernel參數檢查:
cat /proc/sys/net/ipv4/ip_no_pmtu_disc
0 代表pmtud enable (default)
1 代表pmtud disable
以下是我實驗時的環境:

Remote Server (mtu=1500) ----- (mtu=1400) Linux NAT Box (mtu=1400) ----- Client (mtu=1500)

1. 從Client往Server端送出icmp packet size大於1400bytes但小於1500bytes的包,for example 1450 bytes, DF=1
2. Linux NAT Box將會回報封包需要分片!並透過icmp unreachable包告訴Client,本機的mtu為1400bytes
opensuse:~ # ping 10.12.64.220 -s 1450
PING 10.12.64.220 (10.12.64.220) 1450(1478) bytes of data.
From 10.12.95.3: icmp_seq=1 Frag needed and DF set (mtu = 1400)
From 10.12.95.3 icmp_seq=1 Frag needed and DF set (mtu = 1400)
1458 bytes from 10.12.64.220: icmp_seq=2 ttl=63 time=2.85 ms
1458 bytes from 10.12.64.220: icmp_seq=3 ttl=63 time=4.97 ms
1458 bytes from 10.12.64.220: icmp_seq=4 ttl=63 time=3.48 ms
此後將會保持一段時間不需要detect。

Monday, December 14, 2009

[Shell script] 自動開啟或關閉 vsftpd匿名登入機制

1 #!/bin/bash
2
3 vsftp_conf="/etc/vsftpd/vsftpd.conf"
4
5 if [ -f $vsftp_conf ]; then
6 if [ $# -ne 1 ]; then
7 echo "Parameters is not allow"
8 echo "usage: $0 on or $0 off"
9 exit 1
10 fi
11
12 case "$1" in
13 on) CMD='YES';;
14 off) CMD='NO';;
15 *)
16 echo "format error!"
17 exit 1
18 ;;
19 esac
20
21 if [ $CMD = 'YES' ]; then
22 sed 's/^.*anonymous_enable=.*/anonymous_enable=YES/' $vsftp_conf > /tmp/$$.vsftpd.conf
23 mv -f /tmp/$$.vsftpd.conf $vsftp_conf
24 /etc/init.d/vsftpd restart
25 else
26 sed 's/^.*anonymous_enable=.*/anonymous_enable=NO/' $vsftp_conf > /tmp/$$.vsftpd.conf
27 mv -f /tmp/$$.vsftpd.conf $vsftp_conf
28 /etc/init.d/vsftpd restart
29 fi
30 else echo "$vsftp_conf is not exist"
31 fi

說明:
列5 先判斷/etc/vsftpd/vsftpd.conf是否存在,若不存在則回報檔案不存在。(列30)
列6 判斷所傳入的引數是否為1個,若不是則回報錯誤並結束。 (列7~10)
列12-19 使用case,判斷是on, off或是格式有誤。
列21-24 若為on則設定anonymous_enable=YES,並重新啟動vsftpd。
列25-28 若為off則設定anonymous_enable=NO,並重新啟動vsftpd。

測試:
1. 允許匿名登入:
[root@centos bin]# ./vsftpd.sh on
Shutting down vsftpd: [ OK ]
Starting vsftpd for vsftpd: [ OK ]
[root@centos bin]# ftp localhost
Connected to localhost.localdomain.
220 (vsFTPd 2.0.5)
530 Please login with USER and PASS.
KERBEROS_V4 rejected as an authentication type
Name (localhost:root): ftp
331 Please specify the password.
Password:
230 Login successful.
Remote system type is UNIX.
Using binary mode to transfer files.
ftp>

2. 不允許匿名登入:
[root@centos bin]# ./vsftpd.sh off
Shutting down vsftpd: [ OK ]
Starting vsftpd for vsftpd: [ OK ]
[root@centos bin]# ftp localhost
Connected to localhost.localdomain.
220 (vsFTPd 2.0.5)
530 Please login with USER and PASS.
KERBEROS_V4 rejected as an authentication type
Name (localhost:root): ftp
331 Please specify the password.
Password:
530 Login incorrect.
Login failed.
ftp>
References:

Friday, December 11, 2009

TestShell Studio

今天下午參加了派恩科技所舉辦的新世代電子與網通產品自動化測試技術研討會,見識到了QualiSystems所研發的TestShell tools其強調並不需要programming的能力就能完成自動化測試的工作,讓我印象最為深刻的就是TestShell Studio,它能結合多種網通測試設備(IXIA,SmartBits and etc),自訂commands,遠端控制DUT,錄製Web access action等等強大的功能以加快測試的速度!AWESOME!

只要把你腦海中的想法透過滑鼠Drag-&-drop,整個測試流程就完成了!我想這對於網通廠商來說是個非常有力的測試工具,也值得每個網通QA學習。

美中不足的是......
1. 沒有提供Trial version
2. 目前似乎沒有for Linux的版本

Wednesday, December 09, 2009

Google Chrome for Linux and Mac OSX goes beta!

Google Chrome for Linux與Mac OSX終於出Beta版了,在Linux方面提供了Debian/Ubuntu/Fedora/OpenSUSE的deb與rpm,而在Mac OSX呢,很遺憾地PPC的user還是被遺忘了,剛好我就是PPC的user @@||

Anyway,在Linux下與Firefox V3.5.5相比,Google Chrome運行起來的確是讓我感覺到有快一點,不過目前發現到有兩個缺點:

1. 預設的中文字型不好看。
2. 即使我已經裝了Adobe flash player,還是不能播放Youtube的影片。
有興趣的人可以試用看看唷!


Monday, November 30, 2009

emesene 1.5.1 - "awesome" bugfix edition has been released!

曾幾何時,當我從Pidgin跳槽至emesene時感覺到非常順手好用,但是唯一的缺點就是emesene常常回報對方收不到我的訊息,有時真覺得有點惱人,所以這陣子又跳回去使用Pidgin,雖然沒那麼好看但至少穩定。

Well,今天連到emesene official website發現到v1.5.1已經正式release了,並且也修正了送不出訊息的問題,好樣的重新拿回來使用!

嘿!不過目前還沒有OpenSUSE 11.2的rpm檔,先用tarball了。

Friday, November 27, 2009

How to configure mirror port on Cisco 2960G switch

碰到了就紀錄一下囉~
# monitor session 1 source interface Gi 0/11
# monitor session 1 destination interface Gi 0/10
如此一來port 10就會成為port 11的mirror port。


判斷service是否可使用TCP wrappers

在Linux系統中,針對service比較簡單的安全政策可透過TCP wrappers來做管理,但是有些service是可被TCP wrappers控管的,有些則不是,如何判斷呢?其實只要用ldd命令來查看service是否有利用到libwrap wrapper library就可以囉!以下舉幾個例子:
1. OpenSSH:
[root@centos ~]# ldd /usr/sbin/sshd | grep libwrap
libwrap.so.0 => /lib/libwrap.so.0 (0x003f9000)
2. NFS:
[root@centos ~]# ldd /usr/sbin/rpc.nfsd | grep libwrap
3. Apache:
[root@centos ~]# ldd /usr/sbin/httpd | grep libwrap
由上可知OpenSSH可由TCP wrappers託管,但是NFS與Apache則不行。(有自己的安全機制)

回憶起以前考RHEL3時是用死記的方法記下那些service可以被TCP wrappers託管,現在年紀大了記憶體不足,只好靠些小技巧來幫助。

Thursday, November 26, 2009

Netifera

Netifera是一套for Linux與MAC OSX的網路環境偵測軟體,使用起來非常簡單易懂。
帽客安裝在CentOS5.4下,從安裝到使用上沒有發生什麼問題,且整體跑起來感覺很流暢!值得推薦給大家使用。

What is Netifera?
Netifera is a new modular open source platform for creating network security tools. This project provides many advantages for both security developers and researchers who want to implement new tools as well as the community of users of these tools.
Netifera website
Netifera quick guide
Download Netifera

Thursday, November 19, 2009

如何透過ISO檔,更新CentOS

之前介紹過如何透過ISO檔升級OpenSUSE,身為紅帽與蜥蜴系的愛好者,當然也要介紹一下如何透過ISO檔升級CentOS(應該也可用於Redhat與Fedora)。

Step1. 建立掛載點:
# mkdir -p /mnt/iso/1
Step2. 掛載ISO檔:
# mount -o loop /mnt/nfs/CentOS-5.4*.iso /mnt/iso/1
Step3. 安裝createrepo套件:
# yum install createrepo
Step4. 產生來源repository:
# cd /mnt/iso
# createrepo .
Step5. 建立新repository設定檔:
# vi /etc/yum.repos.d/centos54.repo
[CentOS5.4 Repository]
baseurl=file:///mnt/iso
enabled=1
Step6. 準備升級:
先將原本的repos全部rename成xxx.repo.bak
# yum clean all
# yum update
成功的話就可看到下圖顯示準備更新成CentOS5.4的套件:


Wednesday, November 18, 2009

學習Linux CLI 的好站

想學習Linux CLI嗎?以下的網站非常值得閱讀或是當作線上工具書:
LinuxCommand
O'Reilly's Linux Command Directory
The Linux CookBook
Ols3 shell script
Also please let me know your favorite websites for learning Linux command line in the comments.

Tuesday, November 17, 2009

Fedora 12 即將release!

Oh.. Fedora12預計於.....2009.11.17 release (不就是今天嗎? 逃~),太久沒注意Fedora project了,明天download下來在VirtualBox上跑看看吧。

BTW, 最近真是OS的大混戰呀! 打得激烈!
Apple MAC OSX 10.6.2 [未使用,好想用呀~哭]
CentOS 5.4 [使用中]
Ubuntu 9.10 [未使用]
OpenSUSE 11.2 [使用中]
Fedora 12 [快要出了]
Windows 7 [恩...]

Friday, November 13, 2009

升級OpenSUSE 11.1至11.2之雜記

OpenSUSE 11.2已經於11.12日正式release了,雖然說11.1目前在S10e上跑得挺順的,但是手癢的我還是決定給它升級看看,以往我會選擇重新安裝的方法來升級,反正/home是配置到另外一個partition,系統重新安裝也不會讓資料遺失,但是總覺得要重新調整到自己習慣的桌面設定太浪費時間了,於是這一次我選擇透過將software repositories指定成OpenSUSE 11.2的方法來安裝:

Step1. Yast->Software->Software Repositories->Add->Local ISO Image添加OpenSUSE11.2镜像。
Step2. 手動移除OpenSUSE 11.1的repositories
Step3. # zypper dup
遺憾的是.....我竟然在X Window幹下此等蠢事,zypper dup會將有衝突的軟件強制刪除,沒想到在Firefox開啟的狀態下,造成系統crash導致更新尚未完成!重開機後整個系統爛掉,唉!我可不能panic呀,冷靜下來進入failsafe mode重新再執行一次zypper dup,沒想到卻回報無法找到來源,原來還需要讓Kernel把loop的模組掛起來,於是便執行modprobe loop,如此一來就可以繼續升級的動作了。

沒想到升級完後,只有保留了kernel-2.6.27.37-0.1-pae而竟然沒有安裝上新的kernel-2.6.31.5-0.1-desktop,導致無法進入GNOME..... anyway透過zypper再裝上新版的kernel吧,裝上後一切搞定,可以正常進入GNOME,目前嘗試使用看看。

Update1_新增OpenSUSE 11.2的repositories:
# zypper ar http://ftp.gwdg.de/pub/linux/misc/packman/suse/11.2/ packman
# zypper ar http://download.opensuse.org/distribution/11.2/repo/oss/ opensuse11.2_oss
# zypper ar http://download.opensuse.org/distribution/11.2/repo/non-oss/opensuse_11.2_non-oss
# zypper ar http://download.opensuse.org/update/11.2/ opensuse11.2_update
Update2_安裝S10e(Broadcom Corporation BCM4312 802.11b/g)的wireless module:
# zypper in broadcom-wl*

Friday, October 30, 2009

CentOS 5.4 now is available to download!

令人喜愛的CentOS5.4正式release囉!趕緊來download.... :)

CentOS 5.4 release notice
Download site

如果已經安裝了之前的版本,則可透過以下的命令線上更新系統:
# yum list updates
# yum update

Thursday, October 29, 2009

備份利器: rsnapshot

rsnapshot與我之前用rsync備份的方法比較起來看來是更加地簡單好用了,有興趣的朋友可參考以下的文章作個測試:
How To Backup Local Unix Host Using rsnapshot rsync Utility
How To Backup Remote Linux Host Using rsnapshot rsync Utility

Thursday, October 22, 2009

Clone HD in the VirtualBox

錯誤方法:
copy / paste original vdi檔。


正確方法:
Windows->cmd->vboxmanage clonehd "original vdi" "new vdi"


之後匯入新的vdi檔就不會造成UUID重複的問題了。

Monday, October 19, 2009

Install FreeMind in OpenSUSE 11.1

在OSX下習慣用FreeMind紀錄一些自己的ideas,但我的末代"老"白iBook G4它老人家重達2.2Kg在加上一些書籍,我實在是背不動了,所以就將S10e安裝成OpenSUSE帶去上班用,索性也來裝個FreeMind來使用吧,沒想到,它真的不是很好安裝,很多套件不論是官方的repository或是packman repository都沒有,只好手動自己找一找裝一裝了。(忽然想起多年前在RHEL3.0要裝K3b support燒錄mp3的壯烈情況。)

裝完了之後,遇到了中文亂碼的問題,參考了佑子窩 blogger所提供的方法很順利的解決了。
不過OpenSUSE與Ubuntu有個地方不一樣:
OpenSUSE: ln -s /usr/share/fonts/truetype/uming.ttf
Ubuntu: ln -s /usr/share/fonts/truetype/arphic/uming.ttf

[Shell script] Select選單語法練習

1. 以選單方式,提供要刪除哪一個檔案 (a1, a2, a3, a4 and a5)
2. 只有當user輸入y/Y時,才會將檔案刪除。
#!/bin/bash
select VAR in a1 a2 a3 a4 a5 exit
do
case $VAR in
a1) read -p "Delete a1? (y/Y/n/N)" FLAG
if [ $FLAG = y -o $FLAG = Y ]; then
rm -f ./a1
fi;;
a2) read -p "Delete a2? (y/Y/n/N)" FLAG
if [ $FLAG = y -o $FLAG = Y ]; then
rm -f ./a2
fi;;
a3) read -p "Delete a3? (y/Y/n/N)" FLAG
if [ $FLAG = y -o $FLAG = Y ]; then
rm -f ./a3
fi;;
a4) read -p "Delete a4? (y/Y/n/N)" FLAG
if [ $FLAG = y -o $FLAG = Y ]; then
rm -f ./a4
fi;;
a5) read -p "Delete a5? (y/Y/n/N)" FLAG
if [ $FLAG = y -o $FLAG = Y ]; then
rm -f ./a5
fi;;
exit) exit;;
esac
done

Friday, October 16, 2009

[Shell script] 遞迴

#!/bin/bash
function re () {
local tmp
tmp=$1
if [ $tmp -eq 1 ]; then
total=1
else
re $(($tmp-1))
total=$(($tmp*$total))
fi
}


read -p "Data=" VAR
re $VAR
echo "$VAR!=$total"
太久沒寫了腦袋打結了一下。

Thursday, October 15, 2009

Fine Tuning Firefox

參考了以下的文章在OpenSUSE 11.1下調整了FireFox的參數,感覺有改善!
Fine Tuning Firefox

順便找到備份FF的軟體:
FEBE

最後附上OpenSUSE 11.1美美的桌面環境。

Wednesday, October 07, 2009

OpenSUSE 11.2 roadmap

沒意外的話應該在今年的11月12號OpenSUSE 11.2就會release了,我還蠻喜歡OpenSUSE team的roadmap。

Milestone -> Release Candidate -> Gold Master
http://en.opensuse.org/Roadmap/11.2

如何幫助測試OpenSUSE: http://en.opensuse.org/Testing/

Sunday, October 04, 2009

Free Partition Manager for Windows

I find a good partition management tool for Windows series OS.
EASEUS Partition Master it's very useful, and Home user edition is free!

Tested on Lenovo S10e netbook and it's works.

Tuesday, September 29, 2009

Shell script 練習

看到Ols3前輩出的練習題,故嘗試寫看看,題目是這個樣子的:
# 把 以下資料檔 d1.txt d2.txt 予以整合
d1.txt
====================
abc:12
bob:25
cdc:36
OK:121
Tomy:99
Jack:108

d2.txt
====================
Jack:9
cdc:8
OK:11
Tomy:22
bob:5
abc:88

試寫一 script 來處理 d1.txt d2.txt 使其變成

abc:12:88
bob:25:5
cdc:36:8
Jack:108:9
OK:121:11
Tomy:99:22

My script:
#!/bin/bash

for VAR1 in `cat ./d1.txt | sort`
do
for VAR2 in `cat ./d2.txt | sort`
do
if [ `echo $VAR1 | cut -d: -f1` = `echo $VAR2 | cut -d: -f1` ]; then
echo $VAR1\:`echo $VAR2 | cut -d: -f2`
fi
done
done

References:

Thursday, September 24, 2009

Powerful web application and network load testing tool: curl-loader

找到了一個還蠻強大的web application與network load testing的工具: curl-loader
curl-loader是based on Linux並號稱可以提供類似SpirentAvalanche與IXIA loader的功能(IXIA用過,但是IXIA loader我可是沒用過 XD),同時間透過curl-loader可以產生上萬筆的clients來產生實際的HTTP或是FTP的流量,重點是透過它的configure file,curl-loader會自動的幫你bind IP,真是貼心的設計呀,使用之前最好是依照它的建議更改些Linux預設的參數,當然如果要產生big real flow那就要使用高檔點的機器囉,帽客實際上跑了一下,發現到當產生30K HTTP clients時,會將dual core(Intel C2D E4500)的CPU resource全部吃光光!

建議調整的參數:
ulimit -n 100000
echo 1 > /proc/sys/net/ipv4/tcp_tw_recycle
echo 1 > /proc/sys/net/ipv4/tcp_tw_reuse
echo 100000 > /proc/sys/fs/file-max
echo 0 > /proc/sys/net/ipv4/conf/all/rp_filter
echo 0 > /proc/sys/net/ipv4/conf/ethX/rp_filter
echo "109568 109568 109568" > /proc/sys/net/ipv4/tcp_mem

Monday, September 21, 2009

Wednesday, September 16, 2009

Linux上常見的Load Balancer Project

常見的有:
Linux Virtual Server
Ultra Monkey
Red Hat Cluster Suite
High-Availability Linux

References:

Friday, September 11, 2009

OSX 10.5.x 重大更新通知

OSX剛剛提醒我目前有更新囉,這次的更新還不小,有iTunes, QuickTime, Java for MAC與Security update。

Wednesday, September 09, 2009

只印出本次登入所輸入的命令

Linux系統預設上可透過history(bash內建的指令)看到以前與本次登入所輸入的所有命令,而當使用者登出系統後系統會自動將本次登入時所輸入的所有命令新增到 ~/.bash_history中,至於最多紀錄多少筆則要取決於HISTSIZE/HISTFILESIZE設定為多少(兩者預設應該都是1000),所以排除舊的命令歷史記錄,新的紀錄應該會從1001開始,於是乎可以利用以下簡單的方法列印出目前登入所輸入的所有指令:

# history | while read cmd; do set -- $cmd; if [ $1 -gt 1000 ]; then echo "$1:$2";fi; done
1001:history
1002:set
1003:history
1004:ifconfig
1005:history

Note:
1. 預設上HISTFILESIZE是設定~/.bash_history可紀錄多少筆,預設是1000,假設今天設定成2000則代表~/.bash_history可存放2000筆記錄,於是乎上面的指令就必需改成這樣:
# history | while read cmd; do set -- $cmd; if [ $1 -gt 2000 ]; then echo "$1:$2";fi; done

2.若~/.bash_history未滿1000筆時,那就要特別注意判斷的條件了。