Thursday, January 03, 2019

在Ubuntu 18.04 架設VNC Server

很久前有筆記過如何在CentOS7上架設VNC Server,這幾天實做了一下VNC Server在Ubuntu 18.04上。

以下就簡單紀錄一下步驟。

Steps:
1. Install VNC Server (遠端桌面環境將採用xfce):
$ sudo apt-get install vnc4server xfce4 xfce4-goodies
2. 建立VNC server的配置檔與user密碼:
$ vncpasswd
$ vim.tiny ~/.vnc/xstartup
#!/bin/sh
unset SESSION_MANAGER
unset DBUS_SESSION_BUS_ADDRESS
exec startxfce4 
$ chmod 755 ~/.vnc/xstartup
3. 手動啟動VNC Server:
這個時候我們先測試看看VNC Server可不可以正常工作。


如果有看到以上類似的畫面,那說明VNC Server已經啟動並且listen在TCP port 5901。但是請注意,預設它會只listen在localhost,這個等一下在建立systemd startup script的時候,我們可以修改它。
4. 建立systemd startup script: 
 做這個設定的最大好處是將來系統重開機後,我就不需要每次都要手動啟動VNC Server了。
4.1 建立VNC Server script file:
 $ sudo vim.tiny /etc/systemd/system/vncserver@.service
[Unit]
Description=Remote desktop service (VNC)
After=syslog.target network.target

[Service]
Type=simple
User=u
PAMName=login
PIDFile=/home/%u/.vnc/%H%i.pid
ExecStartPre=/bin/sh -c '/usr/bin/vncserver -localhost no -kill :%i > /dev/null 2>&1 || :'
ExecStart=/usr/bin/vncserver :%i -localhost no -geometry 1440x900 -alwaysshared -fg
ExecStop=/usr/bin/vncserver -kill :%i

[Install]
WantedBy=multi-user.target
剛剛有提到預設VNC Server只會listen在localhost:5901,但透過參數-localhost no可以讓它listen在0.0.0.0也就是all net的概念。 
4.2 手動reload systemd: (每次有新增或修改systemd的startup script file後,記得此步驟)
$ sudo systemctl daemon-reload
4.3 透過systemd啟動VNC Server:
$ sudo systemctl start vncserver@1.service
4.4 在系統開機時,自動啟動VNC Server:
$ sudo systemctl enable vncserver@1.service
假設一切順利的話,輸入相關的命令後,應該可以看到類似的畫面。


 5. 遠端測試: (採用Ubuntu內建的Remmina remote desktop client)

Friday, December 28, 2018

2018 Top 10的Snap 套件

即將邁入2019,回顧一下2018 前10名最受喜愛的snap套件是哪些呢?

剛看了一下敝公司的官方網頁,以下有Top10的排行榜唷~ :D
https://blog.ubuntu.com/2018/12/27/top-snaps-in-2018

不過說真的,我個人蠻常用的Skype, mailspring, simplenote現在都用snap來安裝,並且會自動定時更新,超方便的呀~

不知道何時會有line for snap?

Wednesday, September 19, 2018

How can I setup an IPv6 router via radvd on Ubuntu 18.04 LTS?

What's radvd?
Router advertisement daemon.

Reference:
https://zh.wikipedia.org/wiki/Radvd
http://www.litech.org/radvd/

一般來說 IPv6 Client決定Global IPv6的方式有兩種,分別是Stateless與Stateful,預設radvd是採用stateless IPv6,不過透過更改某個參數(M flag),就可以轉換成stateful,但是此時網路上必須有對應的DHCPv6 server來負責管理與分配IPv6 address。

網路上可以找到很多先進寫的資料關於Stateless與Stateful的差異,我也就不班門弄斧了,廢話不多說,直接進入主題,如何架設radvd在Canonical/Ubuntu 18.04 LTS

Steps:

Step1. Install radvd package.
$ sudo apt-get install radvd
Step2. Copy example file of radvid.conf from /usr/share/doc/radvd/examples/ to /etc.
$ sudo cp /usr/share/doc/radvd/examples/radvd.conf.example /etc/radvd.conf
Step3. Open/Edit radvd.conf
根據你的需求,去配置相關的參數,最重要的應該是prefix,更多詳細的參數可以參考man page。
https://www.systutorials.com/docs/linux/man/5-radvd.conf/
Step4. Restart radvd
$ sudo systemctl restart radvd; sudo systemctl enable radvd

以上一個簡單的IPv6 stateless的Router已經架設完成,IPv6 client現在自己可以搭配prefix自動產生host ID。


Wednesday, August 15, 2018

How can I configure Ubuntu 16 to start teamviewer automatically?

Steps:

1. Opened /etc/init.d/rc.local

$ sudo vi /etc/init.d/rc.local


2. Added teamviewer's command and parameter below in file rc.local:
teamviewer passwd ubuntu
3. Restart system

4. Examine if teamviewer daemon can work as expected:

$ systemctl status teamviewerd
● teamviewerd.service - TeamViewer remote control daemon
   Loaded: loaded (/etc/systemd/system/teamviewerd.service; enabled; vendor preset: enabled)
   Active: active (running) since 三 2018-08-15 11:00:14 CST; 1min 25s ago
  Process: 1555 ExecStart=/opt/teamviewer/tv_bin/teamviewerd -d (code=exited, status=0/SUCCESS)
 Main PID: 1567 (teamviewerd)
   CGroup: /system.slice/teamviewerd.service
           └─1567 /opt/teamviewer/tv_bin/teamviewerd -d

$ ps aux | grep -i teamviewer
root      1567  0.3  0.3 1181612 12212 ?       Sl   11:00   0:00 /opt/teamviewer/tv_bin/teamviewerd -d
u         1890  0.3  2.2 1990224 88556 ?       Sl   11:00   0:00 /opt/teamviewer/tv_bin/TeamViewer

Afterwards, you can remote control host via Partner ID and password which is ubuntu in this example.


Friday, May 04, 2018

How can I create a multiboot USB stick from Linux?

You can refer to https://www.pendrivelinux.com/multiboot-create-a-multiboot-usb-from-linux/

It works for me!


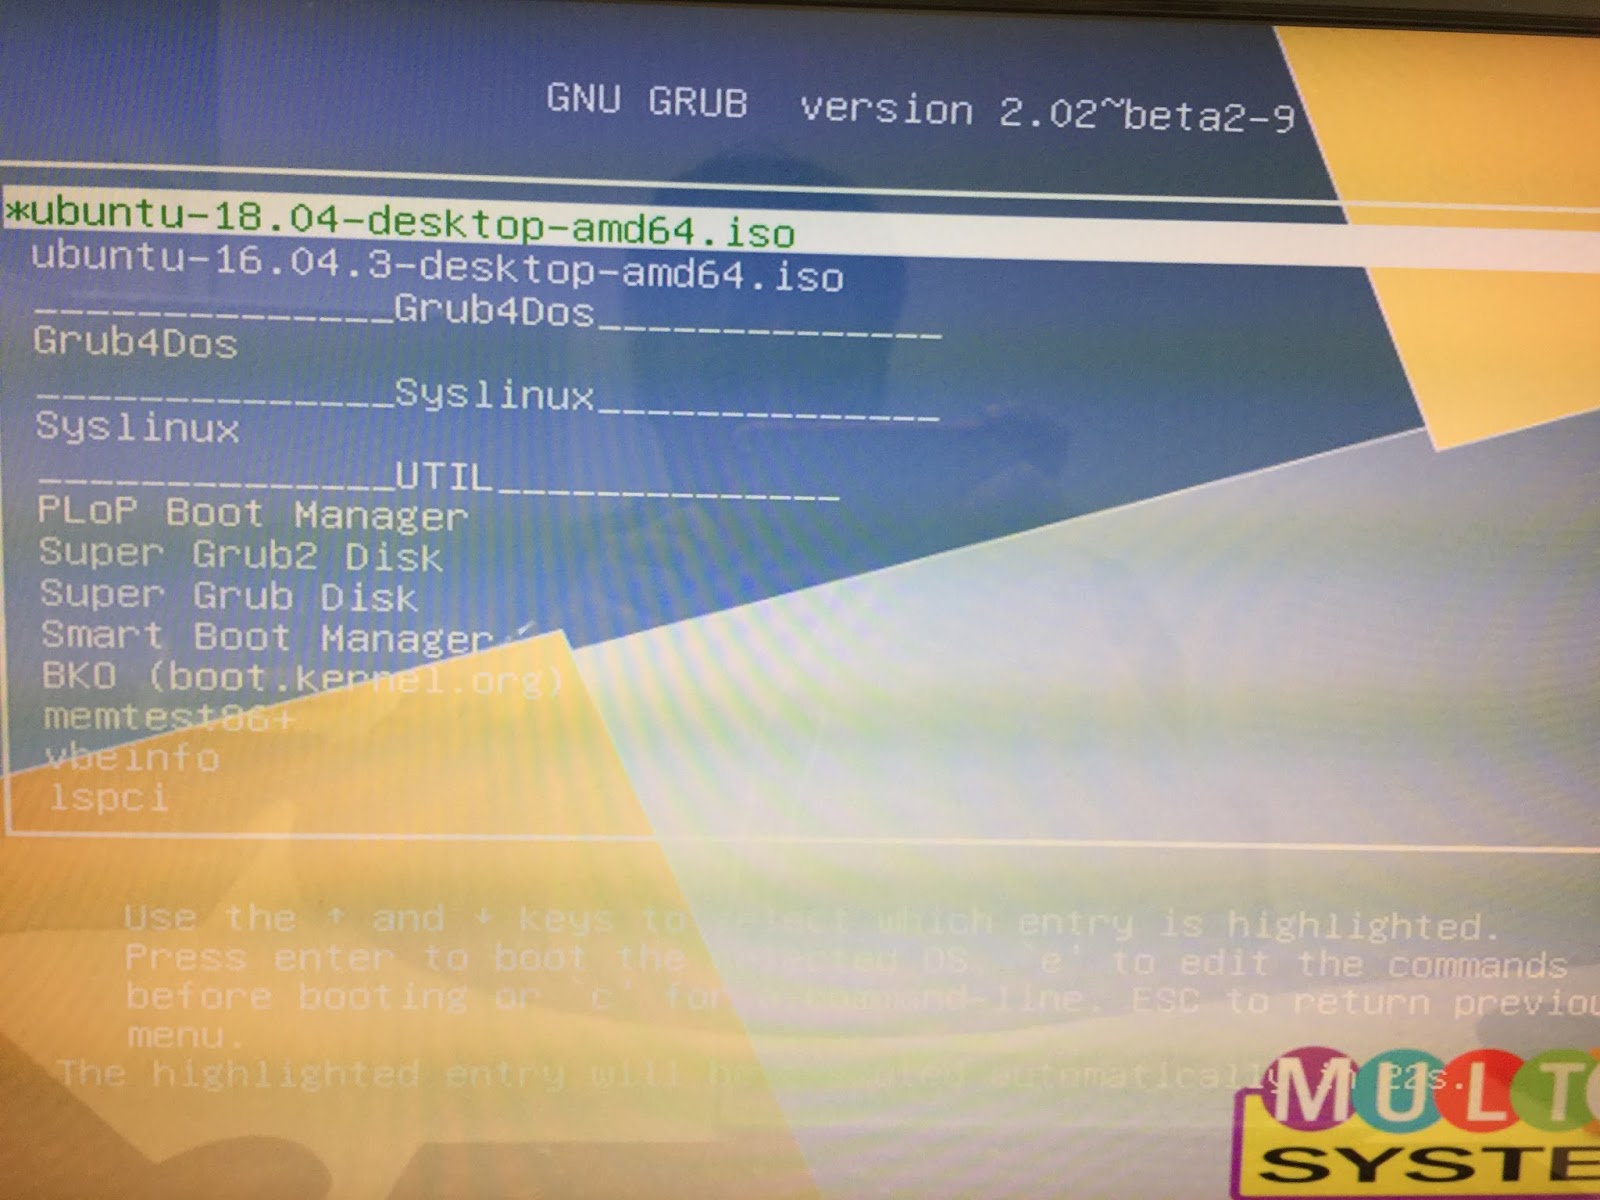
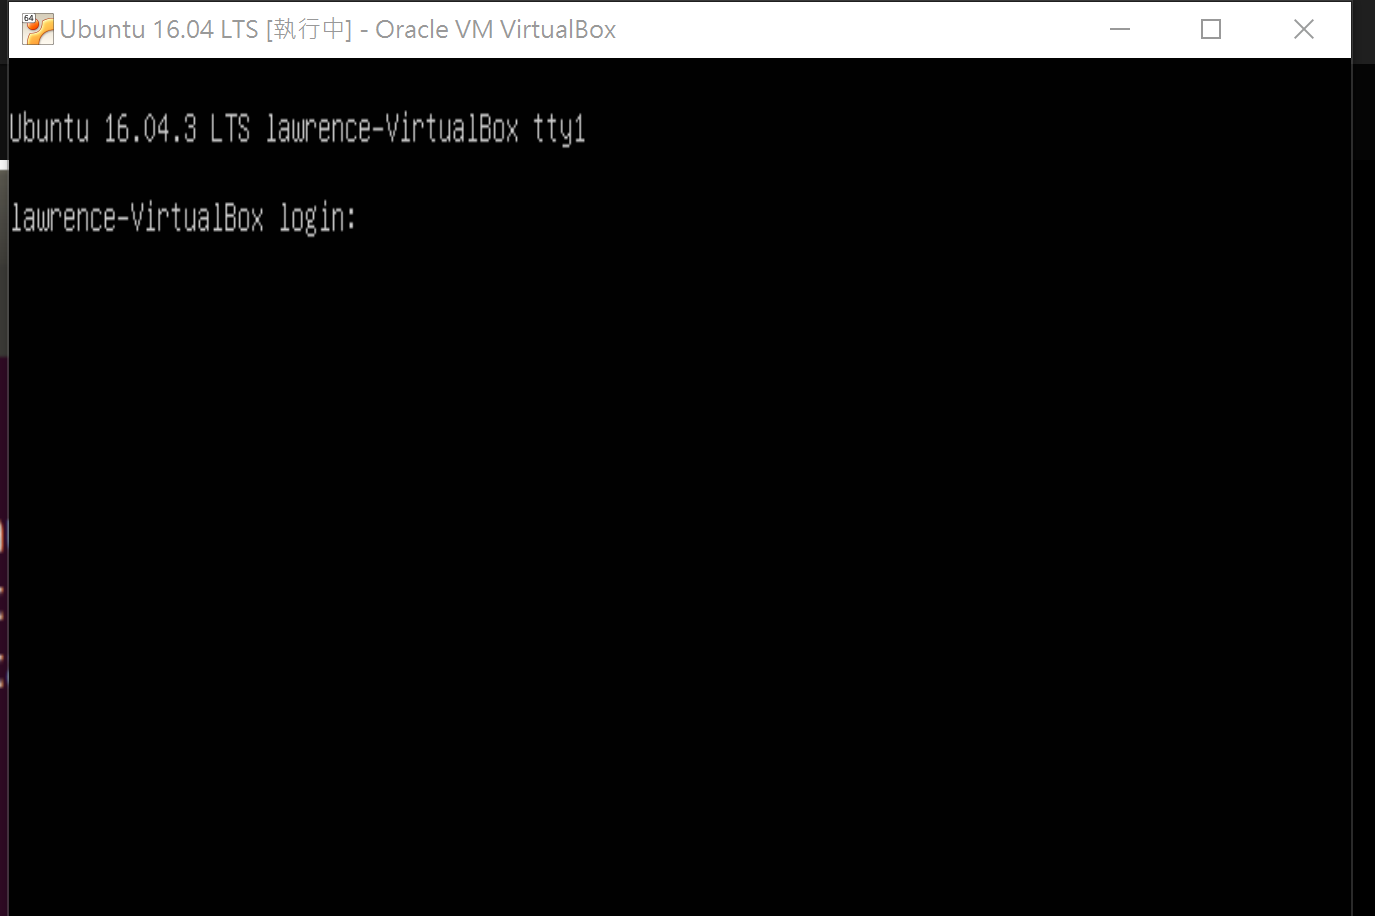
Above you can see that I am able to boot Ubuntu 16.03 as well as 18.04 with one USB stick w/o problem.

But somehow you've to disable security boot in BIOS.

Enjoy~

How can I setup a proxy server in Ubuntu 16.04?

Step1. Install package squid
# sudo apt-get install -y squid

Step2. To setup common proxy settings:
# sudo vi /etc/squid/squid.conf

To add some lines below:
# line 977
acl lan src 192.168.1.0/24
(where 192.168.1.0 means network you would like to allow client to access your proxy server)

# line 1189
http_access allow lan
(Allow lan here)

# line 1602
http_port 3128
(To modify default proxy port if needed)

Step3. Restart squid
# sudo systemctl restart squid

Step4. Examine squid service
# sudo systemctl status squid
● squid.service - LSB: Squid HTTP Proxy version 3.x
Loaded: loaded (/etc/init.d/squid; bad; vendor preset: enabled)
Active: active (running) since 四 2018-04-26 15:24:04 CST; 1min 56s ago
Docs: man:systemd-sysv-generator(8)
Process: 3088 ExecStop=/etc/init.d/squid stop (code=exited, status=0/SUCCESS)
Process: 3119 ExecStart=/etc/init.d/squid start (code=exited, status=0/SUCCESS)
CGroup: /system.slice/squid.service
├─3159 /usr/sbin/squid -YC -f /etc/squid/squid.conf
├─3161 (squid-1) -YC -f /etc/squid/squid.conf
├─3162 (logfile-daemon) /var/log/squid/access.log
└─3163 (pinger)

四 26 15:24:04 uc16-VirtualBox systemd[1]: Starting LSB: Squid HTTP Proxy version 3.x...
四 26 15:24:04 uc16-VirtualBox squid[3119]: * Starting Squid HTTP Proxy squid
四 26 15:24:04 uc16-VirtualBox squid[3159]: Squid Parent: will start 1 kids
四 26 15:24:04 uc16-VirtualBox squid[3119]: ...done.
四 26 15:24:04 uc16-VirtualBox systemd[1]: Started LSB: Squid HTTP Proxy version 3.x.
四 26 15:24:04 uc16-VirtualBox squid[3159]: Squid Parent: (squid-1) process 3161 started

# netstat -tupln | grep 3128
tcp6 0 0 :::3128 :::* LISTEN 3161/(squid-1)

Done ~

In proxy client side:
You can use tcpdump or wireshark to ensure that http request will go to proxy server after you configured http proxy server within browser.

root@server1:~$ sudo tcpdump -n -v -i any port 3128
tcpdump: listening on any, link-type LINUX_SLL (Linux cooked), capture size 262144 bytes
15:29:06.382845 IP (tos 0x0, ttl 64, id 2257, offset 0, flags [DF], proto TCP (6), length 145)
192.168.1.211.40994 > 192.168.1.254.3128: Flags [P.], cksum 0x85a5 (incorrect -> 0x9ba8), seq 670754847:670754940, ack 314235908, win 237, options [nop,nop,TS val 1731217504 ecr 1884649606], length 93
15:29:06.383195 IP (tos 0x0, ttl 64, id 35299, offset 0, flags [DF], proto TCP (6), length 212)
192.168.1.254.3128 > 192.168.1.211.40998: Flags [P.], cksum 0xbf6c (correct), seq 2355697405:2355697565, ack 1986317666, win 486, options [nop,nop,TS val 1884649610 ecr 1731217476], length 160
15:29:06.383264 IP (tos 0x0, ttl 64, id 17423, offset 0, flags [DF], proto TCP (6), length 52)
192.168.1.254.3128 > 192.168.1.211.40994: Flags [.], cksum 0xaba6 (correct), ack 93, win 503, options [nop,nop,TS val 1884649610 ecr 1731217501], length 0
15:29:06.383359 IP (tos 0x0, ttl 64, id 2258, offset 0, flags [DF], proto TCP (6), length 1353)
192.168.1.211.40994 > 192.168.1.254.3128: Flags [P.], cksum 0x8a5d (incorrect -> 0x8fe0), seq 93:1394, ack 1, win 237, options [nop,nop,TS val 1731217505 ecr 1884649610], length 1301
15:29:06.384198 IP (tos 0x0, ttl 64, id 9911, offset 0, flags [DF], proto TCP (6), length 268)

Wednesday, April 11, 2018

How can I setup a Linux NAT Router in Ubuntu?

Steps:

1. Enable packet forwarding for IPv4 between NICs:

  • Open and edit /etc/sysctl.conf
  • Ucomment net.ipv4.ip_forward=1
  • To execute command sysctl -p
2. Create a postrouting rule within iptables:

  • iptables -t nat -A POSTROUTING -o enp0s8 -s 192.168.1.0/24 -j MASQUERADE
  • Where enp0s8 is WAN and 192.168.1.0/24 is LAN, please modify those parameters depend on your environment.
3. Save and restore iptables rule after reboot:

  • Save rules: iptables-save > /etc/iptables.save
  • Restore rules:
  • Open and edit /etc/network/interfaces to add pre-up.....

# interfaces(5) file used by ifup(8) and ifdown(8)
auto lo
iface lo inet loopback
auto enp0s3
iface enp0s3 inet static
address 192.168.1.254
netmask 255.255.255.0
pre-up iptables-restore < /etc/iptables.save

    Done~

    Tuesday, February 27, 2018

    如何在Ubuntu 16.04 desktop 透過PXE安裝Ubuntu?

    在開始之前,請先準備與安裝相關的service在Ubuntu desktop 16.04 LTS:

    準備:
    1. Download Ubuntu desktop ISO
    2. Download PXE bootloader

    安裝:
    1. DHCP Server
    $ sudo apt-get install isc-dhcp-server
    2. TFTP Server
    $ sudo apt-get install tftpd-hpa inetutils-inetd
    3. NFS Server
    $ sudo apt-get install nfs-kernel-server
    配置:
    1. DHCP Server:
    $ sudo vi /etc/dhcp/dhcpd.conf
     subnet 192.168.1.0 netmask 255.255.255.0 {
     range 192.168.1.200 192.168.1.253;
     option domain-name-servers 8.8.8.8;
     option routers 192.168.1.1;
     option broadcast-address 192.168.1.255;
     default-lease-time 600;
     max-lease-time 7200;
     next-server 192.168.1.254;
     filename "pxelinux.0";

     }
     $ sudo systemctl restart isc-dhcp-server
     2. TFTP Server:
    $ sudo vi /etc/default/tftpd-hpa
    TFTP_USERNAME="tftp"
    TFTP_DIRECTORY="/var/lib/tftpboot"TFTP_ADDRESS=":69"
    TFTP_OPTIONS="--secure"
    RUN_DAEMON="yes"
    OPTIONS="-l -s /var/lib/tftpboot"
    $ sudo vi /etc/xinetd.conf
    tftp    dgram   udp    wait    root    /usr/sbin/in.tftpd /usr/sbin/in.tftpd -s /var/lib/tftpboot
    $ sudo systemctl restart tftpd-hpa 
    3. PXE bootloader:
    $ tar -xJf syslinux-6.03.tar.xz
    $ cd syslinux-6.03
    $ sudo cp bios/core/pxelinux.0 /var/lib/tftpboot
    $ sudo cp bios/com32/lib/libcom32.c32 /var/lib/tftpboot
    $ sudo cp bios/com32/libutil/libutil.c32 /var/lib/tftpboot
    $ sudo cp bios/com32/elflink/ldlinux/ldlinux.c32 /var/lib/tftpboot
    $ sudo cp bios/com32/menu/vesamenu.c32 /var/lib/tftpboot
    $ mkdir /var/lib/tftpboot/pxelinux.cfg
    $ sudo vi /var/lib/tftpboot/

    pxelinux.cfg/default 
    DEFAULT vesamenu.c32
    MENU TITLE Network boot
    LABEL ubuntu-mate-16.04.2-desktop-amd64
      MENU LABEL ubuntu-mate-16.04.2-desktop-amd64
      KERNEL vmlinuz.efi
      APPEND initrd=initrd.lz root=/dev/nfs boot=casper netboot=nfs nfsroot=192.168.1.254:/var/nfs/ubuntu_desktop splash -- 
    * Remember to copy vmlinuz.efi and initrd.lz to the folder /var/lib/tftpboot from Ubuntu ISO.
    * 補充: 針對18.04要修改一下設定檔如下:
      APPEND initrd=./u18/initrd_ubuntu18.04.lz root=/dev/nfs boot=casper netboot=nfs nfsroot=192.168.1.254:/var/nfs/ubuntu18.04 splash toram --


    4. NFS file Server:
    $ sudo mount -o loop ubuntu-16.04.3-desktop-amd64.iso /mnt/
    $ sudo mkdir -p /var/nfs/ubuntu_desktop
    $ sudo cp -rf /mnt/* /var/nfs/ubuntu_desktop/
    $ sudo vi /etc/exports

    /var/nfs/ubuntu_desktop *(ro,sync)
    $ sudo systemctl restart nfs-kernel-server
    $ showmount -e localhost 
    Export list for localhost:
    /var/nfs/ubuntu_desktop *

    Boot from Network boot:


    Done!

    Tuesday, February 13, 2018

    How can I move Launcher from left to the buttom on Ubuntu 16.04?

    It's very simple, and it works for me even if I reboot or re-login the system b/c Ubuntu will remember it.

    Steps:
    1. Open a terminal

    2. To execute "gsettings set com.canonical.Unity.Launcher launcher-position Bottom"

    Done~

    Sunday, February 04, 2018

    How can I get detail information of USB device?

    The command lsusb, which able to list all USB devices of machine below:
    lawrence@Lawrence-ThinkPad-X200:~$ lsusb
    Bus 002 Device 004: ID 7392:7711 Edimax Technology Co., Ltd EW-7711UTn nLite Wireless Adapter [Ralink RT2870]
    Bus 002 Device 001: ID 1d6b:0002 Linux Foundation 2.0 root hub
    Bus 008 Device 001: ID 1d6b:0001 Linux Foundation 1.1 root hub
    Bus 007 Device 001: ID 1d6b:0001 Linux Foundation 1.1 root hub
    Bus 006 Device 001: ID 1d6b:0001 Linux Foundation 1.1 root hub
    Bus 001 Device 003: ID 17ef:480c Lenovo Integrated Webcam
    Bus 001 Device 001: ID 1d6b:0002 Linux Foundation 2.0 root hub
    Bus 005 Device 001: ID 1d6b:0001 Linux Foundation 1.1 root hub
    Bus 004 Device 002: ID 08ff:2810 AuthenTec, Inc. AES2810
    Bus 004 Device 001: ID 1d6b:0001 Linux Foundation 1.1 root hub
    Bus 003 Device 001: ID 1d6b:0001 Linux Foundation 1.1 root hub


    However, I would like to know more informations. For example, speed, vendor, manufacturer......, etc. And there is a command usb-devices, which can help me.


    lawrence@Lawrence-ThinkPad-X200:~$ usb-devices 
    T:  Bus=02 Lev=01 Prnt=01 Port=00 Cnt=01 Dev#=  4 Spd=480 MxCh= 0
    D:  Ver= 2.00 Cls=00(>ifc ) Sub=00 Prot=00 MxPS=64 #Cfgs=  1
    P:  Vendor=7392 ProdID=7711 Rev=01.01
    S:  Manufacturer=RalinkS:  Product=802.11 n WLAN
    S:  SerialNumber=1.0
    C:  #Ifs= 1 Cfg#= 1 Atr=80 MxPwr=450mA
    I:  If#= 0 Alt= 0 #EPs= 7 Cls=ff(vend.) Sub=ff Prot=ff Driver=rt2800usb
    T:  Bus=04 Lev=00 Prnt=00 Port=00 Cnt=00 Dev#=  1 Spd=5000 MxCh= 2
    D:  Ver= 3.00 Cls=09(hub  ) Sub=00 Prot=03 MxPS= 9 #Cfgs=  1
    P:  Vendor=1d6b ProdID=0003 Rev=04.13
    S:  Manufacturer=Linux 4.13.0-32-generic xhci-hcd
    S:  Product=xHCI Host Controller
    S:  SerialNumber=0000:0d:00.0
    C:  #Ifs= 1 Cfg#= 1 Atr=e0 MxPwr=0mA
    I:  If#= 0 Alt= 0 #EPs= 1 Cls=09(hub  ) Sub=00 Prot=00 Driver=hub


    Above you can see the Spd=480/USB 2.0, and Spd=5000/USB 3.0.

    Sunday, January 28, 2018

    [Shell script] Find user in system


    The first way:

    #!/bin/bash

    if [ $# -eq 0 ]
    then
     echo "Usage: $0 lawrence"
    else
      grep "\<$1\>" /etc/passwd > /dev/null
      RETVAL=$?
      if [ $RETVAL -eq 0 ]
      then
       echo "Username $1 was found in the system"
      else
       echo "Cannot find username $1"
     fi
    fi

    The second way:

    [ $# -eq 0 ] &&  { echo "Usage: $0 lawrence" ; exit 1; }

    grep "\<$1\>" /etc/passwd > /dev/null
    RETVAL=$?

    [ $RETVAL -eq 0 ] && echo "Username $1 was found in the system" || echo "Cannot find username $1"

    Thursday, January 04, 2018

    How can I add EPEL reop on CentOS 7.x?

    It's quite simple, just two commands below:

    # yum install epel-release

    # yum repolist

    Sample output:

    Friday, September 29, 2017

    How can I disable dnsmasq listen port 53 on the Ubuntu 16.04 LTS?

    By default the DNS Server of Ubuntu 16.04 LTS will be 127.0.0.1:53, i.e., localhost.


    Therefore, system will forward DNS query to the localhost first, and forward to the DNS server which obtained from the DHCP server afterward.

    Actually, I didn't prefer this method, so that I would like to turn off  this mechanism via steps were listed below:

    Steps:
    1. Open /etc/NetworkManager/NetworkManager.conf

    2. To disable dnsmasq


    3. Restart NetworkManager


    4. Examine /etc/resolv.conf


    Done.

    Friday, September 22, 2017

    How can I switch multi-user or graphical mode via one command? (Systemd)

    To switch multi-user to graphical mode (runlevel 3 to runlevel 5)

    # systemctl set-default graphical && reboot


    To switch graphical to multi-user mode (runlevel 5 to runlevel 3)

    # systemctl set-default multi-user && reboot


    Monday, September 18, 2017

    How to know the system and service manage daemon of your Linux? (SysVinit or Systemd)

    It's simple, just check your pid 1. (ps --pid 1)

    SysVinit:


    Systemd:


    Thursday, September 14, 2017

    How can I backup and restore MBR via dd command?

    Check device name of HD:
    # lsblk


    Backup MBR:
    # dd if=/dev/sda of=file bs=1 count=512


    Note:
    1. The size of MBR is 512 bytes and located in the first sector.
    2. Of cause you need to save MBR backup file somewhere else.

    Restore MBR:
    # dd if=file of=/dev/sda bs=1 count=512


    Monday, September 11, 2017

    Snap commands

    Here I want to list some of snap commands that I often use.

    Also here is a website to understand all of snap commands:
    https://snapcraft.io/docs/reference/snap-command


    Log on to a snap store:
    lawchiu@localhost:~$ sudo snap login xxx.xxx@gmail.comPassword of "xxx.xxx@gmail.com":
    Login successful

    Log out snap store:
    lawchiu@localhost:~$ snap logout

    Update snap:
    lawchiu@localhost:~$ snap refresh
    All snaps up to date
    List installed snap:
    lawchiu@localhost:~$ snap list
    Name             Version       Rev   Developer            Notes
    checkbox-snappy  2.2           859   ce-certification-qa  devmode
    core             16-2.27.5     2774  canonical            core
    hello            2.10          20    canonical            -
    pc               16.04-0.8     9     canonical            gadget
    pc-kernel        4.4.0-83.106  68    canonical            kernel
    lawchiu@localhost:~$

    Remove snap:
    lawchiu@localhost:~$ snap remove hello
    hello removed

    Find packages:
    lawchiu@localhost:~$ snap find 


    Thursday, September 07, 2017

    Install and use glances on Ubuntu

    Glances is a great tools which able to monitor CPU, Memory, Disk, Network statistics... etc.

    Please refer to glances website for details.

    Steps:
    1. Install glances via apt:
    lawrencechiu@lawrencechiu-HP-Compaq-6005-Pro-SFF-PC:~$ sudo apt-get install glances


    2. Executed glances:
    lawrencechiu@lawrencechiu-HP-Compaq-6005-Pro-SFF-PC:~$ sudo glances

    3. Then you can see CPU usage, Memory status, SWAP, Network statistics, Disk IO, Disk usage, and PID info in one screen below:


    Green means OK
    Blue means CAREFUL
    Purple means WARNING
    Red means: CRITICAL

    Hotkey:
     a  Sort processes automatically          b  Bytes or bits for network I/O
     c  Sort processes by CPU%                l  Show/hide alert logs
     m  Sort processes by MEM%            w  Delete warning alerts
     p  Sort processes by name                  x  Delete warning and critical alerts
     i  Sort processes by I/O rate               1  Global CPU or per-CPU stats
     t  Sort processes by CPU times          h  Show/hide this help screen
     d  Show/hide disk I/O stats                T  View network I/O as combination
     f  Show/hide filesystem stats             u  View cumulative network I/O
     n  Show/hide network stats                F  Show filesystem free space
     s  Show/hide sensors stats                  g  Generate graphs for current history
     2  Show/hide left sidebar                    r  Reset history
     z  Enable/disable processes stats        q  Quit (Esc and Ctrl-C also work)
     e  Enable/disable top extended stats
     /  Enable/disable short processes name
     D  Enable/disable Docker stats

    Enjoy~


    Thursday, August 31, 2017

    How can I remote ssh login to the Ubuntu 16.04 LTS via root?

    By default you are unable to ssh login to the Ubuntu 16.04 LTS via root, but you can enable it step by step as following:

    1. Login to the system via regular user account.

    2. Set password to root account (Due to root password is empty by default)
    sudo passwd root
    3. To modify the configuration file of sshd_config (Marked PermitRootLogin prohibit-password, and added PermitRootLogin yes )
    sudo vi /etc/ssh/sshd_config
    # Authentication:
    LoginGraceTime 120
    #PermitRootLogin prohibit-password 
    PermitRootLogin yes 
    StrictModes yes
    4. Restart sshd
     sudo systemctl restart ssh

    Done.

    Tuesday, August 29, 2017

    Unable to logon to the Ubuntu Core with 2nd SSH public key?

    After I added a new SSH public key into my Ubuntu One. However, I am unable to logon to the Ubuntu Core system with this new key, therefore I logon to the Ubuntu Core by original public key.

    Afterward, I noticed that my system didn't sync up a new public key from Ubuntu One automatically.

    Until now I have no idea if this is a defect or limitation, please advice, if any.

    Workaround:
    Added 2nd public key via manually into the ~/.ssh/authorized_keys


    Wednesday, August 16, 2017

    How to deploy Ubuntu Core from KVM to VirtualBox?

    Steps:
    1. Download Ubuntu Core of KVM image from URL below:
    https://developer.ubuntu.com/core/get-started/kvm

    2. To decompress xz.

    3. To convert the format of img to the vdi via VBoxManage command below:

    VBoxManage.exe convertdd ubuntu-core-16-amd64.img ubuntu-core-16-amd64.vdi
    4. Import vdi file above to the VirtualBox without issue.


    Wednesday, June 14, 2017

    Python的額外錯誤處理

    Example:
    try:
        data=open('open_file.txt')
        for each_line in data:
            try:
                (var1,var2)=each_line.split(":",1)
                print(var1)
                print(var2)
            except:
                print(each_line)
        data.close()
    except:

        print('File is not existing'

    透過Python的try & except,程式碼果真變得很簡潔~

    Monday, May 22, 2017

    如何將Python程式模組化?

    今天學習了如何將Python function模組化.
    實際的步驟:
    1. 撰寫python, 存檔為*.py
    2. 撰寫setup.py for metadata (*.py跟setup.py需在同一個目錄下)
    3. 執行python setup.py sdist 以建構發行套件檔案4. 執行python setup.py install 來安裝發行套件到本地端

    開啟一個新檔案把module 用import的方式匯入, 透過引用正確的module名稱跟函式就可以執行了.

    Tuesday, April 25, 2017

    Cockpit

    I saw this tools recently, and I am definitely to try it. :)

    Cockpit


    Thursday, April 06, 2017

    Root file system is mounted as read only ?

    I encountered this symptom and found out similar issue and solution is listed as below:

    http://www.unix.com/linux/168716-root-filesystem-goes-readonly.html

    Method:
    fsck -p /dev/sdX

    Thursday, August 27, 2015

    TIPS for Expect Script

    在此筆記一些Expect Script的使用技巧。

    1. 記錄Expect Script執行的過程:
     log_file -noappend ./$0.log
    .......
    .......
    .......
    log_file
    2. 與遠端主機斷線:
    expect eof
    3.  For loop於Expect Script的用法:
    expect -c "
    for {set i 1} {\$i <= 10} {incr i 1} {

    }
    "
    4. If於Expect Script的用法:
    expect -c "
      if { \$i == 1 } {

     }
    5. 於Expect Script跳脫"符號的方法:
    expect -c
    send \"test \\\"test\\ test\\ test\\\"\r\"
    "

    Tuesday, August 25, 2015

    如何讓rsyslog 也支援TCP?

    預設rsyslog只支援UDP with port 514,如果要支援TCP,可以載入TCP的模組即可使用。

    $ModLoad imudp.so
    $UDPServerRun 514

    $ModLoad imtcp.so
    $InputTCPServerRun 514

    記得修改完畢後restart rsyslog。

    Monday, February 09, 2015

    Use Linux be an IPv6 Router

    簡單筆記一下如何使用Linux當IPv6的Router,以利將來備查。順便此次的實作是使用CentOS7.0,所以啟動daemon的方式跟以往SysV的方式不太一樣。

    Step1. Enable IPv6 forwarding for Kernel via /etc/sysctl.conf:
    net.ipv6.conf.all.forwarding = 1
    net.ipv6.conf.default.forwarding = 1
    net.ipv6.conf.br0.forwarding = 1
    net.ipv6.conf.br1.forwarding = 1
    net.ipv6.conf.br2.forwarding = 1

    Step2. Use radvd be a DHCPv6 Server:
    Step2.1 Open then edit /etc/radvd.conf:interface br0
    {
    AdvSendAdvert on;
    MinRtrAdvInterval 30;
    MaxRtrAdvInterval 100;
    prefix 3001:688::/64
    {
    AdvOnLink on;
    AdvAutonomous on;
    AdvRouterAddr on;
    };
    };
    interface br1
    {
    AdvSendAdvert on;
    MinRtrAdvInterval 30;
    MaxRtrAdvInterval 100;
    prefix 3001:588::/64
    {
    AdvOnLink on;
    AdvAutonomous on;
    AdvRouterAddr on;
    };
    };
    interface br2
    {
    AdvSendAdvert on;
    MinRtrAdvInterval 30;
    MaxRtrAdvInterval 100;
    prefix 3001:288::/64
    {
    AdvOnLink on;
    AdvAutonomous on;
    AdvRouterAddr on;
    };
    };

    Step2.2: Launch radvd immediately as well as start running it when system boots up:[root@rhel7 network-scripts]# systemctl start radvd
    [root@rhel7 network-scripts]# systemctl enable radvd
    [root@rhel7 network-scripts]# systemctl status radvd
    radvd.service - Router advertisement daemon for IPv6
       Loaded: loaded (/usr/lib/systemd/system/radvd.service; enabled)
       Active: active (running) since 五 2015-02-06 16:22:51 CST; 1h 41min ago
     Main PID: 9884 (radvd)
       CGroup: /system.slice/radvd.service
               ├─9882 /usr/sbin/radvd -u radvd
               └─9884 /usr/sbin/radvd -u radvd
     2月 06 16:49:43 rhel7 radvd[9884]: resuming normal operation
     2月 06 16:49:44 rhel7 radvd[9884]: attempting to reread config file
     2月 06 16:49:44 rhel7 radvd[9884]: resuming normal operation
     2月 06 16:49:51 rhel7 radvd[9884]: attempting to reread config file
     2月 06 16:49:51 rhel7 radvd[9884]: resuming normal operation
     2月 06 16:49:53 rhel7 radvd[9884]: attempting to reread config file
     2月 06 16:49:53 rhel7 radvd[9884]: resuming normal operation
     2月 06 16:49:53 rhel7 radvd[9884]: attempting to reread config file
     2月 06 16:49:53 rhel7 radvd[9884]: resuming normal operation
     2月 06 18:03:32 rhel7 systemd[1]: Started Router advertisement daemon for IPv6.
    Verify:
    HostA(300:288::253):

    eth1      Link encap:Ethernet  HWaddr 08:00:27:45:E9:40
              inet addr:10.10.2.253  Bcast:10.10.2.255  Mask:255.255.255.0
              inet6 addr: 3001:288::253/64 Scope:Global
              inet6 addr: fe80::a00:27ff:fe45:e940/64 Scope:Link
              UP BROADCAST RUNNING MULTICAST  MTU:1500  Metric:1
              RX packets:6439011 errors:0 dropped:0 overruns:0 frame:0
              TX packets:6261045 errors:0 dropped:0 overruns:0 carrier:0
              collisions:0 txqueuelen:1000
              RX bytes:2632403693 (2.4 GiB)  TX bytes:244180721 (232.8 MiB)
    [root@server1 ~]# ip -6 route show
    3001:588::/64 via 3001:288::1 dev eth1  metric 1024  expires 4293343sec mtu 1500 advmss 1440 hoplimit 4294967295
    3001:688::/64 via 3001:288::1 dev eth1  metric 1024  expires 4293666sec mtu 1500 advmss 1440 hoplimit 4294967295

    [root@server1 ~]# ping6 3001:588::100 -c 3
    PING 3001:588::100(3001:588::100) 56 data bytes
    64 bytes from 3001:588::100: icmp_seq=0 ttl=63 time=31.9 ms
    64 bytes from 3001:588::100: icmp_seq=1 ttl=63 time=24.3 ms
    64 bytes from 3001:588::100: icmp_seq=2 ttl=63 time=5.61 ms
    --- 3001:588::100 ping statistics ---
    3 packets transmitted, 3 received, 0% packet loss, time 2015ms
    rtt min/avg/max/mdev = 5.615/20.607/31.904/11.046 ms, pipe 2

    HostB(3001:588::100):

    Wireless LAN adapter Wireless Network Connection:
       Connection-specific DNS Suffix  . : example.com   IPv6 Address. . . . . . . . . . . : 3001:588::100
       IPv6 Address. . . . . . . . . . . : 3001:588::2677:3ff:fe77:f29c
       Link-local IPv6 Address . . . . . : fe80::2677:3ff:fe77:f29c%31
       IPv4 Address. . . . . . . . . . . : 10.10.5.188
       Subnet Mask . . . . . . . . . . . : 255.255.255.0
       Default Gateway . . . . . . . . . : fe80::6a05:caff:fe22:2b8b%31
                                           3001:588::1
                                           10.10.5.254

    D:\Tools\wbox-3>ping -6 3001:288::253
    Pinging 3001:288::253 with 32 bytes of data:
    Reply from 3001:288::253: time=29ms
    Reply from 3001:288::253: time=64ms
    Reply from 3001:288::253: time=158ms
    Reply from 3001:288::253: time=24ms
    Ping statistics for 3001:288::253:
        Packets: Sent = 4, Received = 4, Lost = 0 (0% loss),
    Approximate round trip times in milli-seconds:
        Minimum = 24ms, Maximum = 158ms, Average = 68ms

    Friday, August 22, 2014

    如何避免remote syslog寫入到本機的/var/log/messages?

    如題,假設今天log receive server將收集幾十台甚至幾百台裝置的log,預設上rsyslog會將這些裝置的log也同時寫入到本機的/var/log/messages。這是個非常令人感到困擾的一件事,因為本機的log將會被洗版.... 還好這是有方法可以解決的,以下用rsyslog舉個例子:

    :fromhost-ip,isequal,"192.168.1.1"                        /var/log/remote.log
    :fromhost-ip,isequal,"192.168.1.2"                        /var/log/remote.log
    :fromhost-ip,isequal,"192.168.1.3"                        /var/log/remote.log
    ........
    *.info;mail.none;authpriv.none;cron.none               /var/log/messages


    192.168.1.1~3的log會寫入到/var/log/remote.log,但同時也會寫入
    到/var/log/messages!


    解決方法:

    :fromhost-ip,isequal,"192.168.1.1"                        /var/log/remote.log
               & ~
    :fromhost-ip,isequal,"192.168.1.2"                        /var/log/remote.log
               & ~
    :fromhost-ip,isequal,"192.168.1.3"                        /var/log/remote.log
              & ~
    ........
    *.info;mail.none;authpriv.none;cron.none               /var/log/messages

    "& ~"能通知rsyslog,當把remote device log寫入到/var/log/remote.log後,就停止接下來的動作,那麼當然remote device log就不會寫入到/var/log/messages囉!

    Wednesday, July 30, 2014

    My PS1 in ~/.bashrc

    export PS1="\[\e[00;30m\]\u@\h:\w\\$ \[\e[0m\]"

    user@hostname:directory $or#

    ->

    root@rhel7:/lib/systemd/system# 

    [lawrence@rhel7 tmp]$ 


    Friday, July 25, 2014

    How to enable vncserver on CentOS7/RHEL7

    CentOS7/RHEL7 改用了systemd取代了SysVinit,因此我必須把這幾年已經還給天地的Linux重新拿出來研究一番,否則真的跟不上時代了!那就先從學習systemd開始吧!


    Case: How can I enable vncserver at boot?

    Steps:
    1. Install vnc:
    #yum install tigervnc*

    2. 建立vnc user:
    以某個user來執行vncserver之後,在user家目錄中有這個/.vnc/xstartup檔案就可以了,當然passwd也是會一起產生的。
    以上與CentOS6/RHEL6無異。


    3. 修改vnc config:
    開啟/lib/systemd/system/vncserver@.service
    修改[service]這個field如下:
    [Service]
    Type=forking
    # Clean any existing files in /tmp/.X11-unix environment
    ExecStartPre=/bin/sh -c '/usr/bin/vncserver -kill > /dev/null 2>&1 || :'
    ExecStart=/sbin/runuser -l root -c "/usr/bin/vncserver"
    ExecStop=/bin/sh -c '/usr/bin/vncserver -kill > /dev/null 2>&1 || :'
    用root啟動vncserver不是一個好習慣.....


    4. daemon-reload:
    修改unit(service)的configuration後,必需讓systemd知道,所以我要執行 systemctl daemon-reload昭告天下。

    5. 手動啟動vncserver:
    systemctl start vncserver@multi-user
    6. 開機啟動vncserver:
    systemctl enable vncserver@multi-user

    Monday, January 06, 2014

    解決facility與severity在LogAnalyzer是空白的問題

    最近實作中也碰到了這個問題,解決的方法如下:
    http://wiki.rsyslog.com/index.php/Fix_blank_Facility_and_Severity_columns_in_loganalyzer

    補充:
    如何改變syslog到Rsyslog format23? 原文並沒有提到唷!這邊幫忙補充一下。

    只需要一個步驟,那就是修改LogAnalyzer的config.php,把LogLineType從syslog改成syslog23如下:
    $CFG['Sources']['Source2']['LogLineType'] = 'syslog23';

    Wednesday, December 18, 2013

    How to turn on wireless monitor mode to sniffer 802.11 wireless frame on OSX 10.9?

    Install:
    Step1. Install XQartz(X11) for OSX 10.6 or later (http://xquartz.macosforge.org/landing/)
    Step2. Logout and login OSX by Admin account.
    Step3. Install Wireshark for OSX 10.6 and later Intel 64 bit (http://www.wireshark.org/download.html)
    Step4. Launch Wireshark and chose XQartz as X11 environment.
    Step5. Turn on monitor mode -> http://ask.wireshark.org/questions/26270/how-to-turn-on-monitor-mode-on-mac-osx-1075

    Specify channel for 2.4G or 5G radio:
    Step1. sudo ln -s /System/Library/PrivateFrameworks/Apple80211.framework/Versions/Current/Resources/airport /usr/sbin/airport
    Step2. sudo airport -z #disassociates you card from the current network
    Step3. sudo airport --channel= ["channel you want to switch to"] #sets the channel the card monitors on

    Tuesday, December 03, 2013

    為何tail -f | grep "" >> 檔案 然後發現資料不完全? missing line?

    昨天被同事問到這個問題,由於小弟智力有限一時間竟無法理解,然而今天找到答案了,原來是libc對於這種 pipe的結構不會自動去清除buffer,所以一旦buffer滿了(4KB by default)那接下來的資料就無法繼續傳給pipe之後來處理,所以就會missing line囉,解決的方法就是手動自行清除buffer如下以避免爆炸。

    tail -f | grep "pattern" --line-buffered >> /tmp/log &

    Monday, October 28, 2013

    How does snmptrap work on Linux?

    在此簡單記錄下如何設定CentOS接收snmp v2與v3的trap event.

    Steps:
    1. 安裝net-snmp。

    2. 確定snmptrapd已經安裝於系統。

    3. 匯入mibs files:
    先確定mibs的目錄:
    [root@localhost ~]# net-snmp-config --default-mibdirs
    /root/.snmp/mibs:/usr/share/snmp/mibs
    可以看到我的mibs可以放在/root/.snmp/mibs or /usr/share/snmp/mibs,在此我選擇放在/usr/share/snmp/mibs。

    4. 設定snmptrapd可以接收snmp v2與v3的trap event:
    開啟並編輯[root@localhost mibs]# vi /etc/snmp/snmptrapd.conf 如下:
    #SNMP v2 with community as public
    disableAuthorization no
    authCommunity log,execute,net public
    # SNMP v3 with user as admin and passphase as aaaaaaaa
    createUser admin MD5 aaaaaaaa DES aaaaaaaa
    authUser log,execute,net admin

    5. 不以daemon的方式啟動snmptrapd:
    [root@localhost mibs]# snmptrapd -m all -c /etc/snmp/snmptrapd.conf -Lo -f
    NET-SNMP version 5.3.2.2
    -m all -> 讀入所有的mibs files
    -c -> 預設的configuration file
    -Lo -> 輸出到基本output
    -f -> do not fork from the shell
    這邊你會看到snmp trap event會輸出至螢幕,方便debug用。

    6. 以daemon的方式啟動snmptrapd:
    [root@localhost mibs]# /etc/init.d/snmptrapd start
    正在啟動 snmptrapd:                                        [  確定  ]
    而這裡你將會看到snmp trap event會被寫入到/var/log/messages。


    Friday, August 02, 2013

    How to enable auth details in FreeRADIUS log?

    Here to describe how to enable detail auth information and authentication requests to the log file in FreeRADIUS.

    FreeRADIUS 1.x:
    Open and edit /etc/raddb/radiusd.conf to set:
    log_auth = yes
    auth_log
    detail auth_log {
                    detailfile = ${radacctdir}/%{Client-IP-Address}/auth-detail-%Y%m%d
                    #
                    #  This MUST be 0600, otherwise anyone can read
                    #  the users passwords!
                    detailperm = 0600
             }


    FreeRADIUS 2.x:
    Open and edit /etc/raddb/radiusd.conf to set:
    auth = yes
    Open and edit /etc/raddb/sites-available/default to set:
    auth_log


    Thursday, June 27, 2013

    How can I allow IP protocol 47 (gre) via iptables to connect a GRE GW?

    Topology:
    GRE GW1 ----- Switch -----(eth0)Linux NAT Router(eth1) ----- Switch ----- GRE GW2

    To configure IP protocol 47 to GRE GW on NAT Router below:
    # iptables -t nat -A PREROUTING -i eth0 -p gre -j DNAT --to-destination 10.10.2.186  
    Where 10.10.2.186 is GRE GW2's IP.


    To configure L2oGRE on Linux:
    # modprobe ip_gre
    # ip link add link gre0 name tunnel0 type gretap remote 192.168.0.1 local 10.10.2.186
    # ip link set tunnel0 up
    # brctl addbr br0
    # ip link set br0 up
    # ip link set eth2 up
    # brctl addif br0 tunnel0
    # brctl addif br0 eth2

    Monday, April 01, 2013

    Set http/https proxy server in Linux CLI

    HTTP:
    # export http_proxy="http://10.10.10.254:8080"

    HTTPs:
    # export https_proxy="https://10.10.10.254:8080"

    Where 10.10.10.254 is the IP of Proxy Server, and 8080 is port number.

    Remove:
    # unset http_proxy
    # unset https_proxy

    Afterward you can use curl to verify.

    Wednesday, March 13, 2013

    Howto TACACS+ on CentOS6.x

    Here to describe howto install/configure TACACS+ on CentOS6.x on step by step.

    Step1. Download rpm:
    wget ftp://ftp.muug.mb.ca/mirror/redhat/contrib/libc6/i386/tac_plus-4.0.3-2.i386.rpm

    Step2. Install:
    rpm -ivh tac_plus-4.0.3-2.i386.rpm

    Step3. Configure user in TACACS+:
    vi /etc/tacacs/tac_plus.cfg
    # Created by Devrim SERAL(devrim@tef.gazi.edu.tr)
    # It's very simple configuration file
    # Please read user_guide and tacacs+ FAQ to more information to do more
    # complex tacacs+ configuration files.
    #
    # Put your NAS key below
    key = "testing123"
    # Use /etc/passwd.loc file to do authentication
    # it's must be in passwd file format. So you must mix shadow-passwd files to do it
    #default authentication = file /etc/passwd.loc
    user = lawrence {        login = cleartext 123456}

    # Where is the accounting records to go
    accounting file = /var/log/tacacs.log
    # Permit all authorization request
    default authorization = permit
    # End config file

    # The user lawrence with password 123456 will be created.


    Step4. Start TACACS+ daemon:

    [root@server1 tmp]# /etc/init.d/tacacs start
    Starting tacacs+:
    [root@server1 tmp]# netstat -tupln | grep 49
    tcp        0      0 0.0.0.0:49                  0.0.0.0:*                   LISTEN      9027/tac_plus

    Done~

    Update1, small snapshot from user guide:


    At the service authorization level i.e. inside the braces of a
    service declaration, arguments in an authorization request are
    processed according to the algorithm described later. Some actions
    when authorizing services (e.g. when matching attributes are not
    found) depend on how the default is configured. The following
    declaration changes the default from deny to permit for this user and
    service.

    user = lol {
        service = exec {
            default attribute = permit
        }
    }

    Howto debug:

    DEBUGGING A RUNNING SERVER
    --------------------------

    There is a myriad of debugging values that can be used in conjunction
    with the -d flag to produce debugging output in /var/tmp/tac_plus.log.

    For example, starting the daemon with

            tac_plus -C CONFIG -d 16

    will put authentication debugging into /var/tmp/tac_plus.log. You can
    view this information by using the tail command.

            tail -f /var/tmp/tac_plus.log

    See the man page for more information.


    Thursday, February 07, 2013

    增加FreeRADIUS的listen port

    預設FreeRADIUS的listen port為1812(認證)與1813(計費),但是FreeRADIUS允許我們可以多bind幾個port來使用。

    測試版本: CentOS 5.8/FreeRADIUS 1.1.3-1.6.el5

    Steps:
    1. 確定目前只有1812/1813在使用,1814/1815無任何daemon使用,等會將設定1814為Auth而1815為ACCT。

    [root@server1 raddb]# netstat -tupln | grep 1812
    udp        0      0 0.0.0.0:1812                0.0.0.0:*                               7300/radiusd      
    [root@server1 raddb]# netstat -tupln | grep 1813
    udp        0      0 0.0.0.0:1813                0.0.0.0:*                               7300/radiusd      
    [root@server1 raddb]# netstat -tupln | grep 1814
    [root@server1 raddb]# netstat -tupln | grep 1815


    2. 開啟/etc/raddb/radiusd.conf,並新增listen ports 1814與1815。

    listen {
     ipaddr = *
     port=1814
     type=auth
    }
    listen {
     ipaddr = *
     port=1815
     type=acct
    }

    3. 重新啟動FreeRADIUS:

    [root@server1 raddb]# /etc/init.d/radiusd restart
    正在停止 RADIUS 伺服器:                                    [  確定  ]
    正在啟動 RADIUS 伺服器: Thu Feb  7 13:31:06 2013 : Info: Starting - reading configuration files ...
                                                               [  確定  ]

    4. 檢查1812, 1813, 1814, 1815為FreeRADIUS所使用。

    [root@server1 raddb]# netstat -tupln | grep 1812
    udp        0      0 0.0.0.0:1812                0.0.0.0:*                               7347/radiusd      
    [root@server1 raddb]# netstat -tupln | grep 1813
    udp        0      0 0.0.0.0:1813                0.0.0.0:*                               7347/radiusd      
    [root@server1 raddb]# netstat -tupln | grep 1814
    udp        0      0 0.0.0.0:1814                0.0.0.0:*                               7347/radiusd      
    [root@server1 raddb]# netstat -tupln | grep 1815
    udp        0      0 0.0.0.0:1815                0.0.0.0:*                               7347/radiusd   


    大功告成!

    Tuesday, February 05, 2013

    CentOS 5.9 has released!

    CentOS 5.9 釋出了,明天來update。
    http://www.tecmint.com/how-to-upgrade-from-centos-5-x-to-centos-5-9/

    Wednesday, December 19, 2012

    Linux有Terminator,OSX呢?

    Terminator在Linux上可說是神兵利器,絕對是工程師的最愛,那麼OSX呢? 唉,原生的終端機真的是跟不上時代...... 好在有iTerm2可以用,真是棒呀!現在我只能說13"的MBP螢幕有點小。:p

    Wednesday, December 12, 2012

    Disable IPv6 in Mac OSX 10.7

    如下圖在OSX10.7裡面的網路設定,針對IPv6並沒有關閉的選項,搜尋了一下可以用command暫時將它關閉起來。


    For Ethernet:
    networksetup -setv6off Ethernet

    For Wireless:
    networksetup -setv6off Wi-Fi


    Wednesday, November 07, 2012

    Bonjour browser on OSX


    You can use mDNS or Bonjour browser to query DNS-SD on OSX as following:
    • Browser service:
    mDNS -B                (Browse for services instances)
    MBP:~ lawrence$ mDNS -B _sftp-ssh._tcp.
    Browsing for _sftp-ssh._tcp.
    Talking to DNS SD Daemon at Mach port 5891
    Timestamp     A/R Flags Domain                   Service Type             Instance Name
    12:18:11.060  Add     0 local.                   _sftp-ssh._tcp.          MBP


    • Look up a service:
    mDNS -L           (Look up a service instance)
    MBP:~ lawrence$ mDNS -L "MBP" _sftp-ssh._tcp. .
    Lookup MBP._sftp-ssh._tcp.local
    Talking to DNS SD Daemon at Mach port 5891
    12:18:54.882  Service can be reached at   10.10.2.7      :22
    12:18:54.882  FE80:0000:0000:0000:3E07:54FF:FE35:5093%en0:22
    12:18:54.883  3001:0288:0000:0000:3E07:54FF:FE35:5093%en0:22


    • Bonjour browser:

    References:

    Thursday, October 18, 2012

    DHCP Server某網段的IP range被用完了該怎麼辦?

    做實驗時不小心把某個網段的IP scope用完了,距離release時間有一天,影響到新的client拿不到IP了,靈機一動就想把它手動砍掉吧!不過我要對付的是整個IP scope,嘿嘿~派出sed一行指令就結束了。

    Steps:
    1. dhcpd的lease table是放在/var/lib/dhcpd/dhcpd.leases

    2. 檢查一下格式:

    lease 10.10.6.125 {
      starts 2 2012/10/16 22:12:53;
      ends 3 2012/10/17 22:12:53;
      tstp 3 2012/10/17 22:12:53;
      binding state active;
      next binding state free;
      hardware ethernet b8:ac:6f:21:53:ec;
      uid "\001\270\254o!S\354";
      client-hostname "D129252S";
    }

    10.10.6這個range被fake DHCP client用完了,所以我要把它們手動通通砍掉。

    3. Sed:

    sed -i "/10.10.6/,/}/d" /var/lib/dhcpd/dhcpd.leases

    4. 重啟DHCP Server:
    # /etc/init.d/dhcpd restart

    參考: http://en.kioskea.net/faq/1451-sed-delete-one-or-more-lines-from-a-file

    Saturday, October 06, 2012

    Install Monitorix on CentOS

    Monitorix是一套free, open的套件能幫助系統管理者觀察主機的各種狀況,比如網路的流量,磁碟的使用率與服務的負載等等。安裝與配置的方法則是出乎意料的簡單。

    Step1. Installation:
    # yum install httpd rrdtool rrdtool-perl perl-libwww-perl perl-MailTools perl-MIME-Lite perl-CGI perl-DBI perl-XML-Simple

    # rpm -ivh http://www.monitorix.org/monitorix-n.n.n-1.noarch.rpm
    (where n.n.n is the latest version,2.6.0 for example)

    Step2. Configuration:
    Configure file is in /etc/monitorix.conf
    Apache configure file is in /etc/httpd/conf.d/monitorix.conf, and you need to configure it allow connect to Monitorix from any where.


    Step3. Restart service:
    # /etc/init.d/monitorix start && chkconfig monitorix on
    # /etc/init.d/httpd restart && chkconfig httpd on

    Step4. Access:
    http://X.X.X.X/monitorix/
    (Where X.X.X.X is your IP address)


    Saturday, September 15, 2012

    升級OpenSUSE12.2

    剛剛把OpenSUSE12.1升級到了12.2,先來說說第1印象吧。


    1. 改用了Systemd取代Sys V,所以感覺上開機變更快了。
    2. 字型變更漂亮。
    3. DeadBeef運作良好,不受升級影響。
    4. aMule運作良好,不受升級影響。
    5. Terminator運作良好,不受升級影響。

    問題:

    1. 音效輸出不會自動切換,比如當插入耳機後,喇叭還是有輸出。
    2. Google-Chrome需要重新安裝。
    3. PPS不能播放,可能需要重新安裝。
    4. Tools bar看不到目前的輸入法。
    5. 無法針對RAR檔案解壓縮。

    剛升級完,繼續測試中。

    How to upgrade?

    Friday, September 14, 2012

    How to be a Multicast Video stream Server in Linux

    透過VLC這套軟體,可以在Linux建立支援multicast的媒體串流播放器,以下簡單的記錄IPv4與IPv6的建立與播放的方法:

    1. IPv4:
    - 切換至non-root user.
    - 開啟console.
    - 執行以下的命令:
    vlc -vvv 111755131.mov -L --sout '#duplicate{dst=rtp{mux=ts,dst=239.1.1.1,port=5004,sdp=sap://,name="TestStream"}}'

    111755131.mov 是欲播放的檔案。
    239.1.1.1 with port 5004 是multicast的IPv4 address與port number.


    2. IPv6:
    步驟跟IPv4都一樣,只是將IP改成v6的格式如下:
    vlc -vvv 111755131.mov -L --sout '#duplicate{dst=rtp{mux=ts,dst=[ff08::114],port=5004,sdp=sap://,name="TestStream"}}'


    VLC Client:
    - IGMP v2: Media::Open Network Stream:: rtp://@239.1.1.1:5004

    - IGMP v3: Media::Open Network Stream:: rtp://10.10.10.10@239.1.1.1:5004

    - MLD: Media::Open Network Stream:: rtp://@[ff08::114]:5004

    Set IGMP version in Windows

    Latency when displaying a live RTP stream

    Wednesday, September 05, 2012

    帽客的愛車 VW Tiguan

    Tiguan結合了Tiger與Lguana -> OSX+OpenSUSE? 所以我對它情有獨鍾 :) 別來亂了,這台車是我老婆選的。但是它真的是台好車唷!


    OpenSUSE 12.2正式發行!

    OpenSUSE 12.2已經可以開始下載囉!以下是這一版本的release note.

    Sunday, September 02, 2012

    還有三天!OpenSUSE12.2要來囉!

    緊接著Fedora17,還剩三天OpenSUSE 12.2就要釋出囉!話說我也好久沒有更新我的Blog了.......唉唉唉~

    Tuesday, May 29, 2012

    Free memory on Mac OSX

    公司的MacBookPro很少重新開機,想當然耳系統日以繼夜的運行,當開啟新的APP時,會覺得有點卡卡的,以往習慣用MemoryFree2這套APP去清理"inactive"的memory,但是其實用一個command就可以達成了,實作如下:


    MBP:~ lawrence$ sync && purge

    搞定,收工。

    Monday, May 07, 2012

    How to configure FreeRADIUS2.x support EAP-TLS under Linux?

    延續上篇How to configure FreeRADIUS2.x support EAP-TTLS under Linux?
    現在只要再產生client端要使用的certificate並且把ROOTCA與ClientCA匯入到client端,就可以使用EAP-TLS了,整個步驟如下:

    Step1: MAKING A CLIENT CERTIFICATE

      Client certificates are used by EAP-TLS, and optionally by EAP-TTLS
    and PEAP.  The following steps outline how to create a client
    certificate that is signed by the server certificate created above.
    You will have to have the password for the server certificate in the
    "input_password" and "output_password" fields of the server.cnf file.

    $ vi client.cnf
      Edit the "input_password" and "output_password" fields to be the
      password for the client certificate.  You will have to give these
      passwords to the end user who will be using the certificates.
      Edit the [client] section to have the correct values for your
      country, state, etc.  Be sure that the commonName field here is
      the User-Name that will be used for logins!
    $ make client.pem
      The users certificate will be in "emailAddress.pem",
      i.e. "user@example.com.pem".
      To create another client certificate, just repeat the steps for
      making a client certificate, being sure to enter a different login
      name for "commonName", and a different password.

    Step2: IMPORT ROOTCA, and Client Certificate/以Fedora16為例:
    - 安全性: WPA&WPA2 Enterprise
    - 驗證: TLS
    - 識別: commonName
    - CA: ca.pem
    - 私密金鑰: client.p12
    - 私密金鑰密碼: "input_password" and "output_password"
    Note: ca.pem and client.p12是產生ROOTCA與Client Certificate時所一併產生的,所在的目錄是/etc/raddb/certs/

    That's all.

    Friday, April 27, 2012

    How to configure IPv6 Router advertisement Daemon under Linux?

    在此簡單記錄一下如何在Redhat/Fedora下透過Router advertisement Daemon(radvd)自動分派IPv6的IP address.

    Step1: 設定Kernel參數 for IPv6 support

    net.ipv6.conf.all.forwarding = 1
    net.ipv6.conf.all.autoconf = 0

    Step2: 設定系統支援IPv6
    # vi /etc/sysconfig/network
    ......
    NETWORKING_IPV6=yes
    ......

    Step3: 安裝radvd
    # yum install radvd

    Step4: 設定radvd.conf
    # vi /etc/radvd.conf
    interface eth1
    {
    AdvSendAdvert on;
    MinRtrAdvInterval 30;
    MaxRtrAdvInterval 100;
            AdvOtherConfigFlag on;
    prefix 3001:288::/64
    {
    AdvOnLink on;
    AdvAutonomous on;
    AdvRouterAddr on;
    };
    };


    Step5: 啟動radvd
    # /etc/init.d/radvd start; chkconfig radvd on

    Thursday, April 26, 2012

    How to configure FreeRADIUS2.x support EAP-TTLS under Linux?

    If you would like to make FreeRADIUS 2.x support EAP-TTLS, then following steps outline how to configure it:

    1. Re-generate Root CA/Server certificate:
    # cd /etc/raddb/certs
    # rm -f ca.der ca.key ca.pem
    # rm -f server.crt server.csr server.key server.p12 server.pem

    2. Make Root CA:

    # vi ca.cnf
      Edit the "input_password" and "output_password" fields to be the
      password for the CA certificate.
      Edit the [certificate_authority] section to have the correct values
      for your country, state, etc.
    # make ca.pem
      This step creates the CA certificate.
    # make ca.der
      This step creates the DER format of the self-signed certificate,
      which is can be imported into Windows.

    3. MAKING A SERVER CA:

    # vi server.cnf
      Edit the "input_password" and "output_password" fields to be the
      password for the server certificate.
      Edit the [server] section to have the correct values for your
      country, state, etc.  Be sure that the commonName field here is
      different from the commonName for the CA certificate.
    # make server.pem
      This step creates the server certificate.
      If you have an existing certificate authority, and wish to create a
      certificate signing request for the server certificate, edit
      server.cnf as above, and type the following command.
    # make server.csr
      You will have to ensure that the certificate contains the XP
      extensions needed by Microsoft clients.

    4. To modify client configuration directives in /etc/raddb/clients.conf

    client 10.10.0.0/16 {
            secret          = testing123
            shortname       = private-network-2
    }

    5. To modify EAP type in /etc/raddb/eap.conf

    default_eap_type = ttls
    ....
    ttls {
                    default_eap_type = mschapv2
                    copy_request_to_tunnel = yes
                    use_tunneled_reply = yes
                    #virtual_server = "inner-tunnel"
    }
    ....

    6. To add user in /etc/raddb/users
    lawrence Cleartext-Password := "testing"

    7. To disable MPPE in /etc/raddb/modules/mschap
            use_mppe = no

    8. Restart FreeRADIUS:
    # /etc/init.d/radiusd restart

    That's all.


    Tuesday, April 24, 2012

    How to configure DHCP Server prefer broadcast response all the time under Linux?

    上篇Configure Windows7 prefer DHCP unicast or broadcast response,說明了可更改OS的設定,然而有一種情況是DHCP Server說了算!也就是說DHCP Server可以不管DHCP client原本的預期,而一律採用broadcast的方式回應,在dhcpd中,只要加一筆參數就可以了。

    # vi /etc/dhcpd.conf
    .....

    always-broadcast on;
    ......

    修改後,記得restart dhcpd。
    # /etc/init.d/dhcpd restart

    BTW, Windows7預設prefer broadcast response,WindowsXP則是unicast response,而一般的linux distro.同樣也是unicast。