在Linux中要去mount遠端的Server某個分享資料夾,大部份是透過NFS或是Samba的方法來實做,在此帽客提供另一種方法來做,那便是利用SSH來mount。
OS: CentOS5 kernel version: 2.6.18-8.1.14.el5
透過sshfs便可以達到這樣的需求,但由於使用sshfs之前,必需安裝FUSE module,所以請先至rpm.pbone.net抓取以下的RPM並安裝:
fuse-2.7.0-1.el5.rf.i386.rpm
fuse-devel-2.7.0-3_7.el5.i386.rpm
fuse-kmdl-2.6.18-8.1.14.el5-2.7.0-3_7.el5.i686.rpm
fuse-libs-2.7.0-3_7.el5.i386.rpm
在抓取fuse-sshfs-1.8-1.el5.rf.i386.rpm安裝完後將機器重新開機或是執行modprove fuse。
由於sshfs在mount遠端時都會要求輸入密碼,如同使用ssh一樣,所以我利用了免密碼就可登入到對方主機來做。(在此server2代表client要mount server1的root家目錄)
server2: 產生金鑰並scp到server1
[root@server2 ~]# ssh-keygen -t dsa
Generating public/private dsa key pair.
Enter file in which to save the key (/root/.ssh/id_dsa): Enter passphrase (empty for no passphrase):
Enter same passphrase again:
Your identification has been saved in /root/.ssh/id_dsa.
Your public key has been saved in /root/.ssh/id_dsa.pub.
The key fingerprint is:
97:49:77:78:b0:82:13:59:fa:0b:70:ad:cd:7d:31:f1 root@server2.example.com
[root@server2 ~]# scp .ssh/id_dsa.pub root@10.4.1.33:~/server2.key.pub
Password:
id_dsa.pub
100% 614 0.6KB/s 00:00
server1: 將server2的金鑰copy到~/.ssh/authorized_keys
server1:~/.ssh # touch authorized_keys
server1:~/.ssh # cat ../server2.key.pub > authorized_keys
server2: 使用sshfs mount server1的root家目錄至/mnt/server1
[root@server2 ~]# sshfs root@10.4.1.33:/root /mnt/server1/
[root@server2 ~]# df -h
Filesystem Size Used Avail Use% Mounted on
/dev/hda5 13G 3.6G 8.8G 29% /
/dev/hda1 99M 14M 80M 15% /boot
tmpfs 506M 0 506M 0% /dev/shm
/dev/hda2 4.8G 138M 4.4G 4% /home
sshfs#root@10.4.1.33:/root
1000G 0 1000G 0% /mnt/server1
完成。
Wednesday, November 21, 2007

Monday, November 19, 2007
[Vsftp] Allow anonymous rewrite files
今天發現到在RHEL/SLES的vsftp中,即使我開放讓anonymous有上傳與建立目錄的權限,但當要上傳並覆蓋原本的檔案時會發生權限不足的問題,原來還要多加一個設定anon_other_write_enable=YES
在此總結允許anonymous所有權限的參數:
anonymous_enable=YES
anon_other_write_enable=YES
anon_upload_enable=YES
anon_mkdir_write_enable=YES
write_enable=YES
在此總結允許anonymous所有權限的參數:
anonymous_enable=YES
anon_other_write_enable=YES
anon_upload_enable=YES
anon_mkdir_write_enable=YES
write_enable=YES
Friday, November 16, 2007
[Shell Script] 執行結果變指令!
#!/bin/bash
## A=100
## ls -l
## free -m
eval "`grep "^## " $0 | sed 's/^## //'`"
echo "A=$A"
短短的幾行,卻內含許多觀念!
## A=100
## ls -l
## free -m
eval "`grep "^## " $0 | sed 's/^## //'`"
echo "A=$A"
短短的幾行,卻內含許多觀念!
Friday, November 02, 2007
Top 10 Reasons Not to Use Ubuntu
http://blog.linuxtoday.com/blog/archives/071031-103438.html
這應該是反諷MS吧,雖然我不太prefer MS ,但青菜蘿菠各有所好囉~
當我把compiz特效展現給同事看時,沒有一個不心動的,已經有人安裝Ubuntu了,不過帽客也當起了免費的技術支援。
這應該是反諷MS吧,雖然我不太prefer MS ,但青菜蘿菠各有所好囉~
當我把compiz特效展現給同事看時,沒有一個不心動的,已經有人安裝Ubuntu了,不過帽客也當起了免費的技術支援。
Thursday, November 01, 2007
DNS cache issue
一般來說,DNS cache的值是以TTL來決定,而TTL也只對於DNS Server與Server之間才有用!如果對DNS Client來說它是不會去做DNS cache的,每查詢一次就update一次RR,但帽客今天發現到了一個非常有趣的現象,當你在DNS Client透過 host / nslookup /dig 來做名稱解析時,每問一次就update一次,這不難理解,合乎常規,但當你用ping時,此時就很怪異了,你會發現!被cache住了!比如我設定 server.example.com 對映到192.168.0.254 / 253, 當你用host查尋時,會每問一次就改變一次對映的IP,但ping確沒有唷!主要的原因是被nscd這隻daemon cache住囉!
nscd daemon就是用來設定DNS Client要cache住Name Server cache查尋的結果多久,這個跟TTL值一點關係也沒有,它也可以應用在LDAP,ypserver等等,以下是它的example config file:
enable-cache passwd yes
positive-time-to-live passwd 600
negative-time-to-live passwd 20
suggested-size passwd 211
check-files passwd yes
persistent passwd yes
shared passwd yes
enable-cache group yes
positive-time-to-live group 3600
negative-time-to-live group 60
suggested-size group 211
check-files group yes
persistent group yes
shared group yes
enable-cache hosts yes
positive-time-to-live hosts 5
negative-time-to-live hosts 0
suggested-size hosts 211
check-files hosts yes
persistent hosts no
shared hosts yes
hosts -> 就是針對DNS cache用的。 :)
nscd daemon就是用來設定DNS Client要cache住Name Server cache查尋的結果多久,這個跟TTL值一點關係也沒有,它也可以應用在LDAP,ypserver等等,以下是它的example config file:
enable-cache passwd yes
positive-time-to-live passwd 600
negative-time-to-live passwd 20
suggested-size passwd 211
check-files passwd yes
persistent passwd yes
shared passwd yes
enable-cache group yes
positive-time-to-live group 3600
negative-time-to-live group 60
suggested-size group 211
check-files group yes
persistent group yes
shared group yes
enable-cache hosts yes
positive-time-to-live hosts 5
negative-time-to-live hosts 0
suggested-size hosts 211
check-files hosts yes
persistent hosts no
shared hosts yes
hosts -> 就是針對DNS cache用的。 :)
Saturday, October 27, 2007
list all PCI devices
在Linux的作業系統下,如果想要check HW info的方法其實有很多種,比如我想看CPU時,我可以打cat /proc/cpuinfo,想看記憶體時可打free -m,想看HDD space時,可透過fdisk -l等等。
在以前我如果想要看電腦的網卡或是顯示是那家的chip時,我會透過dmesg然後配合grep去找出我想要知道的資訊,不過現在發現到一個更好用的指令lspci,可以透過它很簡單的撈出所有PCI devices的資訊,以下是我HP nc6230的info,真是方便呀。
00:00.0 Host bridge: Intel Corporation Mobile 915GM/PM/GMS/910GML Express Processor to DRAM Controller (rev 03)
00:01.0 PCI bridge: Intel Corporation Mobile 915GM/PM Express PCI Express Root Port (rev 03)
00:1c.0 PCI bridge: Intel Corporation 82801FB/FBM/FR/FW/FRW (ICH6 Family) PCI Express Port 1 (rev 03)
00:1c.1 PCI bridge: Intel Corporation 82801FB/FBM/FR/FW/FRW (ICH6 Family) PCI Express Port 2 (rev 03)
00:1d.0 USB Controller: Intel Corporation 82801FB/FBM/FR/FW/FRW (ICH6 Family) USB UHCI #1 (rev 03)
00:1d.1 USB Controller: Intel Corporation 82801FB/FBM/FR/FW/FRW (ICH6 Family) USB UHCI #2 (rev 03)
00:1d.2 USB Controller: Intel Corporation 82801FB/FBM/FR/FW/FRW (ICH6 Family) USB UHCI #3 (rev 03)
00:1d.7 USB Controller: Intel Corporation 82801FB/FBM/FR/FW/FRW (ICH6 Family) USB2 EHCI Controller (rev 03)
00:1e.0 PCI bridge: Intel Corporation 82801 Mobile PCI Bridge (rev d3)
00:1e.2 Multimedia audio controller: Intel Corporation 82801FB/FBM/FR/FW/FRW (ICH6 Family) AC'97 Audio Controller (rev 03)
00:1e.3 Modem: Intel Corporation 82801FB/FBM/FR/FW/FRW (ICH6 Family) AC'97 Modem Controller (rev 03)
00:1f.0 ISA bridge: Intel Corporation 82801FBM (ICH6M) LPC Interface Bridge (rev 03)
00:1f.1 IDE interface: Intel Corporation 82801FB/FBM/FR/FW/FRW (ICH6 Family) IDE Controller (rev 03)
01:00.0 VGA compatible controller: ATI Technologies Inc M22 [Mobility Radeon X300]
02:04.0 Network controller: Intel Corporation PRO/Wireless 2200BG Network Connection (rev 05)
02:06.0 CardBus bridge: Texas Instruments PCIxx21/x515 Cardbus Controller
02:06.3 Mass storage controller: Texas Instruments PCIxx21 Integrated FlashMedia Controller
02:06.4 Generic system peripheral [0805]: Texas Instruments PCI6411/6421/6611/6621/7411/7421/7611/7621 Secure Digital Controller
02:06.5 Communication controller: Texas Instruments PCI6411/6421/6611/6621/7411/7421/7611/7621 Smart Card Controller
10:00.0 Ethernet controller: Broadcom Corporation NetXtreme BCM5751M Gigabit Ethernet PCI Express (rev 11)
在以前我如果想要看電腦的網卡或是顯示是那家的chip時,我會透過dmesg然後配合grep去找出我想要知道的資訊,不過現在發現到一個更好用的指令lspci,可以透過它很簡單的撈出所有PCI devices的資訊,以下是我HP nc6230的info,真是方便呀。
00:00.0 Host bridge: Intel Corporation Mobile 915GM/PM/GMS/910GML Express Processor to DRAM Controller (rev 03)
00:01.0 PCI bridge: Intel Corporation Mobile 915GM/PM Express PCI Express Root Port (rev 03)
00:1c.0 PCI bridge: Intel Corporation 82801FB/FBM/FR/FW/FRW (ICH6 Family) PCI Express Port 1 (rev 03)
00:1c.1 PCI bridge: Intel Corporation 82801FB/FBM/FR/FW/FRW (ICH6 Family) PCI Express Port 2 (rev 03)
00:1d.0 USB Controller: Intel Corporation 82801FB/FBM/FR/FW/FRW (ICH6 Family) USB UHCI #1 (rev 03)
00:1d.1 USB Controller: Intel Corporation 82801FB/FBM/FR/FW/FRW (ICH6 Family) USB UHCI #2 (rev 03)
00:1d.2 USB Controller: Intel Corporation 82801FB/FBM/FR/FW/FRW (ICH6 Family) USB UHCI #3 (rev 03)
00:1d.7 USB Controller: Intel Corporation 82801FB/FBM/FR/FW/FRW (ICH6 Family) USB2 EHCI Controller (rev 03)
00:1e.0 PCI bridge: Intel Corporation 82801 Mobile PCI Bridge (rev d3)
00:1e.2 Multimedia audio controller: Intel Corporation 82801FB/FBM/FR/FW/FRW (ICH6 Family) AC'97 Audio Controller (rev 03)
00:1e.3 Modem: Intel Corporation 82801FB/FBM/FR/FW/FRW (ICH6 Family) AC'97 Modem Controller (rev 03)
00:1f.0 ISA bridge: Intel Corporation 82801FBM (ICH6M) LPC Interface Bridge (rev 03)
00:1f.1 IDE interface: Intel Corporation 82801FB/FBM/FR/FW/FRW (ICH6 Family) IDE Controller (rev 03)
01:00.0 VGA compatible controller: ATI Technologies Inc M22 [Mobility Radeon X300]
02:04.0 Network controller: Intel Corporation PRO/Wireless 2200BG Network Connection (rev 05)
02:06.0 CardBus bridge: Texas Instruments PCIxx21/x515 Cardbus Controller
02:06.3 Mass storage controller: Texas Instruments PCIxx21 Integrated FlashMedia Controller
02:06.4 Generic system peripheral [0805]: Texas Instruments PCI6411/6421/6611/6621/7411/7421/7611/7621 Secure Digital Controller
02:06.5 Communication controller: Texas Instruments PCI6411/6421/6611/6621/7411/7421/7611/7621 Smart Card Controller
10:00.0 Ethernet controller: Broadcom Corporation NetXtreme BCM5751M Gigabit Ethernet PCI Express (rev 11)
Thursday, October 18, 2007
Wednesday, October 17, 2007
Mac OSX 10.5 Leopard 即將於2007.10.26 PM6:00開賣
根據官方消息,Apple將於今年的10月26號下午6:00開始於Apple Retail Store開賣MAC OSX 10.5 Leopard,帽客真是感到高興呀!不過在高興之餘忽然驚覺我的iBook,能裝嗎?
於是乎馬上去Apple網站瞧瞧,喔!一進首頁就看到在倒數計時呀!ㄟ~Apple真是個大壞蛋呀!來這招搞得我心癢癢,差點忘了要做什麼,二話不說馬上點選Leopard的Tech Specs的頁面,好險上面有說支援PowerPC G4&G5的CPU,這下子放心的許多,等著升級吧我的小白。
Apple MAC OSX 10.5 Leopard Specs
於是乎馬上去Apple網站瞧瞧,喔!一進首頁就看到在倒數計時呀!ㄟ~Apple真是個大壞蛋呀!來這招搞得我心癢癢,差點忘了要做什麼,二話不說馬上點選Leopard的Tech Specs的頁面,好險上面有說支援PowerPC G4&G5的CPU,這下子放心的許多,等著升級吧我的小白。
Apple MAC OSX 10.5 Leopard Specs
Friday, October 12, 2007
熱鬧的10月
Novell於10月4日發表了OpenSUSE 10.3, 而Ubuntu也準備於10月18日發表Ubuntu 7.10 (Gutsy Gibbon), Apple就更讓人興奮了,將於10月底發表MAC OS 10.5 Leopard!
真是個熱鬧的10月呀!目前帽客所用的OS大概有:
1. CentOS5.0 on IBM desktop
2. MAC OS 10.4 on iBook
3. Ubuntu 7.04 on HP nc6230
4. Windows XP PRO SP2 on IBM desktop
5. 以模擬的方式跑RHEL5, SLES10與OpenSUSE 10.3
這麼多的OS,我覺得MAC還是桌面應用的王者,好用直覺夠簡單,Linux則是我吃飯的工具,應用廣泛,沒有它還真的不知道怎麼辦.... 那Windows...... 嗯...... 讓我想一想
真是個熱鬧的10月呀!目前帽客所用的OS大概有:
1. CentOS5.0 on IBM desktop
2. MAC OS 10.4 on iBook
3. Ubuntu 7.04 on HP nc6230
4. Windows XP PRO SP2 on IBM desktop
5. 以模擬的方式跑RHEL5, SLES10與OpenSUSE 10.3
這麼多的OS,我覺得MAC還是桌面應用的王者,好用直覺夠簡單,Linux則是我吃飯的工具,應用廣泛,沒有它還真的不知道怎麼辦.... 那Windows...... 嗯...... 讓我想一想
Tuesday, October 09, 2007
最近狀況
女兒:
快滿8個月了, 嗯 把戲越來越多了,很可愛但也很抓弄人,但我發現到她不太有耐心同時脾氣也很大,老婆說這點像我 @@ 我承認我EQ是低了點, 但我應該還算有耐心吧 呵
人家都說女兒外表也像我, 嗯!感覺好像是耶~ 拿出小時候的照片一比,果然活生生是我的分身~
看來小孩子真是不能偷生,還需要DNA鑑定嗎?
她的外號是企鵝妹,至於為何呢?這點有空我以後在說明,不過不是因為我喜歡玩Linux的關係就是了.
工作:
對於有在瀏覽本Blog的網友,真是感到抱歉,最近公司有一些改變且案子也都排的很趕,所以就沒有太多的心力update一些心得到Blog上,我想應該會一直忙到年底吧.... 沒辦法 @@ 又因為我是Sr. 級的, 所以總是對自己要求高一點,不然怎麼有資格掛Sr.哩~
Linux:
前幾天OpenSUSE 10.3 release了,於是乎當然是馬上download來玩看看囉~ 誰知道在VirtualBox下NIC有些問題get不到IP? 這真是奇怪 我等會在來試看看,如果不行,就問問Google大神看看吧
學習:
1.公司變美商了,所以上面說要加強英文,我的破英文.....的確要加強!以後每個星期 1 3 5 就強迫自己讀英文吧!
2.至於每個星期2 4,預計review一下以前所學的Linux skill吧 我一直很想去考LPIC,但我記憶體小,這種筆試對我來說是比上機考還痛苦...
娛樂:
1. 預計會買Wii送老婆,一來是可以讓她減肥,二來是結婚記念日快到了,應該要表示一下.
2. 假日會玩玩NDSL,雷頓教授與不可思議的小鎮實在很有趣唷! 有NDSL的朋友可千萬不要錯過呀!
快滿8個月了, 嗯 把戲越來越多了,很可愛但也很抓弄人,但我發現到她不太有耐心同時脾氣也很大,老婆說這點像我 @@ 我承認我EQ是低了點, 但我應該還算有耐心吧 呵
人家都說女兒外表也像我, 嗯!感覺好像是耶~ 拿出小時候的照片一比,果然活生生是我的分身~
看來小孩子真是不能偷生,還需要DNA鑑定嗎?
她的外號是企鵝妹,至於為何呢?這點有空我以後在說明,不過不是因為我喜歡玩Linux的關係就是了.
工作:
對於有在瀏覽本Blog的網友,真是感到抱歉,最近公司有一些改變且案子也都排的很趕,所以就沒有太多的心力update一些心得到Blog上,我想應該會一直忙到年底吧.... 沒辦法 @@ 又因為我是Sr. 級的, 所以總是對自己要求高一點,不然怎麼有資格掛Sr.哩~
Linux:
前幾天OpenSUSE 10.3 release了,於是乎當然是馬上download來玩看看囉~ 誰知道在VirtualBox下NIC有些問題get不到IP? 這真是奇怪 我等會在來試看看,如果不行,就問問Google大神看看吧
學習:
1.公司變美商了,所以上面說要加強英文,我的破英文.....的確要加強!以後每個星期 1 3 5 就強迫自己讀英文吧!
2.至於每個星期2 4,預計review一下以前所學的Linux skill吧 我一直很想去考LPIC,但我記憶體小,這種筆試對我來說是比上機考還痛苦...
娛樂:
1. 預計會買Wii送老婆,一來是可以讓她減肥,二來是結婚記念日快到了,應該要表示一下.
2. 假日會玩玩NDSL,雷頓教授與不可思議的小鎮實在很有趣唷! 有NDSL的朋友可千萬不要錯過呀!
Friday, September 21, 2007
Setup bridging network interface on Virtualbox
在Virtualbox中,如果要用bridging到某一張NIC上,是需要一些設定的,不像VMware跑跑它的script就設定好了 @@ 不過這樣還是可以克服的,手動自己搞定就好了,在實作前先講講要怎麼做好了:
1. 新增一bridge到NIC上的interface (bri0 <-> eth0)
2.替Guest OS新增一個Virtual host interface (vbox0 <-> bri0)
3.在Virtualbox中指定要使用的虛擬NIC (vbox0)
Ubuntu 設定步驟:
Setup1. 安裝bridge的套件:
# sudo apt-get install bridge-utils
Setup2. 設定bri0:
# sudo vi /etc/network/interfaces
->
auto br0
iface br0 inet dhcp
bridge_ports eth0
Setup3. 重啟NIC interface:
# sudo /etc/init.d/networking restart
Setup4. 替Guest OS新增一個Virtual host interface
#sudo VBoxAddIF vbox0 br0
Setup5. 在Virtualbox中指定要使用的虛擬NIC (vbox0)
開啟Virtualbox,並設定Guest OS的其中一張NIC bind到vbox0上
搞定收工! 下面是在Ubuntu下的Guest OS: FC7正在更新套件的畫面:

1. 新增一bridge到NIC上的interface (bri0 <-> eth0)
2.替Guest OS新增一個Virtual host interface (vbox0 <-> bri0)
3.在Virtualbox中指定要使用的虛擬NIC (vbox0)
Ubuntu 設定步驟:
Setup1. 安裝bridge的套件:
# sudo apt-get install bridge-utils
Setup2. 設定bri0:
# sudo vi /etc/network/interfaces
->
auto br0
iface br0 inet dhcp
bridge_ports eth0
Setup3. 重啟NIC interface:
# sudo /etc/init.d/networking restart
Setup4. 替Guest OS新增一個Virtual host interface
#sudo VBoxAddIF vbox0
Setup5. 在Virtualbox中指定要使用的虛擬NIC (vbox0)
開啟Virtualbox,並設定Guest OS的其中一張NIC bind到vbox0上
搞定收工! 下面是在Ubuntu下的Guest OS: FC7正在更新套件的畫面:

Install VirtualBox in Ubuntu 7.04
聽說VirtualBox非常好用,所以帽客也來嘗試裝看看,以下是帽客的安裝步驟.
Setup1. 至官網抓for Ubuntu 7.04的套件 virtualbox download
Setup2. # sudo dkpg -i virtualbox_1.5.0-24069-1_Ubuntu_feisty_i386.deb
Setup3. 發生了套件相依性的問題用apt來一解決: # sudo apt-get -f install
Setup4. 將User加入到virtualbox的group: # sudo usermod -G vboxusers -a lawrence
啟動Virtualbox: #

Setup1. 至官網抓for Ubuntu 7.04的套件 virtualbox download
Setup2. # sudo dkpg -i virtualbox_1.5.0-24069-1_Ubuntu_feisty_i386.deb
Setup3. 發生了套件相依性的問題用apt來一解決: # sudo apt-get -f install
Setup4. 將User加入到virtualbox的group: # sudo usermod -G vboxusers -a lawrence
啟動Virtualbox: #
VirtualBox
裝好了,今天先裝個FC7玩看看 :)
Friday, September 14, 2007
Linux AntiSpoofing method
寫個簡單的script來做吧! 這樣會套用到所有的interface上.
#!/bin/bash
for i in /proc/sys/net/ipv4/conf/*/rp_filter
do
echo 1 > "$i"
echo "$i"
cat `echo "$i"`
done
參考: OReilly.LPI.Linux.Certification.in.a.Nutshell.2nd.Edition
#!/bin/bash
for i in /proc/sys/net/ipv4/conf/*/rp_filter
do
echo 1 > "$i"
echo "$i"
cat `echo "$i"`
done
參考: OReilly.LPI.Linux.Certification.in.a.Nutshell.2nd.Edition
Tuesday, September 11, 2007
Setup IPSec Host to Host Tunnel Connection
1. Test Environment:
Left PC ----- Right PC
Letf PC:
IP address: 192.168.0.2/24
OS: opensuse 10
Install openswan-2.4.4-1.1
Right PC:
IP address: 192.168.0.100/24
OS: CentOS 5.0
Install openswan-2.4.9-31.el5
2.Setup procedure:
2.1 Left PC:
2.1.1 Setup PSK:
# vi /etc/ipsec.secrets
192.168.0.2 192.168.0.100 : PSK "1234567890"
192.168.0.100 192.168.0.2 : PSK "1234567890"
2.1.2 Setup IPSec:
# vi /etc/ipsec.conf
conn hosttohost
# Left security gateway, subnet behind it, nexthop toward right.
left=192.168.0.2
#leftsubnet=192.168.0.0/24
#leftnexthop=10.4.0.1
# Right security gateway, subnet behind it, nexthop toward left.
right=192.168.0.100
#rightsubnet=192.168.1.0/24
#rightnexthop=10.5.30.254
# To authorize this connection, but not actually start it,
# at startup, uncomment this.
type=tunnel
auto=add
authby=secret
2.1.3 Start IPSec
# rcipsec start
# ipsec auto --up hosttohost
2.2 Right PC:
2.2.1 Setup PSK:
# vi /etc/ipsec.secrets
192.168.0.100 192.168.0.2 : PSK "1234567890"
192.168.0.2 192.168.0.100 : PSK "1234567890"
2.2.2 Setup IPSec:
# cp /etc/ipsec.d/examples/linux-linux.conf ..
# vi /etc/ipsec.d/linux-linux.conf
conn linux-to-linux
#
# Simple use raw RSA keys
# After starting openswan, run: ipsec showhostkey --left (or --right)
# and fill in the connection similarly to the example below.
#
left=192.168.0.100
# optional
# leftsubnet=10.0.1.0/24
#leftid=@bofh.xelerance.com
#leftrsasigkey=0sAQPWTXt8DDlEhTZJ91ngNMxTSyuos6JZxXQmtRcwUl6ppUCcuuWvjXrF/qiz6eiL1LMlpGJyG1oVhtFhTaFJl7ZkF/4J1B9LCFzYxvYI97AnLuC0op5pVAZ1SZx29+aRjeMcKC4zbZ6dMMjUdn9H1gqG9rpE0MBEFNSVLEu9U8rtlz14RfxQAQ9ePj64HnGLfgJlDB0VYhKEIcRihy72bvjZ4eoX16S1EY1FgnHyrveZPxRi8sgn6Q19RytEzSmUAlGjvMDhNfenq6WCSYMeqgj0jFSArTNBQmR2QBkUG6NSOXfb+18c6jDPicGmbmWfoRx/PUJo46WiRF4RRmsxnFpbHpklILFzEJ+/k6qHVAekpVfp
# The remote user.
#
right=192.168.0.2
#rightid=@tla.xelerance.com
# optional
# rightsubnet=10.0.2.0/24
#rightrsasigkey=0sAQNxf6caKULJklYZycuo66Ko0U+iHaJUDr0QZHnG4MJ9IRNYi5H6kPxcwKIXkg+OGo+NeUyyWDEc+ox27BFYViAHQNEyBRLZu0kyE681h+cHm7lfCSy0AOEBSCyZF3aGcL8GWxVhtimpJQ4tNxXZg7tLX5sfYw8mZnUBjkHvyccIred/q3cNWbDlq2WU4TL+NBb5FnxXi9Hk/SRV7sMe56fvZuXkcJu4e2C7uocltzzF1b0BZx7yeXwHjzqAWnW/UA54fbSTvzgnrpSC+FMuhWTI1EdxcqGaOFIjGWWGV2nxg/QaPU9i8vpwFwrEEdCJTiqlbYYNudblg4vYthnVNez0/RkfZHfhAaHdbJRSaQzOu88h
authby=secret
auto=add
type=tunnel
2.2.3 Start IPSec:
# service ipsec start
# ipsec auto --up linux-to-linux
3.Verify:
Ping Right PC from Left PC and to check that traffic actually got encrypted!
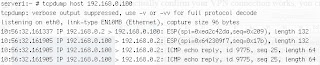
Left PC ----- Right PC
Letf PC:
IP address: 192.168.0.2/24
OS: opensuse 10
Install openswan-2.4.4-1.1
Right PC:
IP address: 192.168.0.100/24
OS: CentOS 5.0
Install openswan-2.4.9-31.el5
2.Setup procedure:
2.1 Left PC:
2.1.1 Setup PSK:
# vi /etc/ipsec.secrets
192.168.0.2 192.168.0.100 : PSK "1234567890"
192.168.0.100 192.168.0.2 : PSK "1234567890"
2.1.2 Setup IPSec:
# vi /etc/ipsec.conf
conn hosttohost
# Left security gateway, subnet behind it, nexthop toward right.
left=192.168.0.2
#leftsubnet=192.168.0.0/24
#leftnexthop=10.4.0.1
# Right security gateway, subnet behind it, nexthop toward left.
right=192.168.0.100
#rightsubnet=192.168.1.0/24
#rightnexthop=10.5.30.254
# To authorize this connection, but not actually start it,
# at startup, uncomment this.
type=tunnel
auto=add
authby=secret
2.1.3 Start IPSec
# rcipsec start
# ipsec auto --up hosttohost
2.2 Right PC:
2.2.1 Setup PSK:
# vi /etc/ipsec.secrets
192.168.0.100 192.168.0.2 : PSK "1234567890"
192.168.0.2 192.168.0.100 : PSK "1234567890"
2.2.2 Setup IPSec:
# cp /etc/ipsec.d/examples/linux-linux.conf ..
# vi /etc/ipsec.d/linux-linux.conf
conn linux-to-linux
#
# Simple use raw RSA keys
# After starting openswan, run: ipsec showhostkey --left (or --right)
# and fill in the connection similarly to the example below.
#
left=192.168.0.100
# optional
# leftsubnet=10.0.1.0/24
#leftid=@bofh.xelerance.com
#leftrsasigkey=0sAQPWTXt8DDlEhTZJ91ngNMxTSyuos6JZxXQmtRcwUl6ppUCcuuWvjXrF/qiz6eiL1LMlpGJyG1oVhtFhTaFJl7ZkF/4J1B9LCFzYxvYI97AnLuC0op5pVAZ1SZx29+aRjeMcKC4zbZ6dMMjUdn9H1gqG9rpE0MBEFNSVLEu9U8rtlz14RfxQAQ9ePj64HnGLfgJlDB0VYhKEIcRihy72bvjZ4eoX16S1EY1FgnHyrveZPxRi8sgn6Q19RytEzSmUAlGjvMDhNfenq6WCSYMeqgj0jFSArTNBQmR2QBkUG6NSOXfb+18c6jDPicGmbmWfoRx/PUJo46WiRF4RRmsxnFpbHpklILFzEJ+/k6qHVAekpVfp
# The remote user.
#
right=192.168.0.2
#rightid=@tla.xelerance.com
# optional
# rightsubnet=10.0.2.0/24
#rightrsasigkey=0sAQNxf6caKULJklYZycuo66Ko0U+iHaJUDr0QZHnG4MJ9IRNYi5H6kPxcwKIXkg+OGo+NeUyyWDEc+ox27BFYViAHQNEyBRLZu0kyE681h+cHm7lfCSy0AOEBSCyZF3aGcL8GWxVhtimpJQ4tNxXZg7tLX5sfYw8mZnUBjkHvyccIred/q3cNWbDlq2WU4TL+NBb5FnxXi9Hk/SRV7sMe56fvZuXkcJu4e2C7uocltzzF1b0BZx7yeXwHjzqAWnW/UA54fbSTvzgnrpSC+FMuhWTI1EdxcqGaOFIjGWWGV2nxg/QaPU9i8vpwFwrEEdCJTiqlbYYNudblg4vYthnVNez0/RkfZHfhAaHdbJRSaQzOu88h
authby=secret
auto=add
type=tunnel
2.2.3 Start IPSec:
# service ipsec start
# ipsec auto --up linux-to-linux
3.Verify:
Ping Right PC from Left PC and to check that traffic actually got encrypted!

Thursday, August 30, 2007
Setup a L2TP over IPSec VPN Server on Linux
Test Environment:
L2TP Client ---------- L2TP Server
L2TP Client: Windows XP SP2
L2TP Server: CentOS 5.0
IP address of L2TP Client: 10.5.30.200
IP address of L2TP Server: 10.5.30.3
必要套件:
xl2tpd-1.1.09-1.fc5.src.rpm
openswan-2.4.9-31.el5.i386.rpm
ipsec-tools* (預設已安裝)
ppp* (預設已安裝)
Setup Procedure:
1.Install RPM:
# rpm –ivh openswan*
# rpm –ivh xl2tpd* (That’s source rpm you must rebuild it)
2.Configure L2TP Server:
2.1 設定帳號與密碼:
# vi /etc/ppp/chap-secrets
lawrence * “redhat” *
2.2 設定xl2tpd設定檔:
[global]
; listen-addr = 192.168.1.98
;
;requires openswan-3.1
;ipsec saref = yes
;
;debug tunnel = yes
auth file = /etc/ppp/chap-secrets
[lns default]
ip range = 192.168.1.128-192.168.1.254
local ip = 192.168.1.99
require chap = yes
refuse pap = yes
require authentication = yes
name = LinuxVPNserver
ppp debug = yes
pppoptfile = /etc/ppp/options.xl2tpd
length bit = yes
2.3 設定/etc/ppp/options.xl2tpd
ipcp-accept-local
ipcp-accept-remote
ms-dns 192.168.1.1
ms-dns 192.168.1.3
ms-wins 192.168.1.2
ms-wins 192.168.1.4
noccp
auth
crtscts
idle 1800
#mtu 1410
#mru 1410
nodefaultroute
debug
lock
proxyarp
connect-delay 5000
logfile /var/log/xl2tpd.log
2.4 啟動L2TP Server
# service xl2tpd start; chkconfig xl2tpd on
3. 設定IPSec
3.1 PSK setting:
# vi /etc/ipsec.secrets
include /etc/ipsec.d/*.secrets
10.5.30.3 %any : PSK "1234567890"
10.5.30.3 -> Server IP address
%any -> allow all machines
格式要一模一樣,不然會出錯
3.2 設定l2tp-psk.conf
套用範例即可:
# cp /etc/ipsec.d/examples/l2tp-psk.conf /etc/ipsec.d/
# chmod 755 l2tp-psk.conf
3.3 啟動IPSec
# service ipsec start; chkconfig ipsec on
3.4 Check IPSec status
# ipsec verify
Checking your system to see if IPsec got installed and started correctly:
Version check and ipsec on-path [OK]
Linux Openswan Uopenswan-2.4.9-31.el5/K2.6.18-8.1.8.el5 (netkey)
Checking for IPsec support in kernel [OK]
NETKEY detected, testing for disabled ICMP send_redirects [OK]
NETKEY detected, testing for disabled ICMP accept_redirects [OK]
Checking for RSA private key (/etc/ipsec.d/hostkey.secrets) [OK]
Checking that pluto is running [OK]
Two or more interfaces found, checking IP forwarding [OK]
Checking NAT and MASQUERADEing [N/A]
Checking for 'ip' command [OK]
Checking for 'iptables' command [OK]
Opportunistic Encryption Support [DISABLED]
這麼一來L2TP over IPSec就成功架設起來了,如果有問題的話可查看以下的log file
/var/log/message
/var/log/secure
/var/log/xl2tpd.log
4. L2TP Client setting:
4.1新增連線
1. 開始->設定->網路連線->新增連線精靈
2. 選擇連線到公司網路(使用指定撥號或是vpn)
3. 選擇虛擬私人網路連線
4. 輸入名稱(可以隨意選)
5. 輸入VPN server IP (10.5.30.3)
4.2 修改設定
1.在安全性的分頁中->選擇進階->只勾選CHAP->可省加密
2. 點選"ipsec 設定"選項,輸入PSK(pre-shared key)
L2TP Client ---------- L2TP Server
L2TP Client: Windows XP SP2
L2TP Server: CentOS 5.0
IP address of L2TP Client: 10.5.30.200
IP address of L2TP Server: 10.5.30.3
必要套件:
xl2tpd-1.1.09-1.fc5.src.rpm
openswan-2.4.9-31.el5.i386.rpm
ipsec-tools* (預設已安裝)
ppp* (預設已安裝)
Setup Procedure:
1.Install RPM:
# rpm –ivh openswan*
# rpm –ivh xl2tpd* (That’s source rpm you must rebuild it)
2.Configure L2TP Server:
2.1 設定帳號與密碼:
# vi /etc/ppp/chap-secrets
lawrence * “redhat” *
2.2 設定xl2tpd設定檔:
[global]
; listen-addr = 192.168.1.98
;
;requires openswan-3.1
;ipsec saref = yes
;
;debug tunnel = yes
auth file = /etc/ppp/chap-secrets
[lns default]
ip range = 192.168.1.128-192.168.1.254
local ip = 192.168.1.99
require chap = yes
refuse pap = yes
require authentication = yes
name = LinuxVPNserver
ppp debug = yes
pppoptfile = /etc/ppp/options.xl2tpd
length bit = yes
2.3 設定/etc/ppp/options.xl2tpd
ipcp-accept-local
ipcp-accept-remote
ms-dns 192.168.1.1
ms-dns 192.168.1.3
ms-wins 192.168.1.2
ms-wins 192.168.1.4
noccp
auth
crtscts
idle 1800
#mtu 1410
#mru 1410
nodefaultroute
debug
lock
proxyarp
connect-delay 5000
logfile /var/log/xl2tpd.log
2.4 啟動L2TP Server
# service xl2tpd start; chkconfig xl2tpd on
3. 設定IPSec
3.1 PSK setting:
# vi /etc/ipsec.secrets
include /etc/ipsec.d/*.secrets
10.5.30.3 %any : PSK "1234567890"
10.5.30.3 -> Server IP address
%any -> allow all machines
格式要一模一樣,不然會出錯
3.2 設定l2tp-psk.conf
套用範例即可:
# cp /etc/ipsec.d/examples/l2tp-psk.conf /etc/ipsec.d/
# chmod 755 l2tp-psk.conf
3.3 啟動IPSec
# service ipsec start; chkconfig ipsec on
3.4 Check IPSec status
# ipsec verify
Checking your system to see if IPsec got installed and started correctly:
Version check and ipsec on-path [OK]
Linux Openswan Uopenswan-2.4.9-31.el5/K2.6.18-8.1.8.el5 (netkey)
Checking for IPsec support in kernel [OK]
NETKEY detected, testing for disabled ICMP send_redirects [OK]
NETKEY detected, testing for disabled ICMP accept_redirects [OK]
Checking for RSA private key (/etc/ipsec.d/hostkey.secrets) [OK]
Checking that pluto is running [OK]
Two or more interfaces found, checking IP forwarding [OK]
Checking NAT and MASQUERADEing [N/A]
Checking for 'ip' command [OK]
Checking for 'iptables' command [OK]
Opportunistic Encryption Support [DISABLED]
這麼一來L2TP over IPSec就成功架設起來了,如果有問題的話可查看以下的log file
/var/log/message
/var/log/secure
/var/log/xl2tpd.log
4. L2TP Client setting:
4.1新增連線
1. 開始->設定->網路連線->新增連線精靈
2. 選擇連線到公司網路(使用指定撥號或是vpn)
3. 選擇虛擬私人網路連線
4. 輸入名稱(可以隨意選)
5. 輸入VPN server IP (10.5.30.3)
4.2 修改設定
1.在安全性的分頁中->選擇進階->只勾選CHAP->可省加密
2. 點選"ipsec 設定"選項,輸入PSK(pre-shared key)
Thursday, August 23, 2007
Shell Script: 計算CPU的使用率
Monday, August 20, 2007
Setup a POP3 Server that enables SSL/TLS function
OS: CentOS4.5
POP3 Server: dovecot
Setup procedure:
1. Edit /etc/dovecot.conf
->
protocols = pop3 pop3s
imap_listen = [::]
pop3_listen = [::]
ssl_disable = no
ssl_cert_file = /usr/share/ssl/certs/dovecot.pem
ssl_key_file = /usr/share/ssl/private/dovecot.pem
disable_plaintext_auth = no
login_dir = /var/run/dovecot-login
login = imap
login = pop3
mbox_locks = fcntl
auth = default
auth_mechanisms = plain
auth_userdb = passwd
auth_passdb = pam
auth_user = root
2. Start dovecot
# service dovecot start; chkconfig dovecot on
POP3 Server: dovecot
Setup procedure:
1. Edit /etc/dovecot.conf
->
protocols = pop3 pop3s
imap_listen = [::]
pop3_listen = [::]
ssl_disable = no
ssl_cert_file = /usr/share/ssl/certs/dovecot.pem
ssl_key_file = /usr/share/ssl/private/dovecot.pem
disable_plaintext_auth = no
login_dir = /var/run/dovecot-login
login = imap
login = pop3
mbox_locks = fcntl
auth = default
auth_mechanisms = plain
auth_userdb = passwd
auth_passdb = pam
auth_user = root
2. Start dovecot
# service dovecot start; chkconfig dovecot on
Friday, August 17, 2007
讓Linux可以讀寫NTFS磁區
帽客家裡的大黑(IBM桌機)有兩顆HDD,一顆是安裝CentOS5另一顆是Windows XP PRO SP2,所以有時開到CentOS的工作環境而想讀寫NTFS磁區時,我記得我之前只解決了讀的問題,昨天上Google發現到現在連寫的問題也解決了,我真是後知後覺呀!
只要安裝好ntfs-3g與fuse後,並以下面的方法mount NTFS的磁區就可以work囉~
# mount /dev/hda7 /mnt/ntfs -t ntfs-3g
# vi /etc/fstab
->
ntfs-3g
只要安裝好ntfs-3g與fuse後,並以下面的方法mount NTFS的磁區就可以work囉~
# mount /dev/hda7 /mnt/ntfs -t ntfs-3g
# vi /etc/fstab
->
/dev/hda7 /mnt/ntfs ntfs-3g defaults 0 0官網:
ntfs-3g
Wednesday, August 15, 2007
Shell Script: 每日檢查硬碟的使用量,當到達90%時寄出Alert mail給root
1. 至/root/bin目錄下,新增一shell script的檔案,名為diskspace.sh,內容如下:
#!/bin/bash
df -h | grep -vE '^Filesystem|tmpfs|cdrom' | awk '{ print $5 " " $1 }' | while read output;
do
usep=$(echo $output | awk '{ print $1}' | cut -d'%' -f1 )
partition=$(echo $output | awk '{ print $2 }' )
if [ $usep -ge 90 ]; then
echo "Running out of space "$partition $usep%" on $(hostname) as on $(date)" | mail -s "Alert: Almost out of disk space $usep%" root
fi
done
2. # chmod 755 diskspace.sh
3. # crontab -e
-> 10 5 * * * /root/bin/diskspace.sh
這個範例用了grep,awk與cut指令來實作,可以見得它們有多好用了 :)
參考來源: http://www.cyberciti.biz/tips/shell-script-to-watch-the-disk-space.html
#!/bin/bash
df -h | grep -vE '^Filesystem|tmpfs|cdrom' | awk '{ print $5 " " $1 }' | while read output;
do
usep=$(echo $output | awk '{ print $1}' | cut -d'%' -f1 )
partition=$(echo $output | awk '{ print $2 }' )
if [ $usep -ge 90 ]; then
echo "Running out of space "$partition $usep%" on $(hostname) as on $(date)" | mail -s "Alert: Almost out of disk space $usep%" root
fi
done
2. # chmod 755 diskspace.sh
3. # crontab -e
-> 10 5 * * * /root/bin/diskspace.sh
這個範例用了grep,awk與cut指令來實作,可以見得它們有多好用了 :)
參考來源: http://www.cyberciti.biz/tips/shell-script-to-watch-the-disk-space.html
Thursday, August 09, 2007
Canon IXUS 850試拍
趁著這次應用展買了Canon IXUS 850,原本也很想買Sony的T100但想到了記憶卡相容性的問題,我還是選擇了Canon :p
附上一張大白(ibook)與小白(NDSL)的合照。

附上一張大白(ibook)與小白(NDSL)的合照。

Subscribe to:
Posts (Atom)