Saturday, March 12, 2011

升級到OpenSUSE 11.4(64 bit)的第一問題

今天把桌機從OpenSUSE 11.3升級到11.4後,發現到之前用得好好的Samba Server竟然無法啟動,檢查/var/log/samba/log.smbd後竟然看到以下的message:
params.c:OpenConfFile() - Unable to open configuration file "/etc/samba/dhcp.conf":
Permission denied

Well..... dhcp.conf怎麼會跑到/etc/samba下?先把它更名一下:
# mv /etc/samba/dhcp.conf /etc/samba/dhcp.conf.bak

再次啟動後竟然還是無法運作?再查看一次log:
linux-8zbb:/etc/samba # tail -f /var/log/samba/log.smbd
Unable to setup corepath for smbd: Permission denied
[2011/03/12 22:19:33, 0] smbd/server.c:1134(main)
smbd version 3.5.7-1.17.1-2505-SUSE-SL11.4-x86_64 started.
Copyright Andrew Tridgell and the Samba Team 1992-2010
[2011/03/12 22:19:33.539756, 0] passdb/secrets.c:73(secrets_init)
Failed to open /etc/samba/secrets.tdb
[2011/03/12 22:19:33.540823, 0] passdb/secrets.c:73(secrets_init)
Failed to open /etc/samba/secrets.tdb
[2011/03/12 22:19:33.541149, 0] smbd/server.c:1234(main)
ERROR: smbd can not open secrets.tdb
這個嘛.....會不會是Novell AppArmor的關係?查看AppArmor的狀況後,我發現到它竟然在系統升級過後被啟動了?老實說AppArmor我並不是很熟,只好先把它關掉囉,之後Samba Server果然可以順利運作了。

Thursday, February 17, 2011

Linux上好用的IP計算工具-sipcalc

sipcalc這個工具真是計算IP位置的好工具!尤其是在Linux console mode就可以使用囉!
當然啦!在OpenSUSE 11.3上只要透過zypper就可以安裝成功了。

Steps:
1. linux-8zbb:~ # zypper in sipcalc
Retrieving repository 'OpenSUSE 11.3 update' metadata [done]
Building repository 'OpenSUSE 11.3 update' cache [done]
Loading repository data...
Reading installed packages...
Resolving package dependencies...

The following NEW package is going to be installed:
sipcalc

1 new package to install.
Overall download size: 29.0 KiB. After the operation, additional 58.0 KiB will be used.
Continue? [y/n/?] (y): y
Retrieving package sipcalc-1.1.5-0.pm.2.1.x86_64 (1/1), 29.0 KiB (58.0 KiB unpacked)
Retrieving: sipcalc-1.1.5-0.pm.2.1.x86_64.rpm [done (15.7 KiB/s)]
Installing: sipcalc-1.1.5-0.pm.2.1 [done]
Additional rpm output:
warning: /var/cache/zypp/packages/Packman_opensuse_11.3/x86_64/sipcalc-1.1.5-0.pm.2.1.x86_64.rpm: Header V3 DSA/SHA1 Signature, key ID 9a795806: NOKEY

2. linux-8zbb:~ # sipcalc 10.10.10.1/23 <- 指定某個IP subnet
-[ipv4 : 10.10.10.1/23] - 0

[CIDR]
Host address - 10.10.10.1
Host address (decimal) - 168430081
Host address (hex) - A0A0A01
Network address - 10.10.10.0
Network mask - 255.255.254.0
Network mask (bits) - 23
Network mask (hex) - FFFFFE00
Broadcast address - 10.10.11.255
Cisco wildcard - 0.0.1.255
Addresses in network - 512
Network range - 10.10.10.0 - 10.10.11.255
Usable range - 10.10.10.1 - 10.10.11.254

linux-8zbb:~ # sipcalc eth0 <- 針對目前的interface
-[int-ipv4 : eth0] - 0

[CIDR]
Host address - 10.10.10.253
Host address (decimal) - 168430333
Host address (hex) - A0A0AFD
Network address - 10.10.10.0
Network mask - 255.255.255.0
Network mask (bits) - 24
Network mask (hex) - FFFFFF00
Broadcast address - 10.10.10.255
Cisco wildcard - 0.0.0.255
Addresses in network - 256
Network range - 10.10.10.0 - 10.10.10.255
Usable range - 10.10.10.1 - 10.10.10.254

沒錯它就是這麼簡單好用,更多的功能請自行研究吧。

Tuesday, February 15, 2011

Linksys WUSB600N ver.2 driver for Linux and How to install it

Linksys WUSB600N ver.2 used Ralink RT3572 chipset, so please go to the Ralink website to download it first.
Steps:
1. Uncompress 2010_1215_RT3572_Linux_STA_v2.5.0.0.DPO.bz2
2. Plug in WUSB600N to your Linux box.
3. To execute "demsg" command to examine the vendor id and product id of WUSB600N. (it should be 1737/0079)
4. Added {USB_DEVICE(0×1737,0×0079)}, /* Linksys WUSB600N v2 */ to the /common/rtusb_dev_id.c file
5. Modified /os/linux/config.mk file to give you WPA encryption:
# Support Wpa_Supplicant
HAS_WPA_SUPPLICANT=y
# Support Native WpaSupplicant for Network Maganger
HAS_NATIVE_WPA_SUPPLICANT_SUPPORT=y
6. # make && make install && reboot
7. After system reboot successfully then plug in the WUSB600N to the Linux box again, and to execute "ifconfig -a" command then you will see the new device ra0

Saturday, February 12, 2011

What's pdsh and how it works?

What's pdsh?
Pdsh is a an efficient, multithreaded remote shell client which executes commands on multiple remote hosts in parallel. Pdsh implements dynamically loadable modules for extended functionality such as new remote shell services and remote host selection.
I.e., If you'd like to control multiple machines at once then you can use pdsh to reach it.
For example:
Server1: 10.10.2.2
node1: 10.10.2.181
node2: 10.10.2.159
And I'd like to control node1 and node2 on Server1 at once.

Steps:
1. Install pdsh on the Server.
2. Import ssh key of Server1 to the node1 and node2.
3. Add hostname-to-IPaddress of node1/node2 in /etc/hosts on Server1.
4. To execute: pdsh -w ssh:root@node[1,2] ls 2> /dev/null then node1 and node2 will to execute ls command and report to the Server1 as following:
lawrence@suse:~/.ssh> pdsh -w ssh:root@node[1,2] ls 2> /dev/null
node1: anaconda-ks.cfg
node1: Desktop
node1: id_rsa.pub
node1: install.log
node1: install.log.syslog
node2: anaconda-ks.cfg
node2: bin
node2: conf-examples
node2: cpulimit-1.1.tar.gz
node2: cpulimit.tar.gz
node2: Desktop
node2: id_rsa.pub
node2: install.log
node2: install.log.syslog
node2: mibs
node2: mibs_20100925.rar

5. Combine multiple commands:
lawrence@suse:~/.ssh> pdsh -w ssh:root@node[1,2] "cd /tmp;ls" 2> /dev/null
node1: pulse-Bk60xcI9xlDq
node1: virtual-root.pHV8bR
node2: etherXXXXWj7KYw
node2: gconfd-root
node2: keyring-RdVKdK
node2: mapping-root
node2: scim-panel-socket:0-root

Saturday, January 29, 2011

從ext3升級到ext4

ext4於Kernel 2.6.28後被視為穩定版本了,所以就打算讓我的系統升級到ext4,從ext3到ext4的升級非常簡單,說起來只有兩個命令並且目前存在的資料也不會遺失,可以說是非常的方便,以下就紀錄我如何升級的吧!

Steps:
1. 準備某一Linux版本的live CD,Fedora 14是個不錯的選擇!
2. 用Live CD開完機後,確定預升級的檔案系統處於無掛載的狀態。
3. 利用tune2fs加上ext4的attribute:
# tune2fs -O extents,uninit_bg,dir_index [device file]
4.檢查檔案系統:
# fsck -pf [device file]
5. 掛載:
# mount -t ext4 [device file] [mount point]
6. 修改/etc/fstab後,重新開機。

升級Ext4將帶來什麼好處?
1. 相容Ext3
2. 單一檔案大小可到16TB,檔案系統可支援到1EB
3. 新的存放方式,增加檔案讀寫速度


Thursday, December 16, 2010

Disable HT on OpenSUSE 11.3

基本上能在BIOS裡關掉HT的話,我是建議這麼做會比較好,但是如果你的laptop BIOS沒有讓你取消HT的功能(for example: S10e),那你只能在grub裡動手腳了。

步驟:
1. 開啟/boot/grub/menu.lst
2. 新增kernel參數如下:
2.1 noht -> 不work....
2.2 maxcpus=1 -> work!

Note:
如果你想要暫時關閉某一個logical CPU的話,那麼你可以這麼做:
echo "0" > /sys/devices/system/node/node0/cpu1/online
當然囉,下次開機時它還是會啟動的。

後記:
說起來我何必去關閉HT呢?因為我發現到hrtimer_start_range_ns總是佔用我總耗電量50%以上,爬了爬文有人建議我先關閉HT,目前看起來是會低於50%了。

Wednesday, December 15, 2010

用Powertop 檢查Linux apps誰最吃電!

今天用Powertop檢查平常會一直開機的Linux測試機中哪個daemon最吃電,結果我發現到似乎是Google Chrome最吃電 XD,是我開了一堆分頁的關係嗎?

Friday, November 26, 2010

讓CPU全速執行吧!

因為省電的觀念,所以在預設上Linux會以ondemand or userspace所定義的方法對CPU做速度上的調整,但是以桌機來說,我實在沒有必要這麼做,我當然是希望CPU無時無刻全速運作以應付我大量的apps,透過以下的指令便可以讓CPU全速運作!

全速:
echo "performance" > /sys/devices/system/cpu/cpu0/cpufreq/scaling_governor

低速省電:
echo "powersave" > /sys/devices/system/cpu/cpu0/cpufreq/scaling_governor

userspace:
echo "userspace" > /sys/devices/system/cpu/cpu0/cpufreq/scaling_governor
(需配合cpuspeed daemon)

ondemand:
echo "ondemand" > /sys/devices/system/cpu/cpu0/cpufreq/scaling_governor

Tuesday, November 23, 2010

Novell宣佈以22億美元賣給Attachmate

沒想到真的賣掉了,不知道以後SUSE Linux將何去何從?看來王子復仇記失敗了 XD
BTW,Novell成立於1979年剛好也正是我生的那一年。

Tuesday, November 16, 2010

Wake on LAN software for Mac OSX

Wake on LAN這個功能,相信各位IT人應該都有使用過,帽客今天發現到一款在Mac OSX上蠻好用的小軟體: Depicus Wake on LAN,它的GUI長得如下:
只要填入你機器的Mac Address/IP address/Subnet Mask,並按下Wake Me Up button,就可以將遠方機器power on起來了,so easy~

How wake on LAN works? please refer to here.

Thursday, November 11, 2010

RHEL6發行了!

等了許久,Redhat總算是釋出了RHEL6! 這一版應該是base on Fedora13,不過帽客慚愧了,因為Fedora13/14沒有好好去玩過,然後RHEL6 Beta1/Beta2只有裝起來過,現在既然RHEL6正式版出了,是時候需要好好學習了。

More details for RHEL6 please refer to here.

Thursday, November 04, 2010

Prolific Technology USB to RS232 console works on MAC OSX

我想Mac的機器,對於大多數的Engineer來說最讓人頭痛的就是沒有RS232 console port,這個東西對於Engineer來說是多麼重要的東西,我想我也不需要多說了,但是這個已經不再是Mac的瓶頸了!利用以下方法就可以讓你在Mac下使用USB to RS232 console。

1. 買個Prolific PL2303的USB to RS232 console: 似乎很多家都是用他的chipset,至少我手邊的兩家不同廠商都是。
2. 到這裡下載driver,請注意它有區分10.6.x與104.x/10.5.x!裝錯版本可是驅動不了的!
3. 裝好driver後將Mac開機後,插入USB to RS232 consoel。
4. 至/dev目錄去檢查是否有多出一個usb device file,for example: /dev/tty.usbxxx。
5. 開啟Mac終端機。
6. 輸入 screen /dev/tty.usbxxx 9600,9600就是你的baud rate,至於怎麼用screen command請參考我以前的筆記。

以上就可以在Mac裡使用console了,但是如果你還是習慣使用圖形介面的console管理介面,我到是推薦一套for Mac的免費serial tools,yes~它就叫做serial tools。

Saturday, October 02, 2010

SparkleShare

上一篇介紹過Dropbox,今天又發現到一套可以讓使用者自己架設線上備份與同步檔案的opensource project: SparkleShare,目前雖然還在Beta階段,不過我想應該很快就會有official了!

若公司內部,有這麼一台遠端檔案集中Server,其功能又與Dropbox類似的話,那就非常方便了!

Wednesday, September 29, 2010

Install Dropbox in OpenSUSE 11.3

今天無意間找到了一個非常實用的工具Dropbox,什麼是Dropbox?簡單的來說它是一個線上備份與檔案同步的一個好工具,使用過後我覺得它有以下幾個優點:
1. 簡單且實用
2. 跨平台(Windows/Mac/Linux/Mobile)
3. 2GB免費空間

如何於OpenSUSE 11.3上安裝:
1. zypper in docutils
2. tar jxvf nautilus-dropbox-0.6.3.tar.bz2 -C /usr/local/src/
3. cd /usr/local/src/nau*
4. ./configure && make && make install

安裝完畢後,就可以在最新安裝的應用程式裡找到它,當執行時會有wizard一步一步告訴你怎麼設定。我測試時是先把檔案透過Windows把檔案上傳到DropBox,然後切換到OpenSUSE看看,結果的確有檔案存在,不知道是不是使用的人還不多?上下傳檔案時還挺快的!

Sunday, September 12, 2010

Remove useless repositories by awk in OpenSUSE

帽客的桌機一路從OpenSUSE 11.1升級到OpenSUSE 11.3後,repositories都沒去清掉,導致一堆沒有在用的repos殘留在那邊,練習一下用awk把沒用的repos一次清光:
linux-8zbb:~ # zypper rr `zypper lr | awk '/No/{ print $3 }'`
Repository 'openSUSE' not found by alias, number or URI.
Removing repository 'Packman repository (openSUSE_11.1)' [done]
Repository 'Packman repository (openSUSE_11.1)' has been removed.
Removing repository 'openSUSE 11.2-0' [done]
Repository 'openSUSE 11.2-0' has been removed.
Removing repository 'opensuse11.2_oss' [done]
Repository 'opensuse11.2_oss' has been removed.
Removing repository 'opensuse11.2_update' [done]
Repository 'opensuse11.2_update' has been removed.
Removing repository 'opensuse_11.2_non-oss' [done]
Repository 'opensuse_11.2_non-oss' has been removed.
Removing repository 'opensuse 11.3 iso' [done]
Repository 'opensuse 11.3 iso' has been removed.
Removing repository 'packman' [done]
Repository 'packman' has been removed.
Removing repository 'openSUSE-11.1-Debug' [done]
Repository 'openSUSE-11.1-Debug' has been removed.
Removing repository 'openSUSE-11.1-Non-Oss' [done]
Repository 'openSUSE-11.1-Non-Oss' has been removed.
Removing repository 'openSUSE-11.1-Oss' [done]
Repository 'openSUSE-11.1-Oss' has been removed.
Removing repository 'openSUSE-11.1-Source' [done]
Repository 'openSUSE-11.1-Source' has been removed.
Removing repository 'openSUSE-11.1-Update' [done]
Repository 'openSUSE-11.1-Update' has been removed.
只能說awk好用又有效率~

Thursday, September 02, 2010

Configure ATI driver on OpenSUSE 11.3

SL410升級到OpenSUSE 11.3後竟然無法順利啟動X Server,做了一些事情後,讓X Server起來了可是得到的結果是....
1. 解析度只有1024*768
2. 沒有3D特效
3. 有開啟3D特效的user account,登入GNOME後,畫面一片空白

好吧,想說新增ATI driver for OpenSUSE 11.3的repository,沒想到更新後更慘,X Server又起不來了?只好先把它移除,然後上google找看看有沒有解法,果然有人提出了完美的更新方法,請注意作者有先說明:
ATI doesn’t provide anymore repository for their binary drivers, so we have to build them on each needed system. When the 11.3 hits the street, the procedure was complex and not so easy, now with their 10.7 ( 8.753 ) version, it’s doable.

照著這位前輩的作法,果然是重新搞定了我的桌面環境,實在是非常地感謝他呀,說起來ATI真是.......

Wednesday, September 01, 2010

Terminator

做帽客這一行的,常常要一次控制或是監控好幾台機器或是待測物,所以我的GNOME terminal就常開了一堆分頁,不過有時要同時"看"好幾台機器的狀況時,就只能忙碌的在好幾個分頁中切換,不然就是只能將它們個個獨立起來分開來看,然而這樣做實在不是很smart,所幸我今天發現了Terminator這樣的一個好工具,它主要的功能如下:

Terminator, multiple terminals in one window. The goal of this project is to produce a useful tool for arranging terminals. It is inspired by programs such as gnome-multi-term, quadkonsole, etc. in that the main focus is arranging terminals in grids (tabs is the most common default method, which Terminator also supports).


看起來很棒吧!實際上用起來的確也是非常nice!以下是它的官方網站:
順便整理一下目前得知的快捷鍵:
Ctrl-Shift-E: 新增terminal並垂直切割
Ctrl-Shift-O: 新增terminal並水平切割
Ctrl-Shift-P: 回到上一個terminal
Ctrl-Shift-N: 至下一個terminal
Ctrl-Shift-W: 關閉目前的terminal
Ctrl-Shift-Q: 結束terminator
F11: 全螢幕顯示

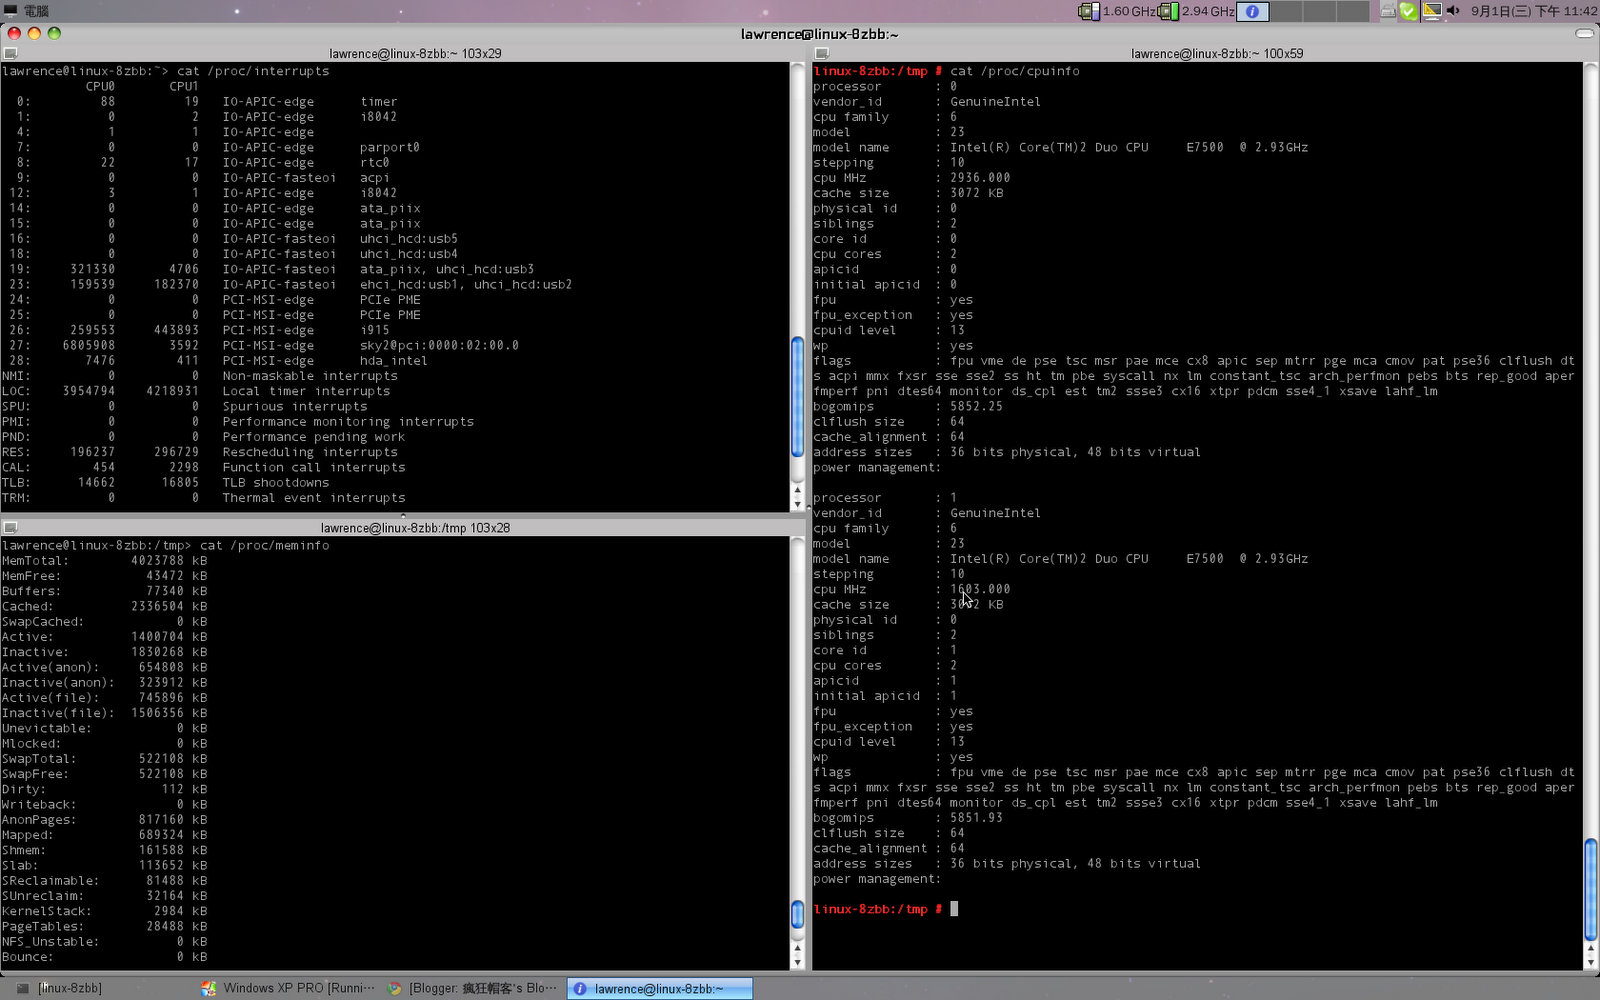
Example: 同時檢視IO, Memory還有CPU information:

Sunday, August 22, 2010

Saturday, August 21, 2010

How to enable bcm4312 wireless NIC

S10e升級到OpenSUSE 11.3後wireless起不來了,kernel需要重新安裝網卡的模組,透過以下的指令可以很方便的安裝起來:
/usr/sbin/install_bcm43xx_firmware

不過很奇怪,在公司使用時一直連不上AP,在家裡卻可以,不知道是不是公司的air太髒了 Orz....,anyway我覺得現在Linux desktop真是比以前方便了許多,不論是安裝套件或是硬體驅動,都比以前來的簡單多了,在此鼓勵大家多多使用opensource!

另外我目前於S10e上改用了Wicd取代了NetworkManager,原因是感覺好像在開自排車,只要設定好腳本,它就會偵測網路目前的狀況,若是以wire連接就優先使用wire,然而當wire出現若干問題時,就會去尋找wireless的連線,好處是當我帶著我的s10e於書房跟寢室時,它就會幫我設定好網路了,至於我呢嘿嘿~則是甚麼都不用做,只要呆呆上網就好了。

/etc/init.d/network restart? ifocnfig? iwconfig? iwlist? 點選NetworkManager選擇AP? 都不用了~

OpenSUSE 11.3 supports iPod/iPhone

OpenSUSE 11.3:
Access to iPhone and iPod touch files from nautilus.Rhythmbox can also play music from those devices.


OpenSUSE 11.3已經完全支援了iPod與iPhone,不過我沒買iPhone所以沒辦法實驗看看,其實我的要求也很簡單就是於Linux desktop中接上iPod然後播放音樂,是透過Linux desktop播放唷!實驗的結果真是出奇意外的好!
以下是簡單的步驟:

1. 安裝Rhythmbox:
# zypper in rhythmbox
2. 將音樂同步到iPod中:
我是透過ibook,這應該沒什麼好說的。 :p
3.開啟rhythmbox:
開啟rhythmbox後,馬上偵測到了我的iPod,並可以播放音樂了,中文顯示沒問題,也能把專輯封面顯示出來感覺就好像是用iTune播放,hey OpenSUSE11.3 is awesome!